AWS
For users of the AWS, Websoft9 has a pre-configured offering in the AWS Marketplace. This tutorial describes installing Websoft9 Enterprise Edition in a single Virtual Machine (EC2).
Prerequisite
You need an account on AWS. Use of the following methods to obtain an account:
- If you or your company already have an account with a subscription, use that account.
- If not, you can open your own AWS account for free. AWS free trial gives you 100+ product trials.
Deploy Websoft9
AWS supports various ways to deploy Websoft9, essentially via EC2 image creation.
Before deployment, you should understand EC2 requirements first.
Regardless of which deployment method you choose, AWS will initiate the deployment of a new EC2.
From AWS Marketplace
-
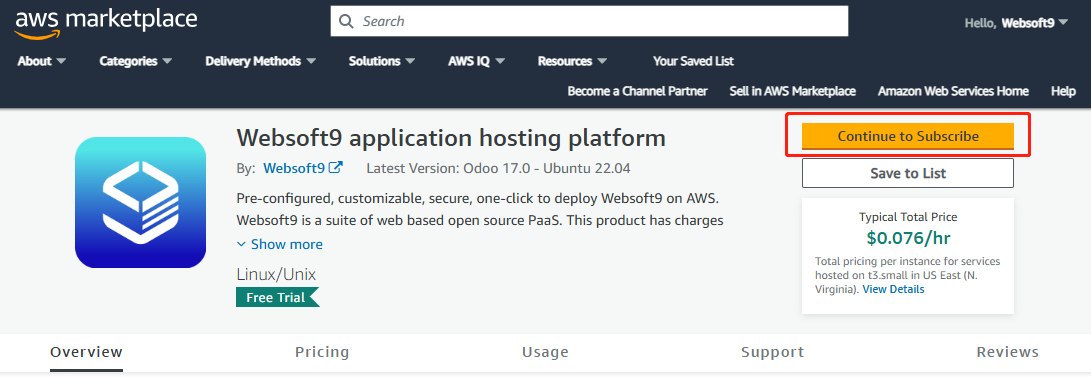
Open Websoft9 offer page at AWS Marketplace
-
Click Continue to Subscribe to start, and accept Terms and Conditions as the system prompts
-
Then click Continue to Configuration to go to Launch step

-
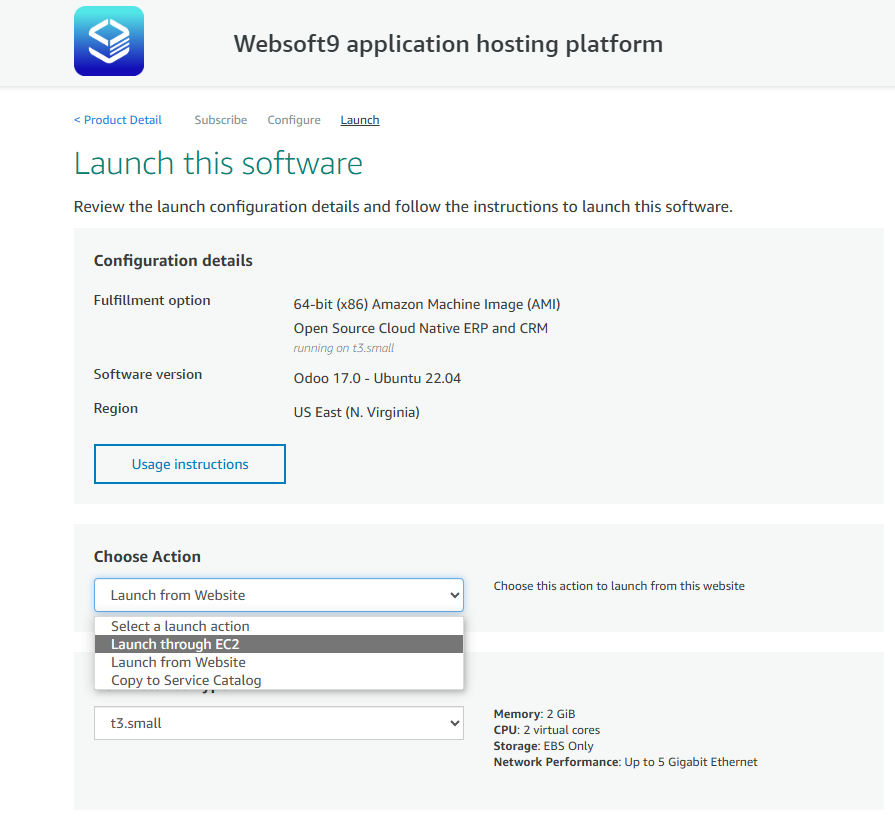
At Launch step, choose the Choose Action

- Launch through EC2 (recommendation)
- Launch from Website
- Copy to Service Catalog
-
Complete EC2 creation and Websoft9 image subscription as instructed.
From AWS Console
-
Login to the AWS Management Console, and start to create EC2 instance
-
When choosing AMIs, click View all public and private AMIs and search keyword "websoft9" to see the list of images.
-
Select one of Websoft9 image, and complete EC2 creation and Websoft9 image subscription as instructed.
From AWS CloudFormation
Websoft9 product information at AWS:
- Product ID: ef170715-3e45-4d1f-b753-bc0dbcf11dcd
- Product code: e5khuz6bgm3khfdzxa1q9fs99
- ARN: arn:aws:aws-marketplace:us-east-1:797851739507:AWSMarketplace/AmiProduct/ef170715-3e45-4d1f-b753-bc0dbcf11dcd
Then you can follow below steps to deploy Websoft9:
-
Prepare AWS CloudFormation for Websoft9 deployment
-
Run this template
- Login to AWS Dashboard, load that AWS CloudFormation template and run it
- Use AWS CLI/API to load that AWS CloudFormation template and run it
From AWS Terraform
You can running Websoft8 by AWS CloudShell with Terraform below:
-
Install Terraform at your AWS CloudShell
sudo yum install -y yum-utils
sudo yum-config-manager --add-repo https://rpm.releases.hashicorp.com/AmazonLinux/hashicorp.repo
sudo yum -y install terraform
terraform -install-autocomplete -
Get the ami* of Websoft9 product at AWS
aws ec2 describe-images \
  --filters "Name=product-code,Values=e5khuz6bgm3khfdzxa1q9fs99" \
--region us-east-1 -
Prepare your Terraform
main.tfand running commandsterraform fmtandterraform validateto check it- key_name
- vpc_security_group_ids
- ami
terraform {
required_version = ">= 1.4.0"
required_providers {
   aws = {
   source  = "hashicorp/aws"
   version = ">= 5.0.0"
   }
}
}

provider "aws" {
region = "us-east-1"
}

resource "aws_instance" "example" {
ami             = "ami-06409e015d6e1bf5c"        # Websoft9 ami at AWS
instance_type   = "t2.micro"
key_name        = "websoft9_auto"
vpc_security_group_ids = ["sg-1240356f"]
tags = {
   Name = "Websoft9  Platform"
   }
} -
Running terraform cli at your AWS CloudShell
# init
terraform init

# deploy
terraform apply

# destory
terraform destroy

# query status
terraform show
After deployment
The deployment process will take a few minutes to complete. Once finished, you can:
- View the details of the new VM through the EC2 Dashboard of AWS console
- Run below command to set root account password
sudo su
passwd - Login to Websoft9 Console and refer to Post-Installation Setup for next steps