Azure
For users of the Microsoft Azure business cloud, Websoft9 has a pre-configured offering in the Azure Marketplace. This tutorial describes installing Websoft9 Enterprise Edition in a single Virtual Machine (VM).
Prerequisite
You need an account on Azure. Use of the following methods to obtain an account:
- If you or your company already have an account with a subscription, use that account.
- If not, you can open your own Azure account for free. Azure’s free trial gives you $200 credit to explore Azure.
Deploy Websoft9
Azure supports various ways to deploy Websoft9, essentially via VM image creation.
Before deployment, you should understand VM requirements first.
Regardless of which deployment method you choose, Azure will initiate the deployment of a new VM.
From Azure Marketplace
-
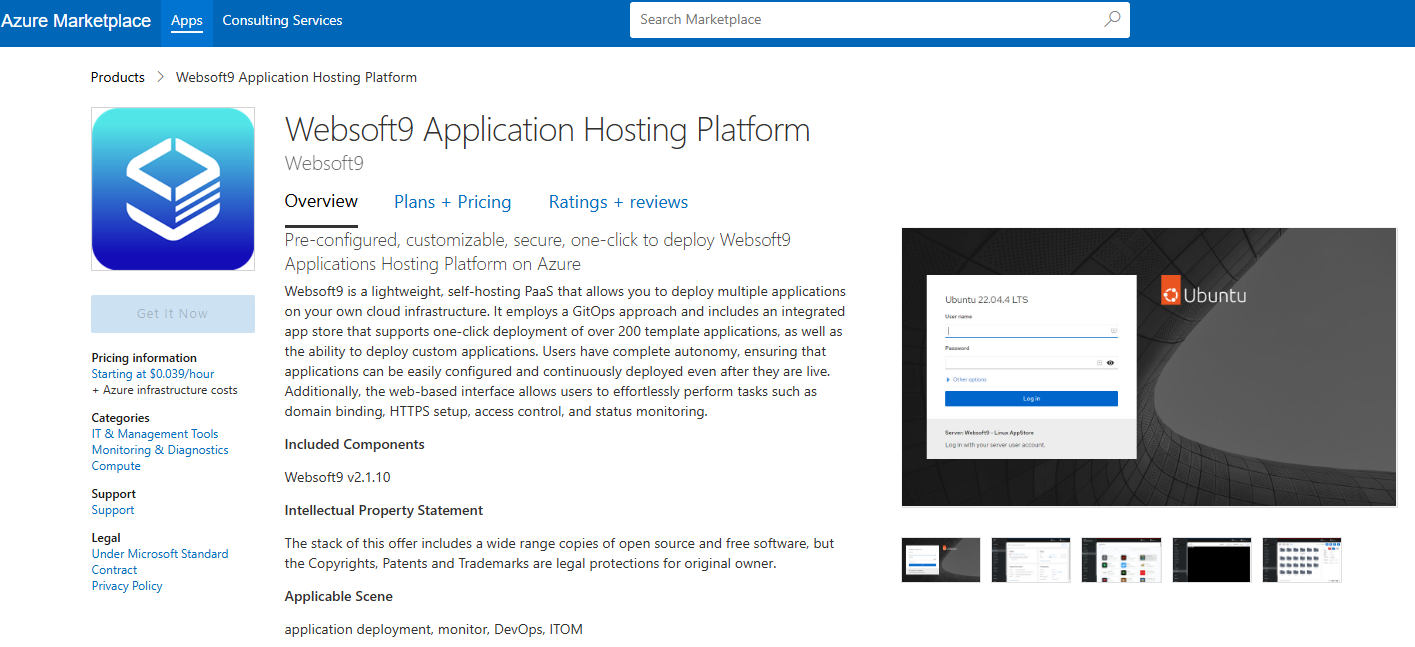
Access Websoft9 on Azure Marketplace, you can see Websoft9 offer detail below
-
Select the target offer and click "GET IT NOW" button on product details page
-
Click "Create" button to create a VM with the image have selected
-
Complete VM creation and Websoft9 image subscription as instructed.
From Azure Portal
Azure Portal provides two entry points for deploying offer based on image
-
Portal > Create a resource, enter the key words
Websoft9 Application Hosting Platformto search Websoft9 image and deploy it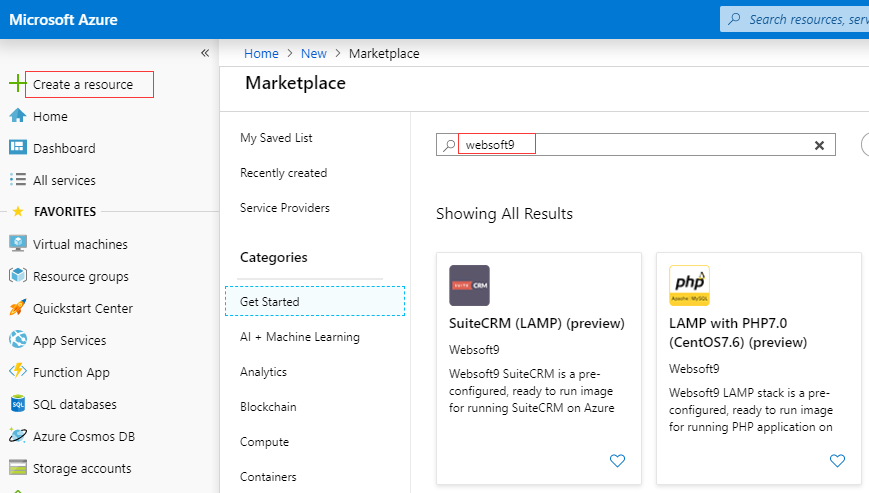
-
Portal > Visual Machines > + Add to create VM, and enter the key words
Websoft9 Application Hosting Platformto search Websoft9 image and deploy it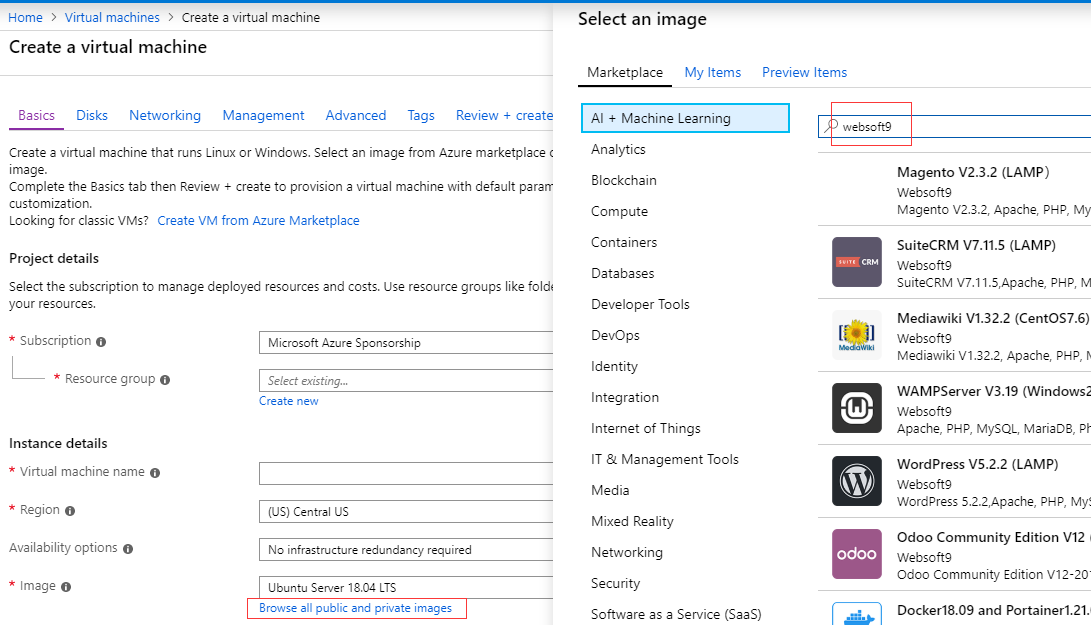
From ARM templates
-
Prepare ARM template for Websoft9 deployment
-
Run this template
- Login to Azure Console, load that ARM template and run it
- Use Azure CLI/API to load that ARM template and run it
After deployment
The deployment process will take a few minutes to complete. Once finished, you can:
- View the details of the new EC2 through the Azure Portal
- Run below command to set root account password
sudo su
passwd - Login to Websoft9 Console and refer to Post-Installation Setup for next steps
Troubleshoot
VHD failed to create a VM?
Description: I use Websoft9 and deleted the VM and kept the VHD. Now, when I create a VM based on the VHD, it fails.
Solution: This VHD contains a subscription relationship, but it cannot be passed to the Azure Portal
Solution: You can create VM from Azure Resource Manager templates and add subscription item to that template
-
Get the Run plan information by Azure CLI
az vm image list --offer websoft9-enterpise --all --output table -
Add item plan to template
  "plan": {
             "name": "websoft9-enterpise",
             "publisher": "websoft9inc",
             "product": "websoft9"}