Azure
Websoft9 is Partner of Azure Marketplace, you can install Websoft9 product on Azure very conveniently.
Installation
How to deploy Websoft9 on Azure? There are three methods:
By Azure Marketplace
-
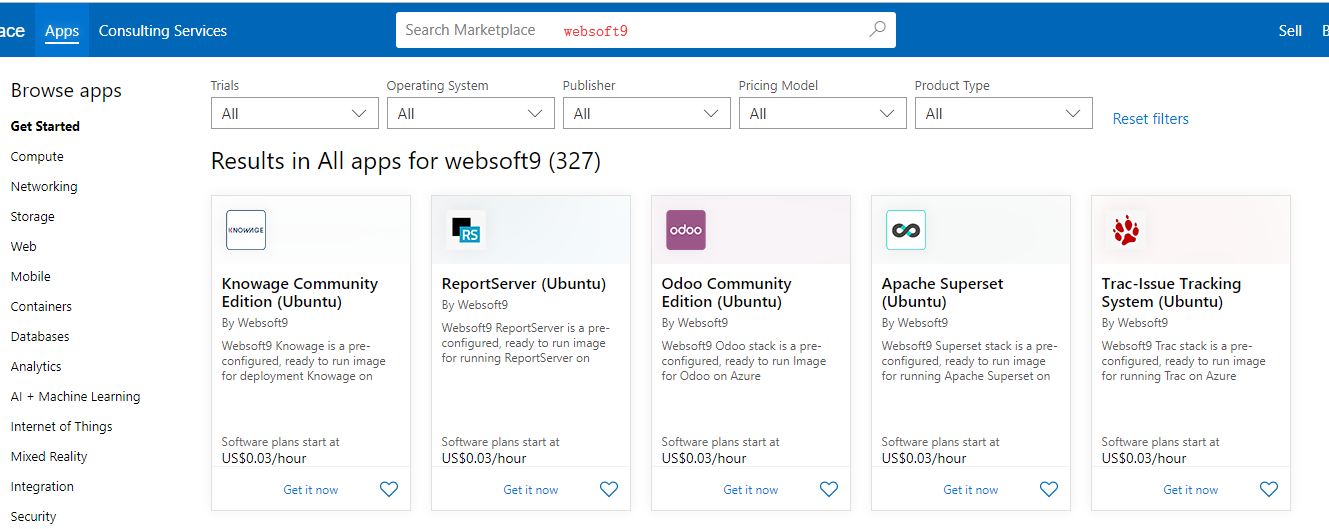
Login to Azure Marketplace
-
Search the keyword "websoft9", list all the image of Websoft9
-
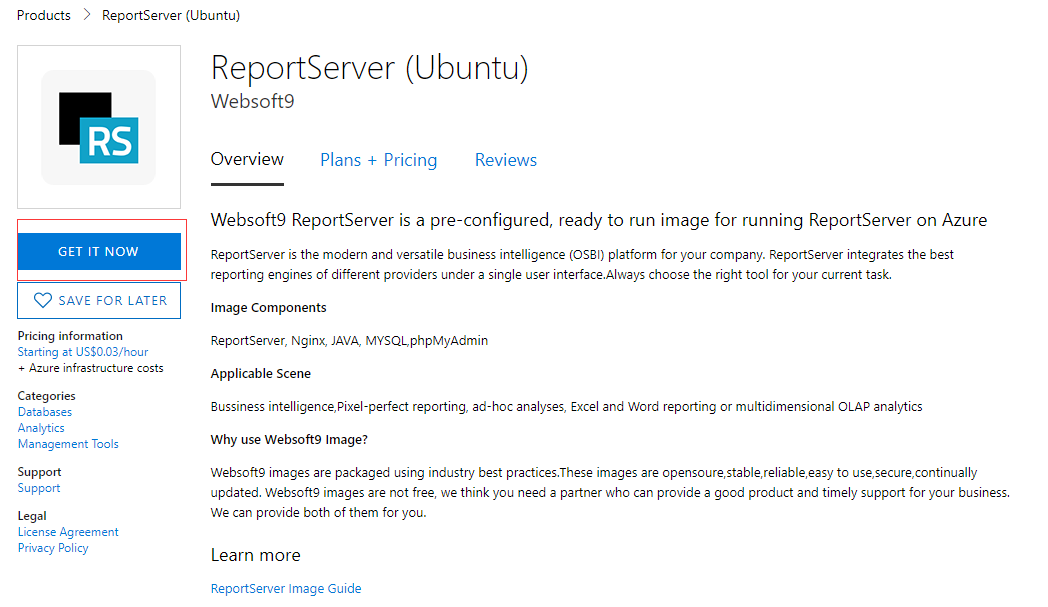
Click the product you want to use, then click the "GET IT NOW" button on product details page
-
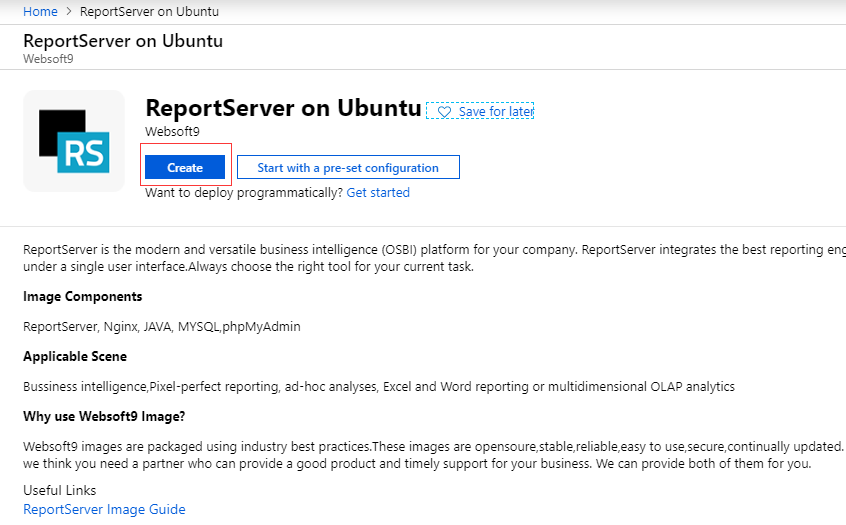
Click "Create" button to create a VM with the image have selected
-
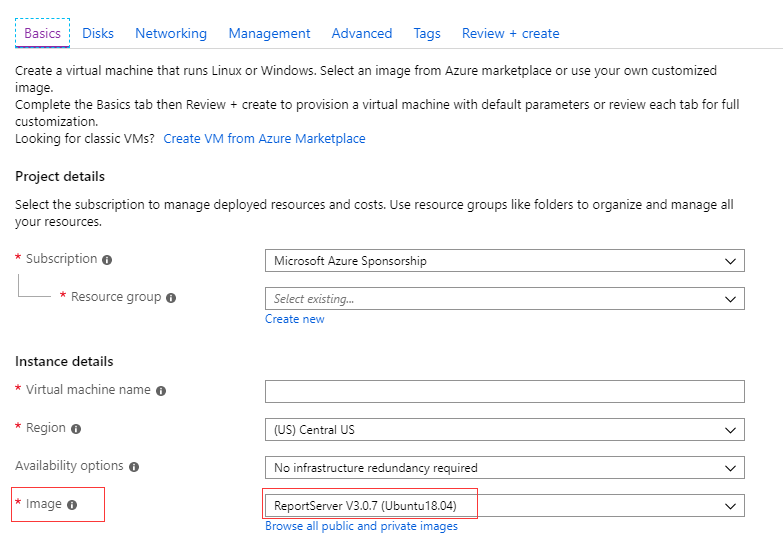
You can see the the image have selected in the image of INSTANCE DETAILS
-
After the VM is created, the mirror is started as the system disk of the VM, that is, the mirror is automatically deployed to the VM.
By Azure Portal
-
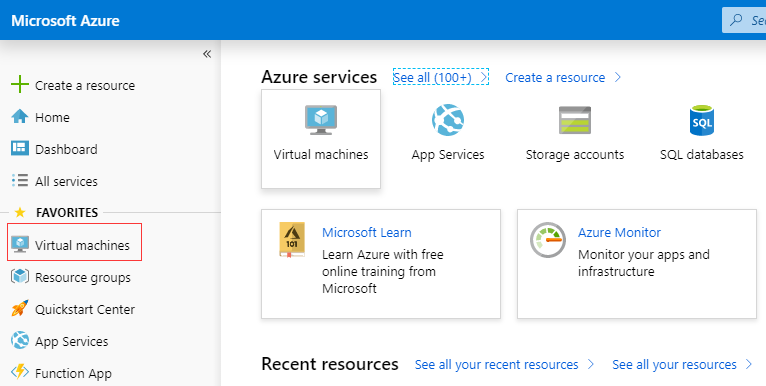
Login to Azure Portal, then click "Create a resource" that means go to the interface of Marketplace on Portal
-
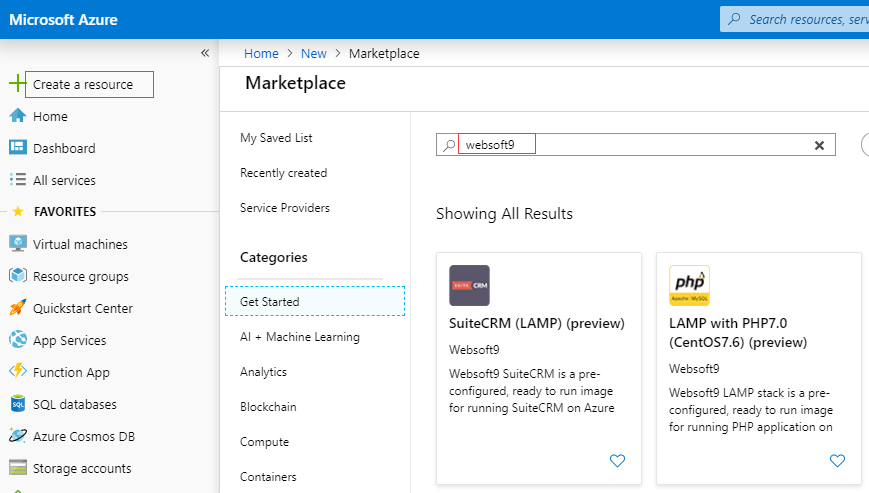
Searche the keyword "websoft9", list all the related image prodcut of Websoft9
-
Click an product you want to use and start the deployment
By VM
-
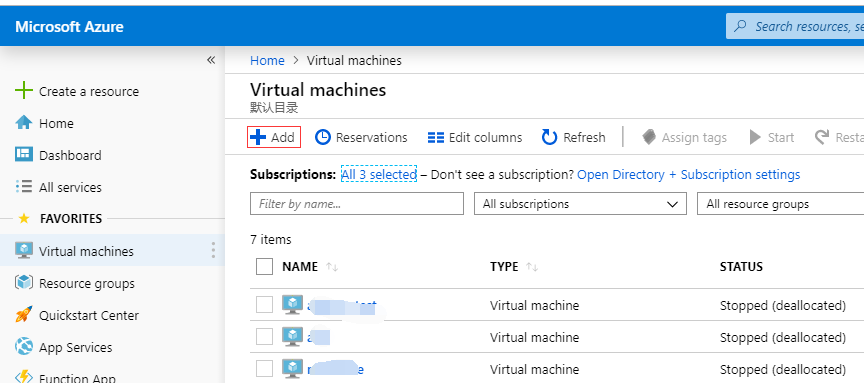
Login to Azure Portal and click "Visual Machines" service
-
Go to the Visual Machine page and click "+ Add" to create an new VM
-
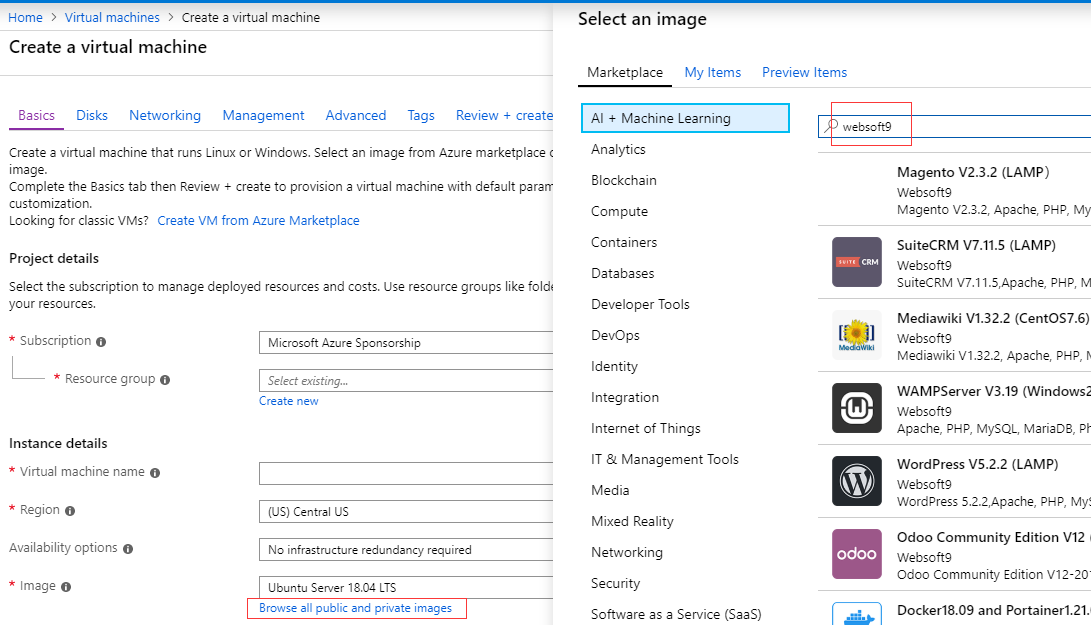
In the image of INSTANCE DETAILS column, click “Browse all public and private images”, and then search the keyword "websoft9" to list all related products
-
Click an product you want to use and start the deployment
After installation
Here are a few resources you might want to check out after completing the installation on Cloud.