Guide
Manage VM
The following lists the common operations of VM management, and the VM status can be modified in the Azure console, including:
Connect VM
The username and password or key pair is set by yourself when VM created.
Azure provides two web-based SSH tools that can be logged in without an account.
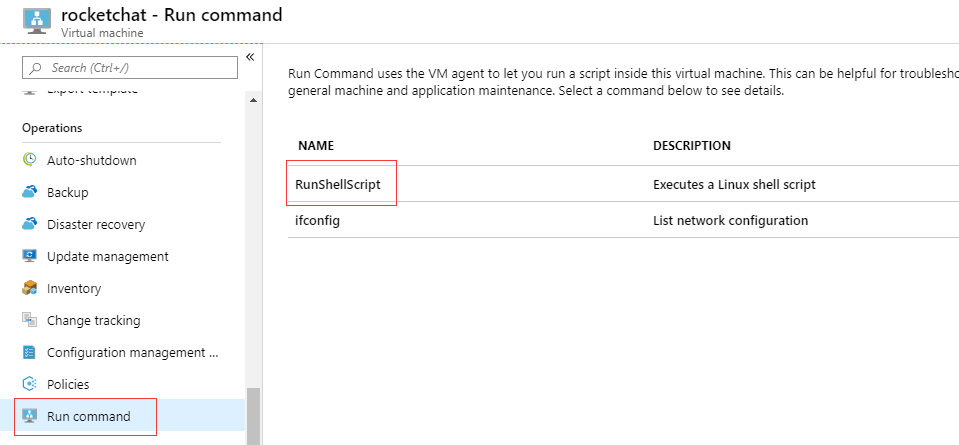
- Method 1: Log in to the Azure Portal, open the VM -> Operations, click "Run command"
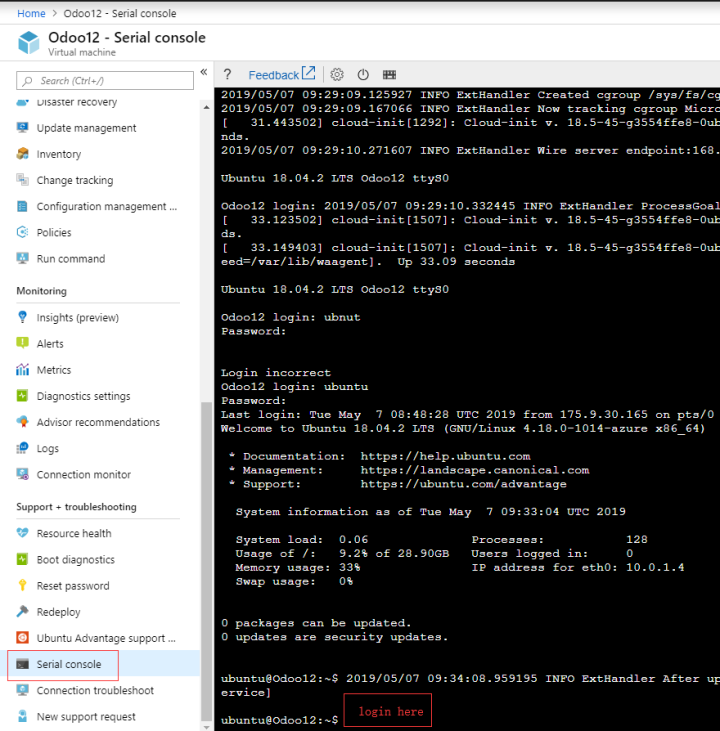
- Method 1: Log in to the Azure Portal, open the VM -> Support+troubleshooting, click "Serial console"
If you are not used to using the online SSH command line tool provided by the cloud platform, download the SSH client tool (e.g putty), configure the login information and then connect to Linux.
After connecting to the server through the command line, the following two most common examples for you:
Sample: Get database password
For security reasons, each time a user deploys, a unique random database password is generated and stored in the service. Just require the following command to view:
cat /credentials/password.txt

//result
MySQL username:root
MySQL Password:@qDg1Vq1!V
Sample: Enable the root account
For security and regulatory requirements, Azure does not open the Linux root account by default, and only provides users with a common account. If you wish to use the root account, enable it by following the steps below:
sudo su
sudo sed -i 's/#PermitRootLogin prohibit-password/PermitRootLogin yes/' /etc/ssh/sshd_config
sudo systemctl restart sshd
sudo passwd root
Create VM
Here's how to create a VM on Azure.
The most basic condition for creating a virtual machine is to prepare a boot disk file for the system disk for the virtual machine. There are two types of template files: one is a image that we are very familiar with, and the other is a VHD (virtual disk) file.
Therefore, there are two ways to create a VM: image-based creation and system-based disk creation.
Image-based Creation
-
Log in to the Azure Portal and open: VM -> Create a virtual machine
-
Select the appropriate image when creating the VM (this is the most important step)
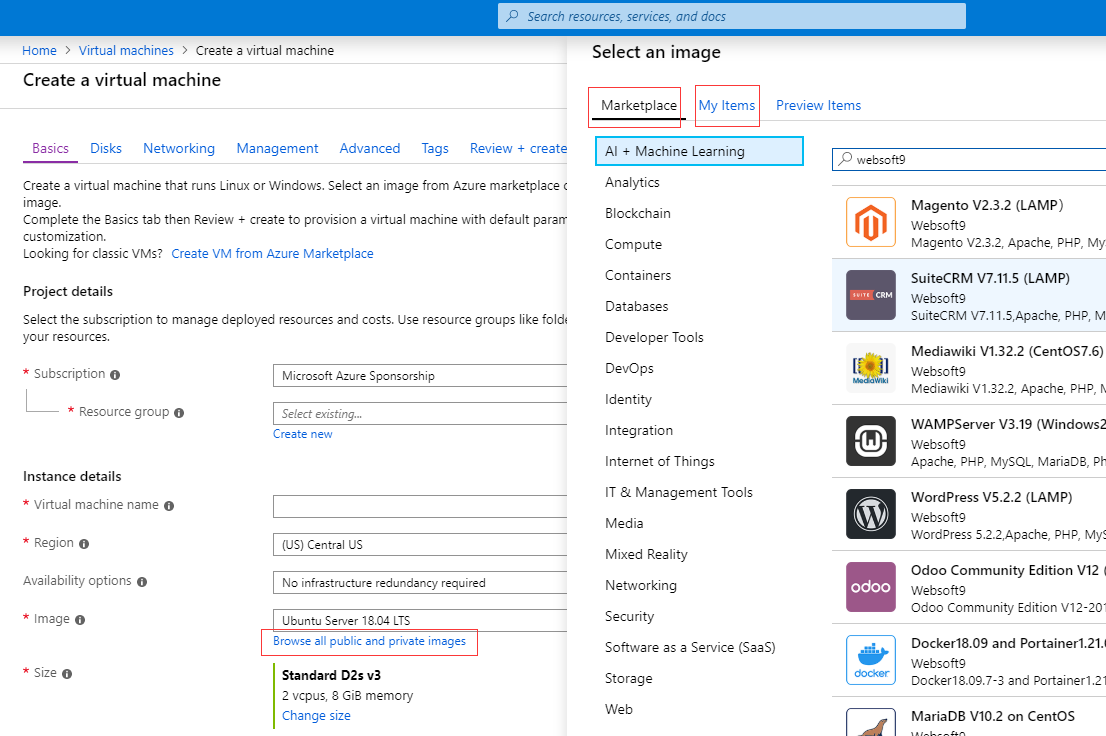
Image sources are: official image, Marketplace image and Customized image. If you use the customized image source, the disk can only choose the hosting mode.
-
Set the account password, network, security group, etc.
-
"Review + create" after you pass, click "Next"
VHD Creation
- Log in Azure Portal, click "All Resources", find a disk that has been unattached
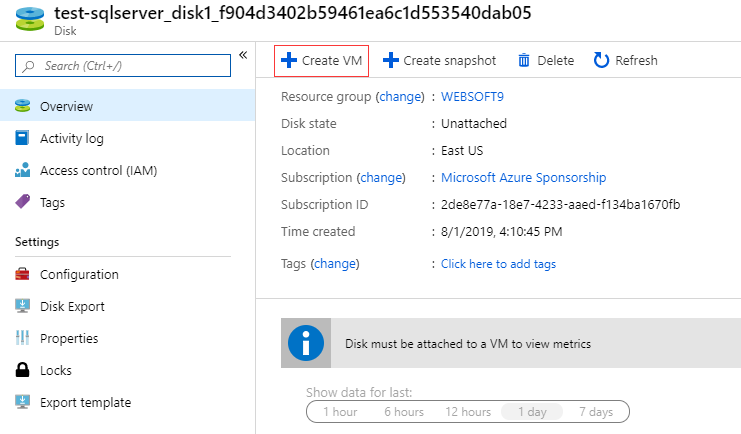
- Click the "Create VM"
- Set the account password, network, security group, etc.
- "Review + create" after you pass, click "Next"
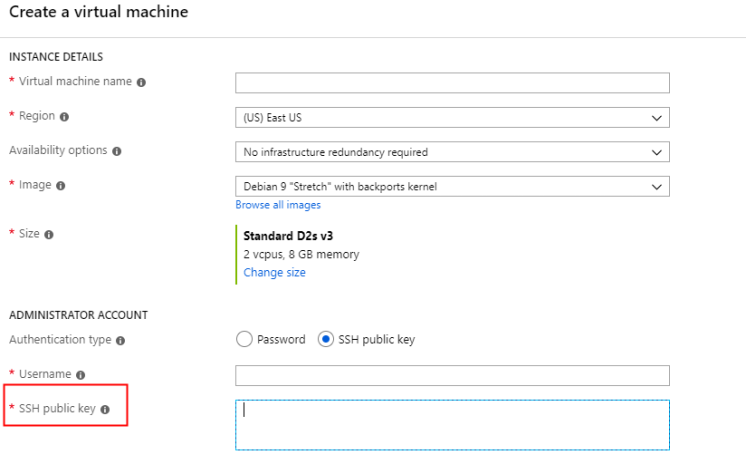
Key pairs
When creating a VM, some users prefer to use the SSH key pair as the login credentials.
Since Azure needs to provide its own SSH public key, it requires the user to prepare in advance.
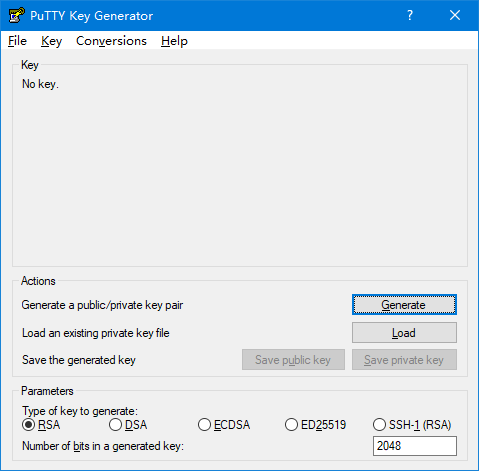
Take PUTTYGEN (KEY GENERATOR FOR PUTTY ON WINDOWS) as an example to illustrate how to create an SSH public key.
-
Download and Install PUTTYGEN.
-
Click "Generate"
-
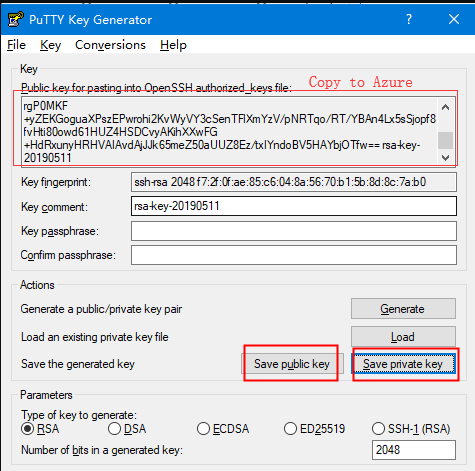
Public key and Private key is OK, you can copy public to Azure(format starting with "ssh-rsa") ,and Save the public key and private key on your local computer for backups
-
When connect Linux on your local computer, you can use private key for authentication
Upgrade VM
Azure have provided a complete Automatic upgrade solution
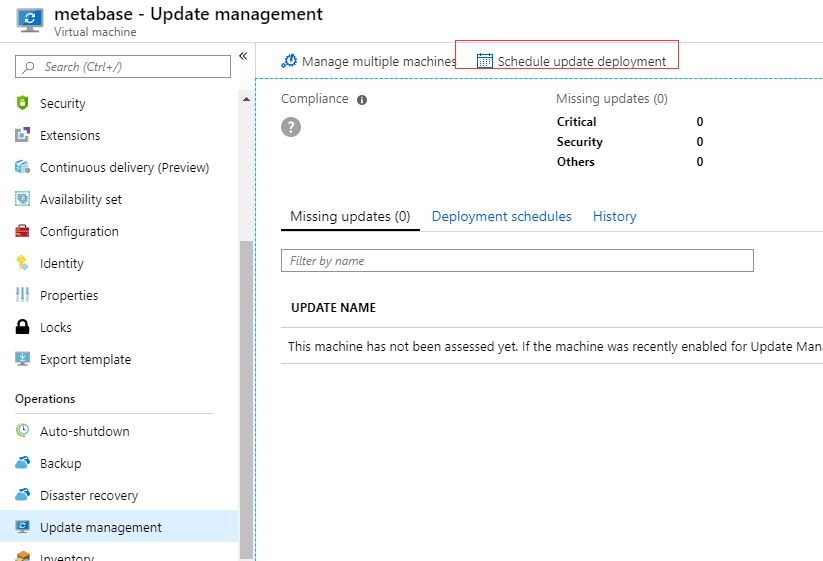
- Login Azure Portal, Click the "Update management" on Operation section, then "Enable" it
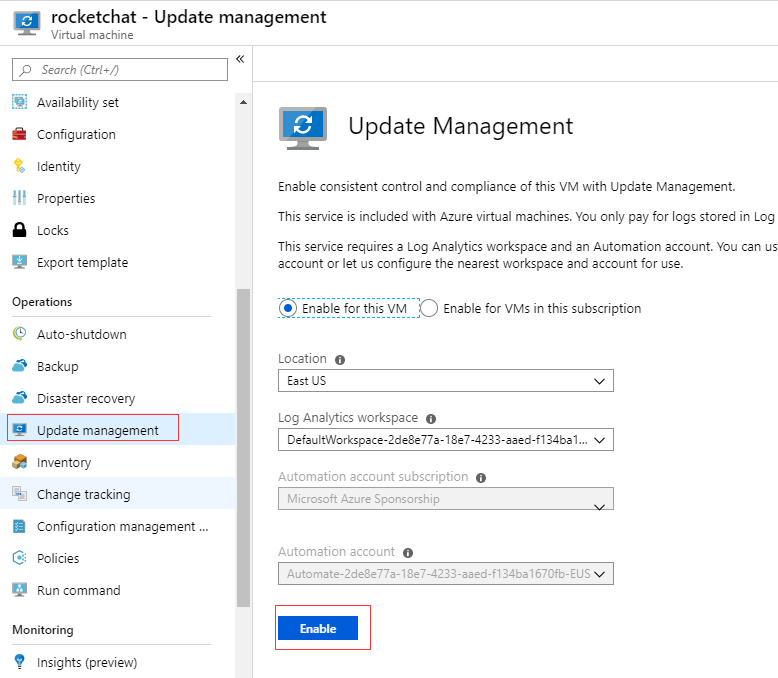
- Wait for minutes and the Azure will create an update solution. Click "Schedule update deployment" to start set update policy
Resize VM
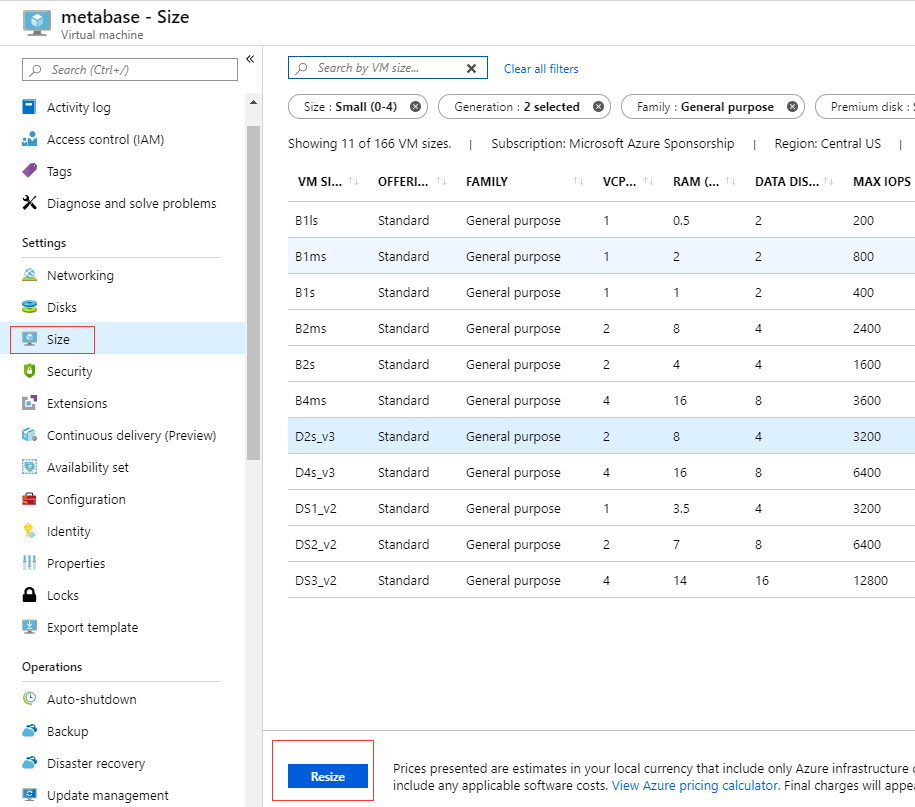
The VM size can be adjusted, login Azure Portal, and then open: Settings -> Size, click the "Resize" button.
Redeploy VM
In some special cases, the user intends to restore the VM to its original state, but it is desirable to keep all VM configuration options and associated resources reserved. At this time, we need to use the "re-deployment" operation.
-
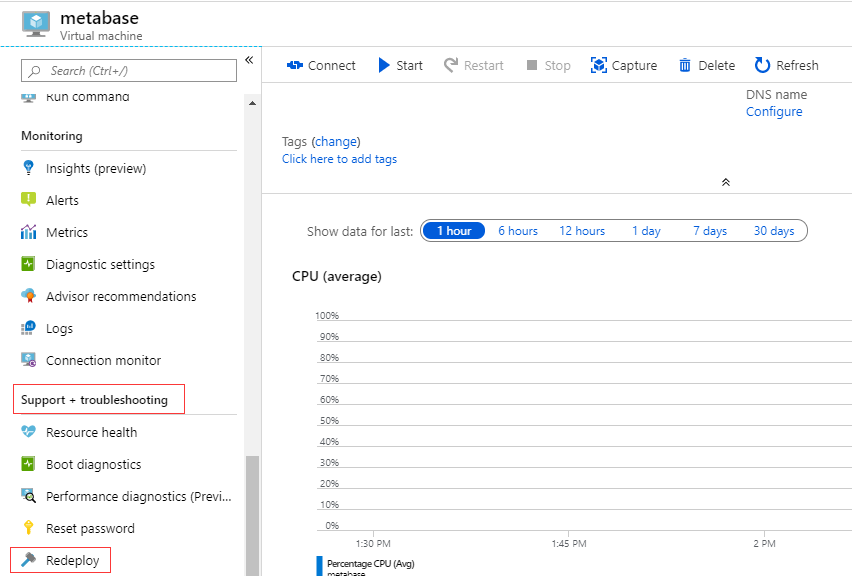
Select the VM and select the Redeploy in the Support+troubleshooting section
-
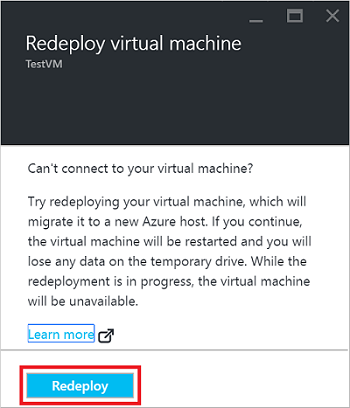
To confirm the action, select the Redeploy button:
-
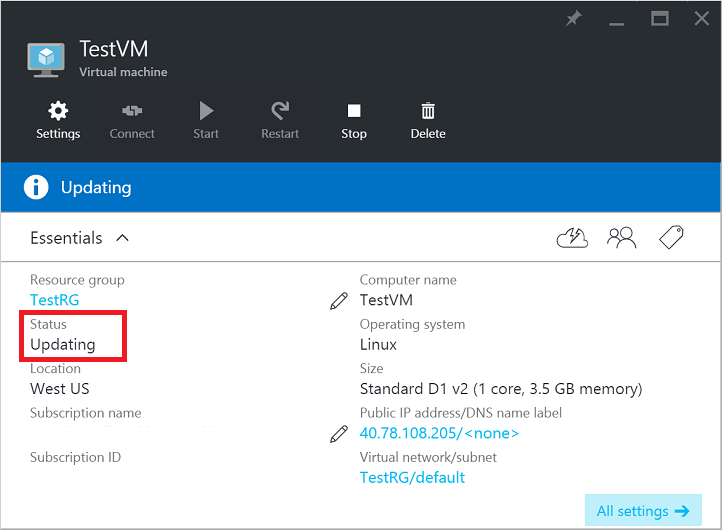
When the VM is ready for redeployment, the VM's Status changes to Updating, as shown in the following example:
-
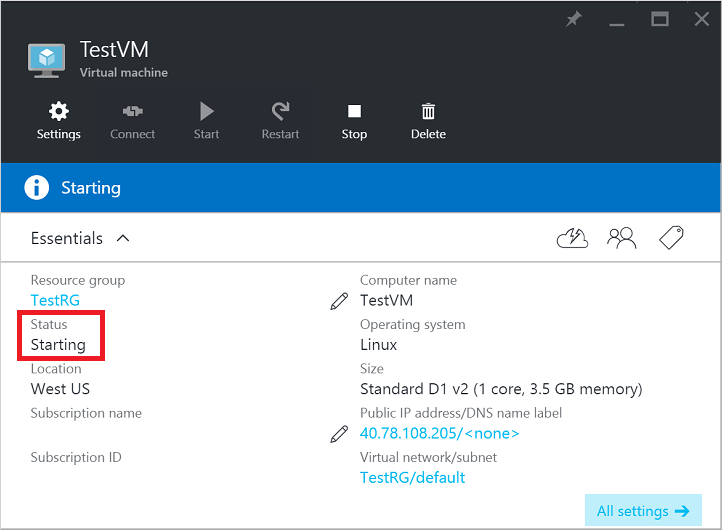
When the VM is started on a new Azure host, the Status changes to Starting, as shown in the following example:
-
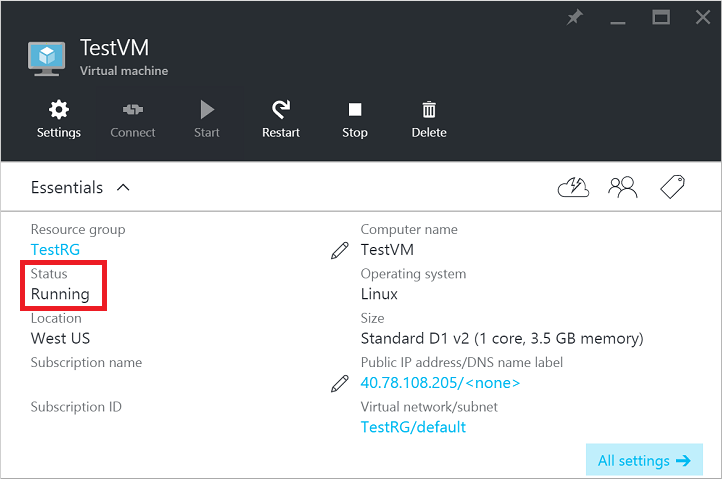
After the VM completes the boot process, the Status returns to Running, which indicates that the VM was successfully redeployed:
Backup VM
We know that no one (organization) can guarantee that the VM will always be up and running. If the VM fails to start or fails to connect, what would happen without backups? Is this worthwhile to try?
If there is a backup, it can be restored to the state at the time of backup, greatly reducing the loss.
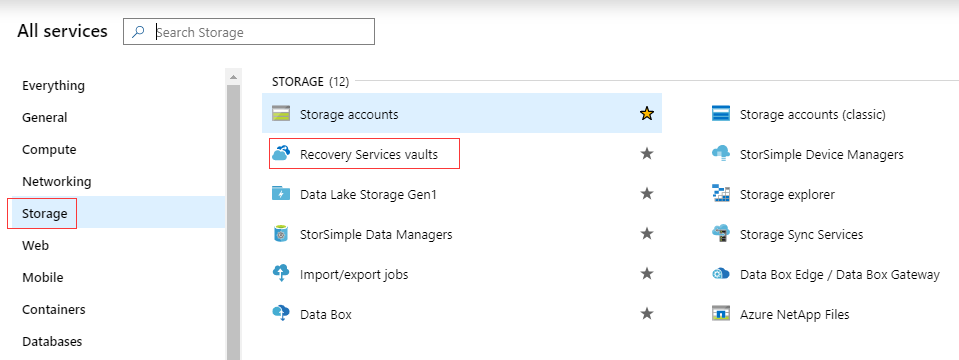
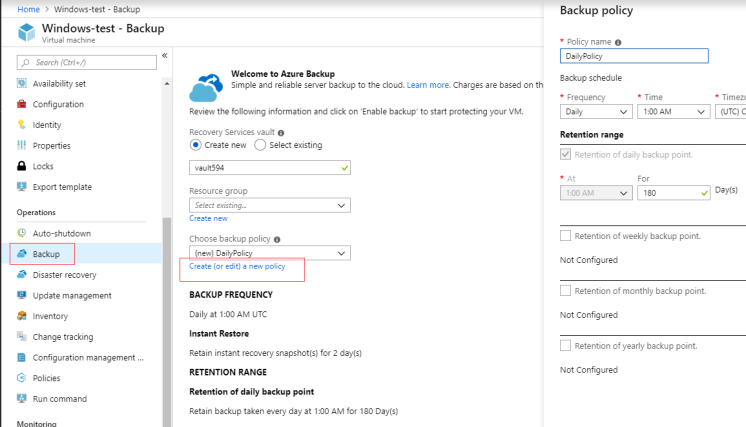
Azure Portal-> All service ->Storage, the "Recovery Services vaults" service is for backup of VM:
Below we explain how to set up backups for existing VMs and create VMs.
Existing VM settings
For the VM that has been created, set the automatic backup strategy, please refer to the following figure.
Create VM settings
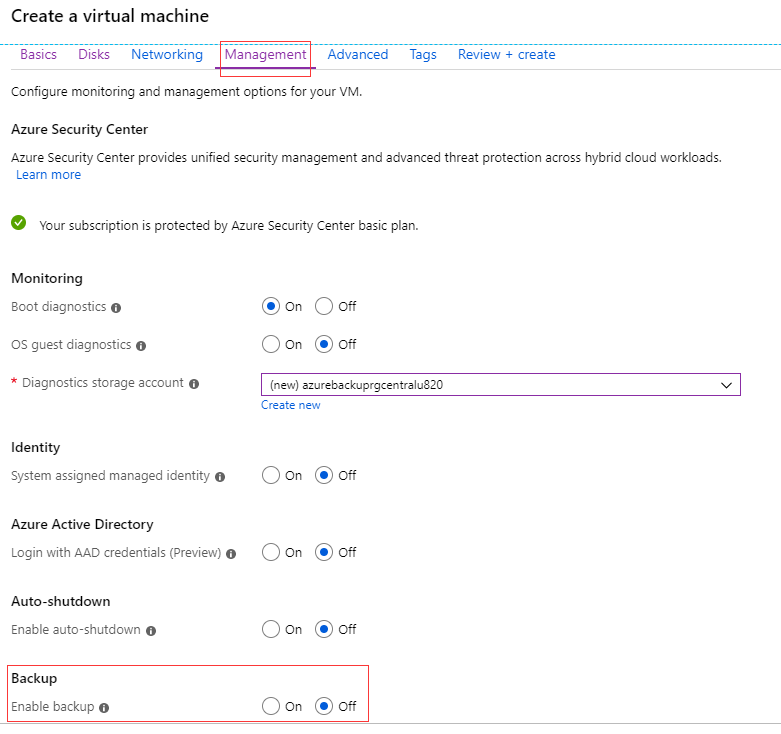
When creating a VM, we can set up automatic backup mode.
-
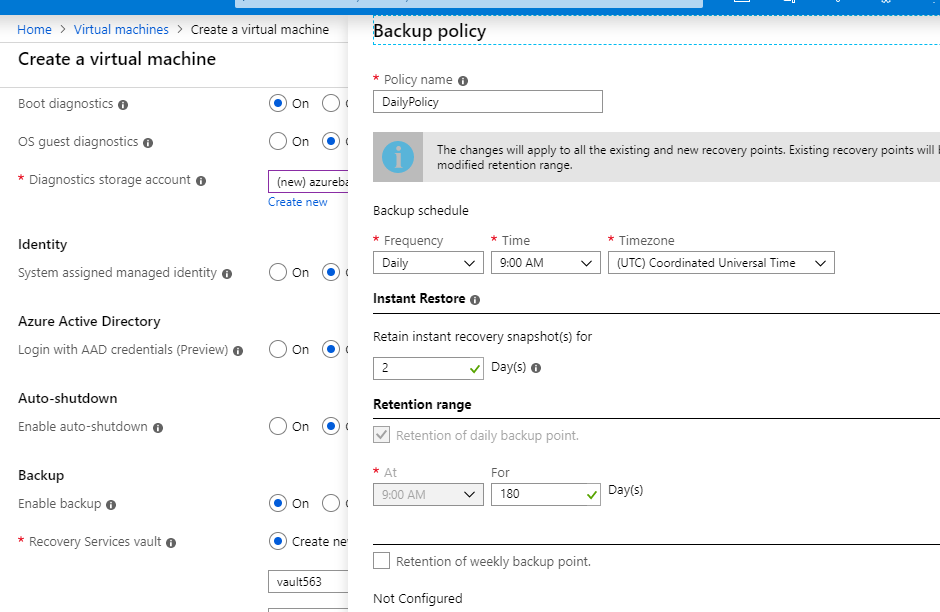
Create a VM, backup items under the Management tab, Enable backup
-
Select an already created vault name or create a new vault name and set a backup policy
-
Increasing the frequency of backups is a good choice when budget allows.
Disk, Snapshot and Image
The reason we put Disk, snapshots and image together is because there is a certain relationship between the them, and even there is an alternate relationship.
There are several special concepts in Azure's disk management, explained in advance:
- Managed Disk: Hosted by Azure Public Store
- Un-Managed disk: The disk can only be managed by the storage account under the account, not as an independent resource.
- Storage account: Azure provides a storage account function, the so-called storage account, which is an entry that can manage the disk.
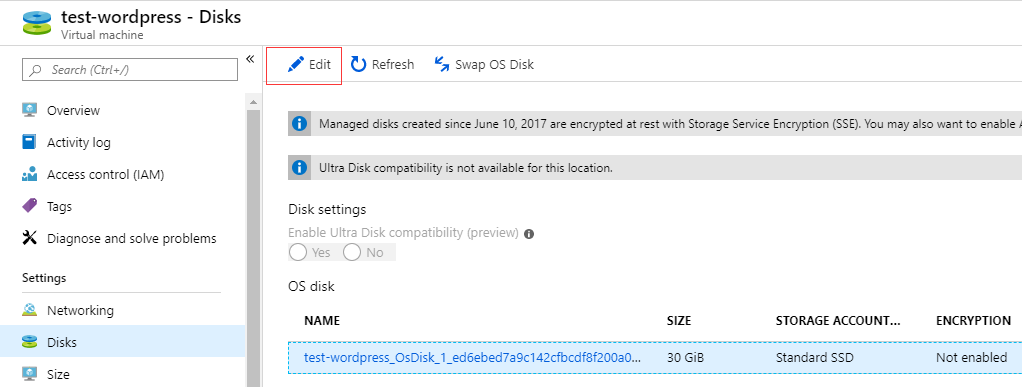
Data Disk
We know that a data disk is different from the system disk and is mainly used to store data.
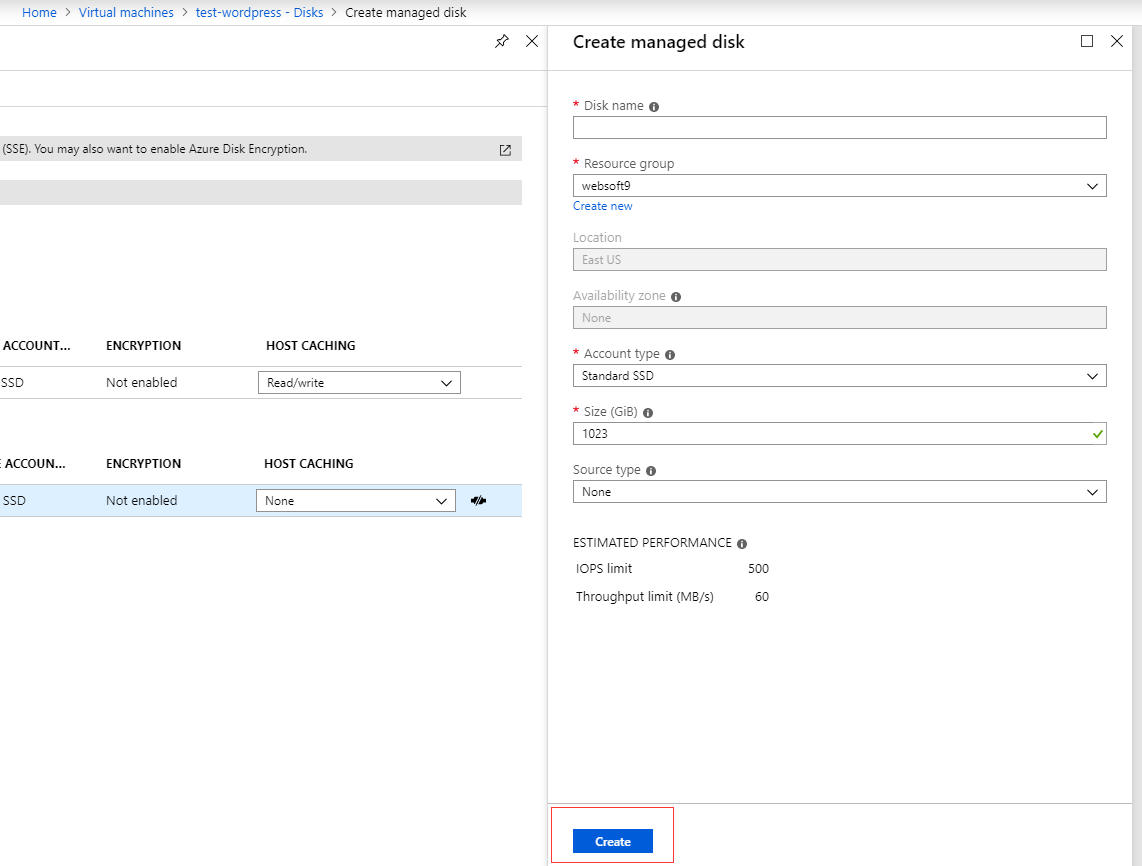
Add Data Disk
- Login Azure Portal, select the VM and Stop it
- Open the Setting->Disks of Stopped VM, click the button "Add data disk"

- Set the disk name,size and other information
- Connect to OS to initialize disk
- Windows, please refer to Azure official documantation Initialize Windows disk
- Linux, please refer to Azure official documantation Initialize Linux disk
- Finish adding data disk
Detach Data Disk
- Login Azure Portal, select the VM and Stop it
- Open the Setting->Disks of Stopped VM
- Click the "Edit" on the top of Disks page
- Then, click the detach icon like below

- Once detach disk, please save it
- Start VM
The disk detach didn't deleted, it remain in the storage account
Change Size
You can change the Size or change the Account type of Data Disk when the disk is not mounted to VM
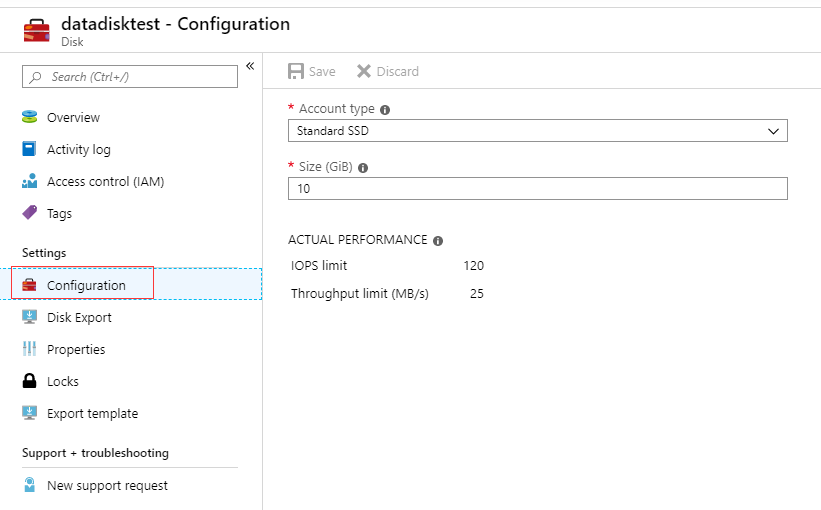
In most times, the disk can only increase size, not reduce size.
Create Snapshot
- Login to Azure Portal
- Open the All Services->Compute->Snapshots
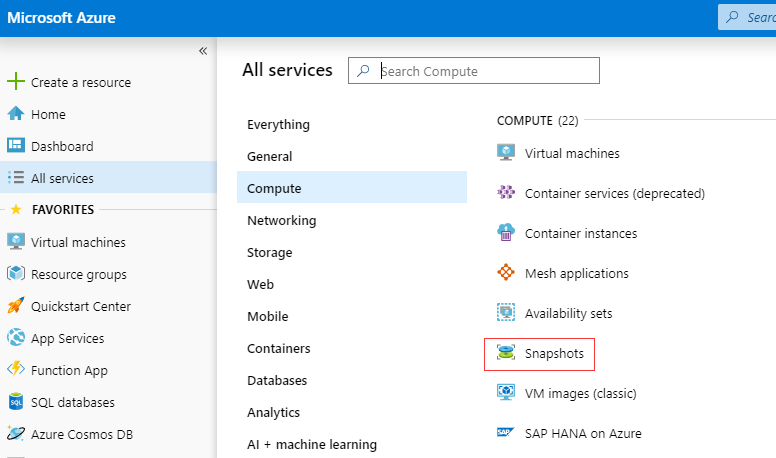
- Then, Click the "+Add" or "Create snapshot" in the Snapshots page

- Follow the prompts to complete the creation from source disk to snapshot
Create Image
As mentioned earlier, image can be created based on snapshots, and image can be created based on VM.
VM to Image
- Login to Azure Portal
- Open the VM, and click the "Capture"
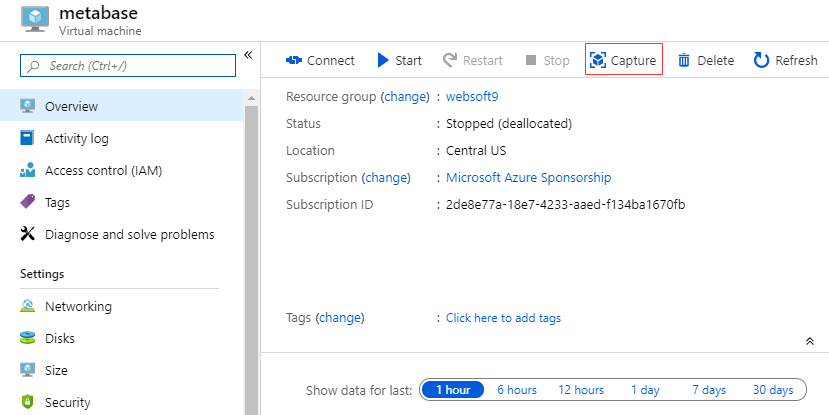
- Follow the prompts to complete the next steps
- It's worth noting that the Capture operation also deletes the VM while creating the image.
Snapshot to Image
- Login to Azure Portal
- Open the All Services->Compute->Snapshots
- You can see all image listed
- Select the snapshot and create image for it
Network and Security
Public IP Address
View it
- Login Azure Portal
- In the Overview of VM, you can see the Public IP Address directly
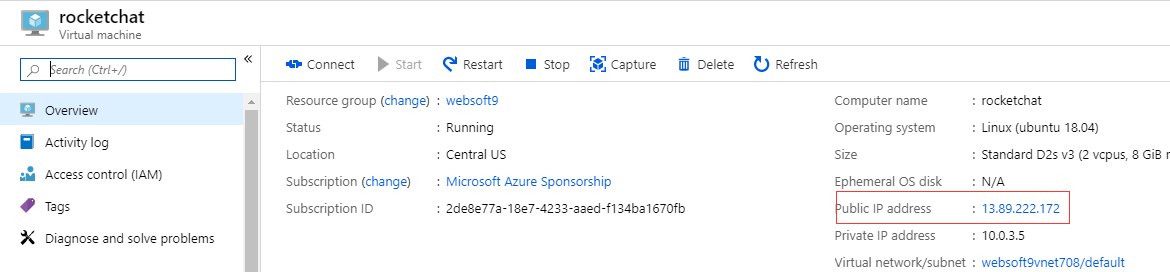
- If the VM does not have a public IP address entry (or is empty), you need to refer to the next section to mount a public IP address.
Mount it
When the created VM does not have a public IP address, as long as there is a free (or newly purchased) public IP address, the Azure console can mount the public network IP address to the virtual machine. The specific steps are as follows:
-
Login Azure Portal
-
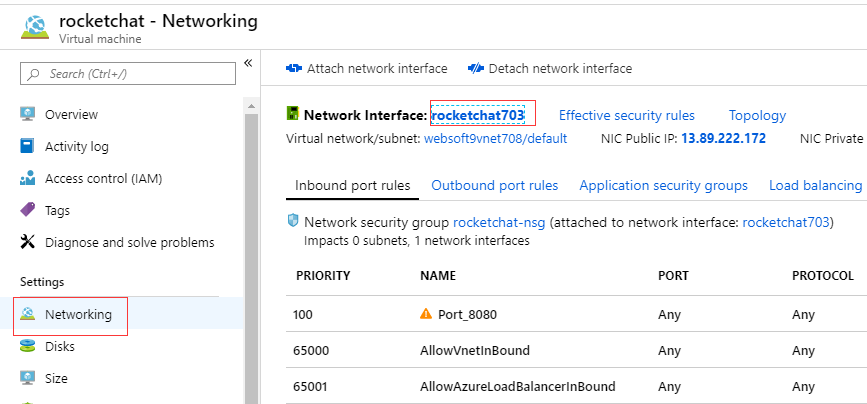
Open the VM->Networking, then the Network Interface item
-
On the details of Network Interface, open the "IP configuration" item and click the "ipconfig1"
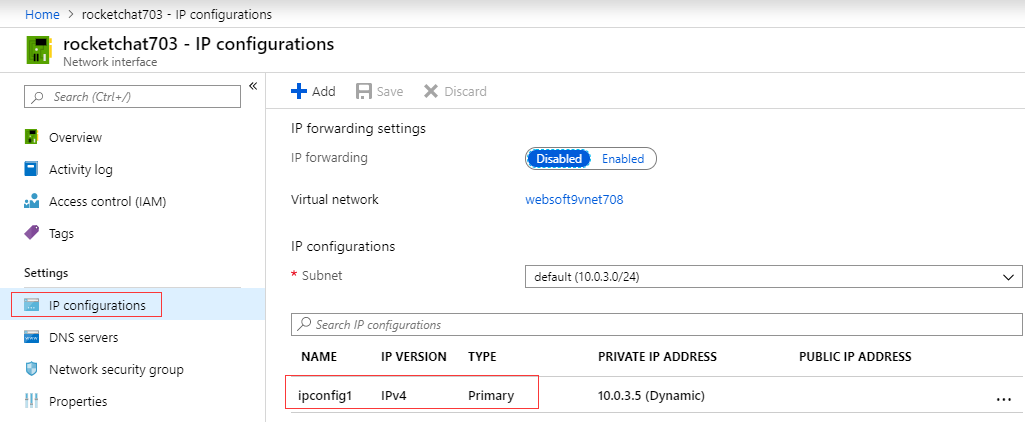
-
Existing public network IP mount operation on ipconfig1
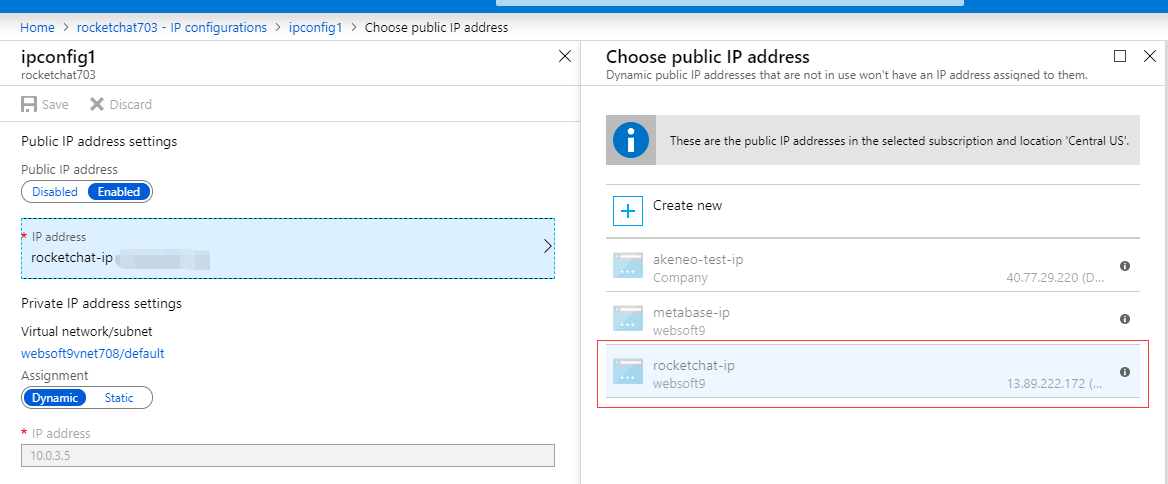
4.If there is no public network IP option, you can create a new one.
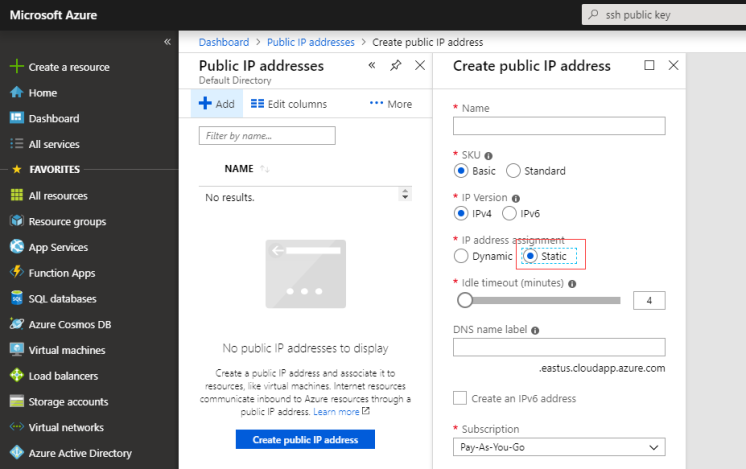
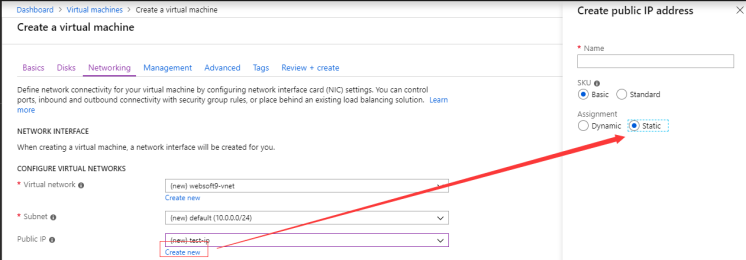
Static IP
The default option for creating a VM is to create a dynamic IP. You can also choose to create a static IP.
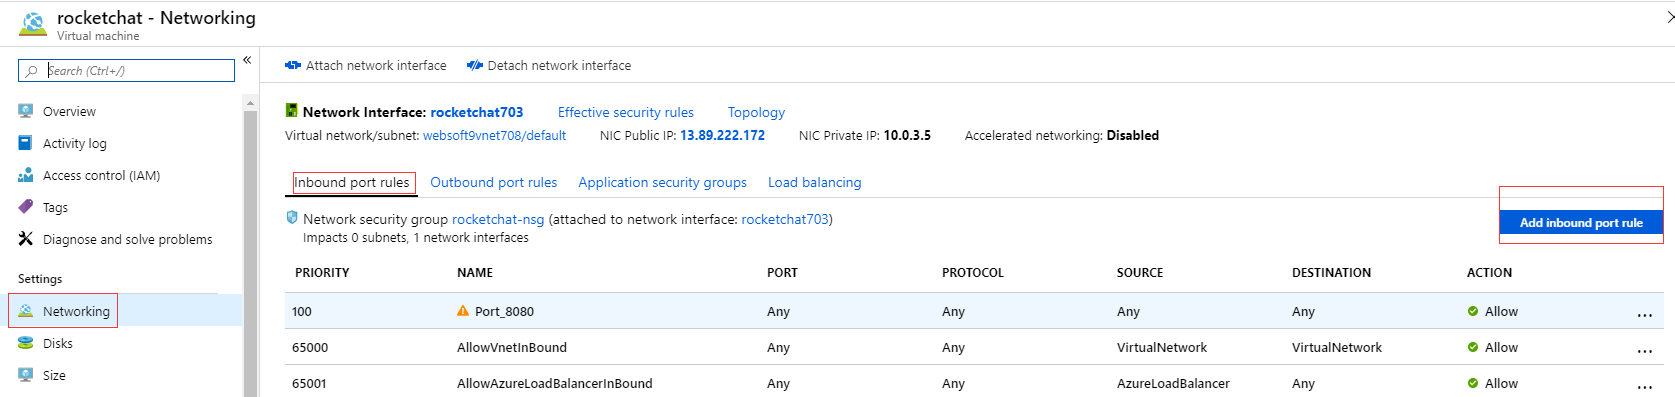
Security Group
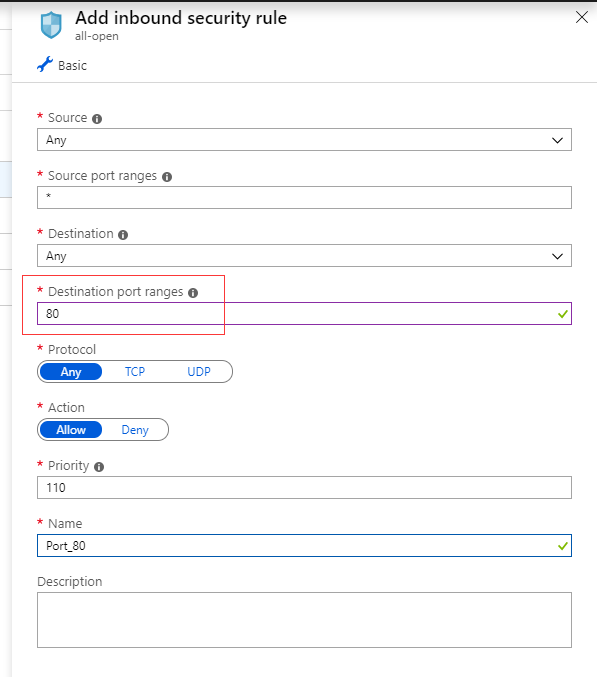
A security group is a function that manages a VM port, which is a channel for access application from external access. Let's take the port of as an example to introduce you to the use of security groups.
-
Open your VM->Networking, you can see the Security Group setting of VM
-
Click "Add inbound port rule" and input the rules like below
-
Save it
Domain Name
General techniques such as applying for a domain name and resolving domain names are not discussed in this document.
Here we introduce a more useful domain name feature of Azure: Azure provides DNS services for each virtual machine.
When the VM is configured with a dynamic IP address, the IP address may change each time the VM is restarted. As a result, the domain name needs to be re-resolved, which brings unnecessary trouble to the operation and maintenance. Azure's DNS function is to help us avoid this problem.
- Login Azure Portal, Open the Overview of VM, Click the "Configure" of DNS name

- Input your DNS name label, e.g "mysite", then Save it
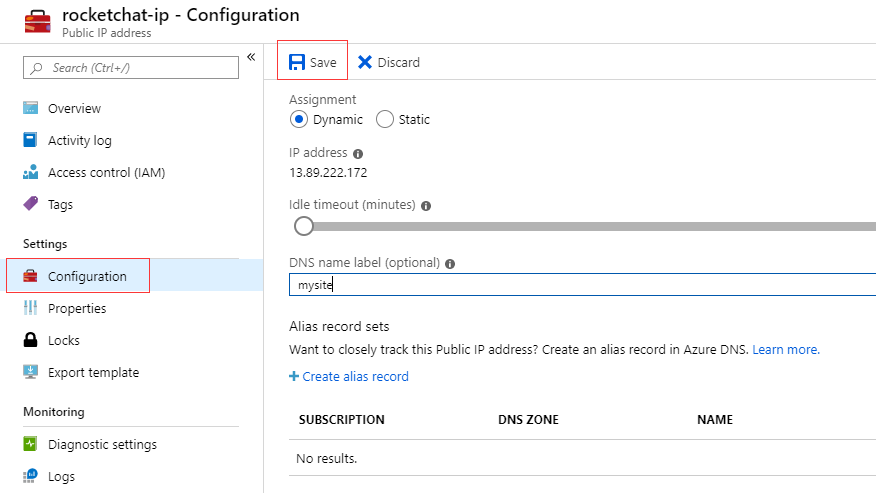
- Complete this setting, you can visit URL http://mysite.centralus.cloudapp.azure.com to this VM's applications