Guide
Manage EC2
Start, Stop and Terminate
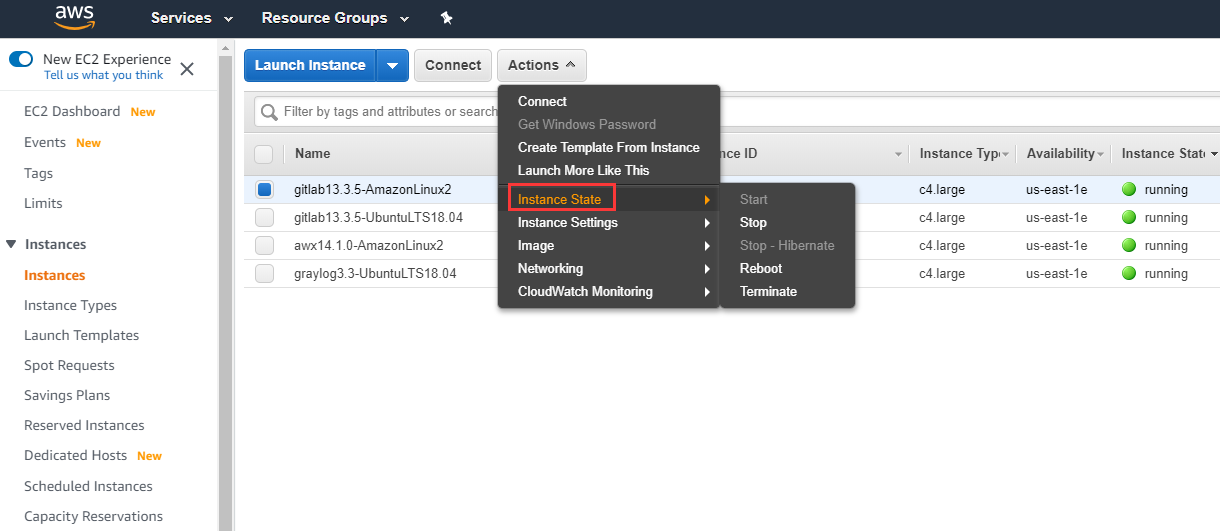
You can change the instance state on EC2 console, including:
- Start
- Stop
- Reboot
- Terminate
- Recover
If you want to automatically recover the instance when it becomes impaired due to an underlying hardware failure or a problem that requires AWS involvement to repair, you need to enable CloudWatch alarms previously.
Connect EC2
For Linux
Command is the basic operation of the Linux system. AWS supports three ways to connect by Command:
| Tool | Instructions |
|---|---|
| A standalone SSH client | Download putty and other SSH clients to local computer to connect to Linux. |
| Hosting SSH client based on my browser (Alpha) | Connect from AWS console website, the prerequisite is to install EC2 Instance Connect on your instance. |
| A Java SSH client directly connected from my browser(Java required) | Directly connect from AWS console website, the prerequisite is to install Java plugin. |
Taking Hosting SSH client based on my browser as an example, steps for how to connect to a Linux server are as follows:
-
Refer to Set up EC2 Instance Connect to install EC2 Instance Connect module(For Websoft9 image, the module is installed by default, just skip this step.)
-
Login to AWS EC2 console, open 【Instance】> 【Connect】and choose the second way to connect.
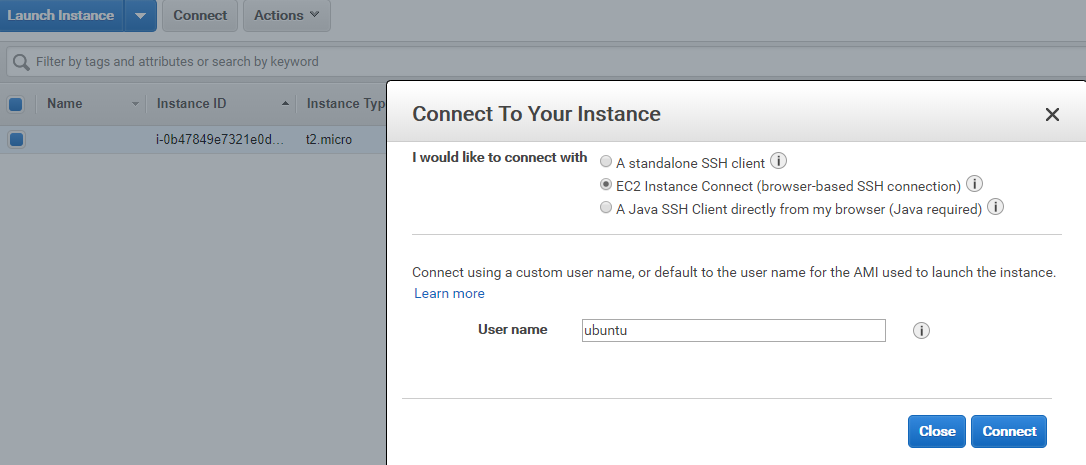
-
Click 【Connect】, a window opens and you are connected to the instance.
After you're connected to the server through command line, the following two most common examples of operations are required.
Sample1: Get password
For security reasons, each time a user deploys, a unique random database password is generated and stored in the service. Just require the following command to view:
sudo cat /credentials/password.txt

//result
MySQL username:root
MySQL Password:@qDg1Vq1!V
Sample2: Enable root user
For security and regulatory requirements, AWS does not open the Linux root account by default, and only provides users with a common account. If you wish to use the root account, enable it by following the steps below:
sudo su
sudo sed -i 's/#PermitRootLogin yes/PermitRootLogin yes/' /etc/ssh/sshd_config
sudo systemctl restart sshd
sudo passwd root
For Windows
Before you use local computer's Remote client to connect Windows Server, you should complete these steps:
-
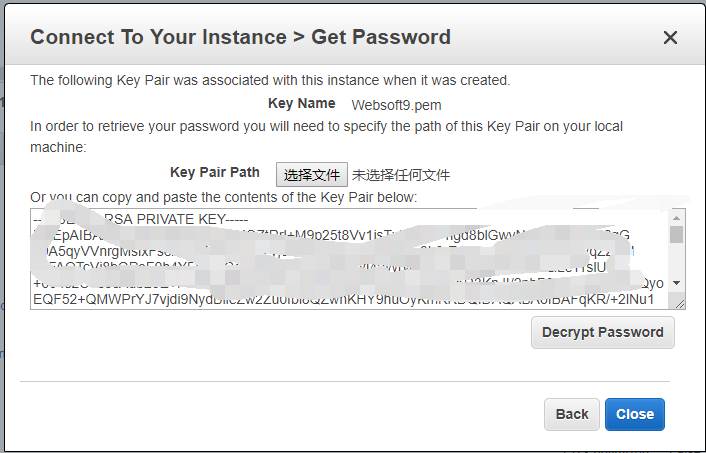
Login to AWS console, choose the instance which you want to connect to, click 【Connect】 and then click 【Get Password】 in the pop-up window.
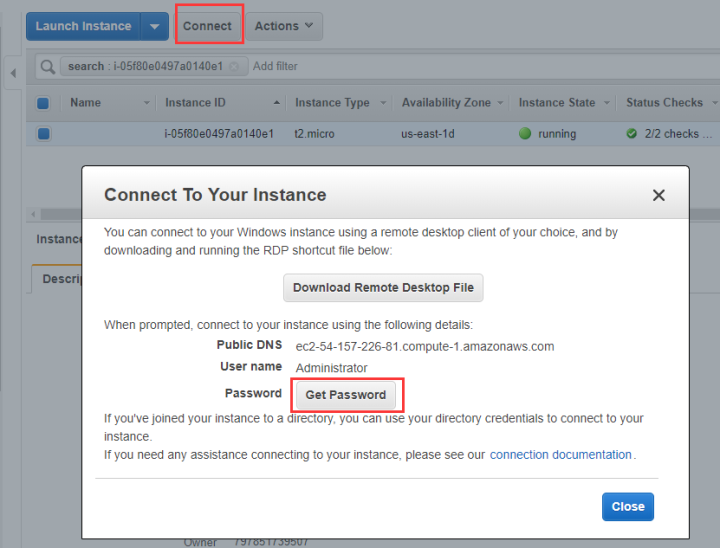
-
Upload the key pair stored locally.
-
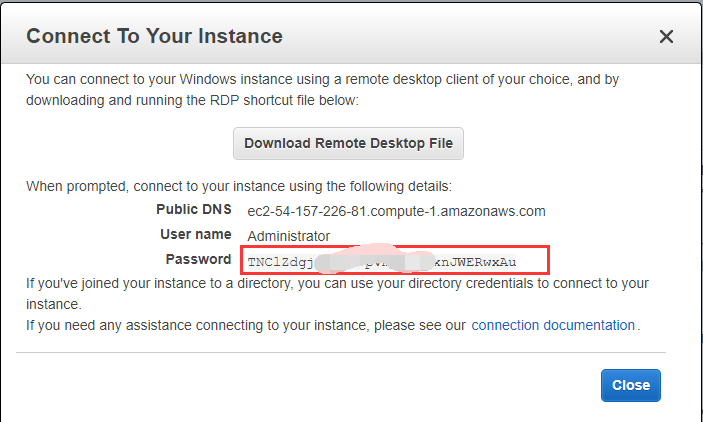
Click 【Decrypt Password】, then the password will be displayed on the interface.
Create EC2
The introduction below is about how to launch instance on AWS.
The basic condition for launching instance is to prepare a boot disk file for the system disk for the instance. The most common template file is image.
Steps below are about how to launch instance based on image:
-
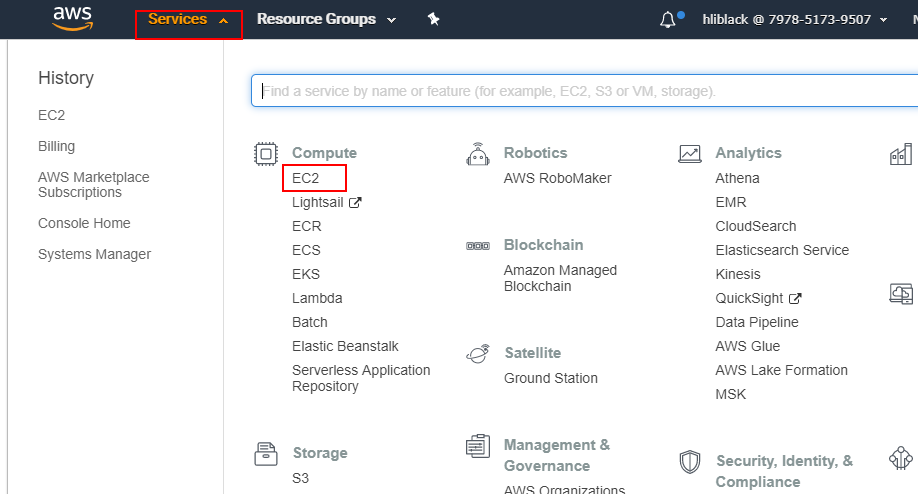
Login to AWS Management Console, and click 【EC2】.
-
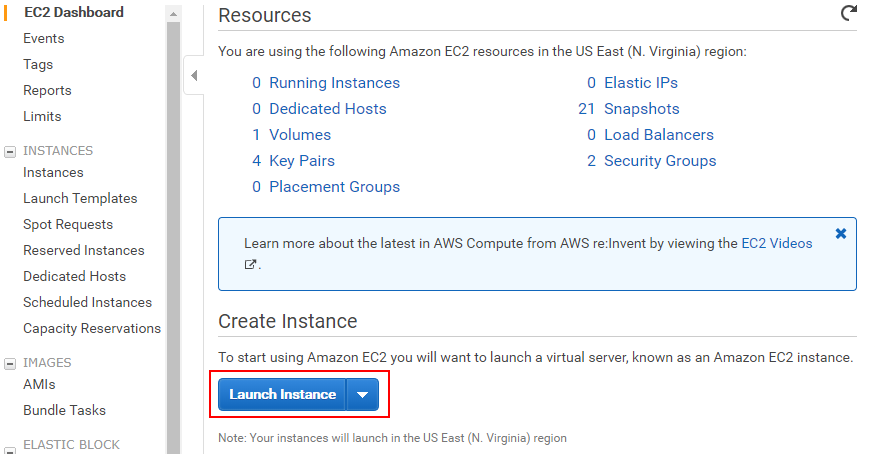
Enter EC2 Dashboard, and click 【Launch Instance】to create Instance.
-
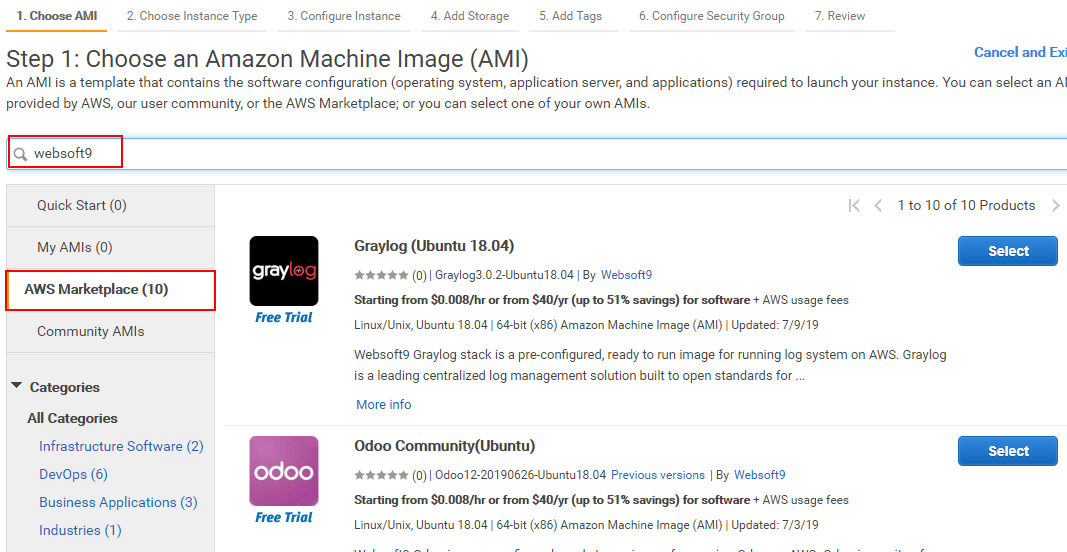
When choosing AMIs, click 【View all public and private AMIs】 and search keyword "websoft9" to see the list of images.
-
Select the image you need.
-
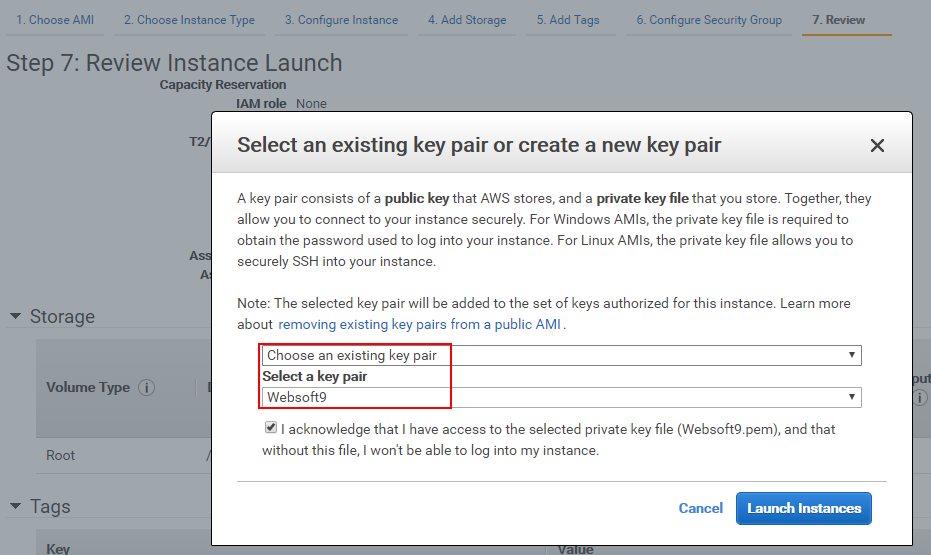
Finish the following steps, which require you to choose instance type, VPC, set key pair and more.
-
Wait several minutes after completing creating EC2, and the image is started as the system disk of the instance, that is, the image is automatically deployed to the instance.
Key Pair for EC2
When launching instance, AWS requires key pair to log in. Steps for how to create key Pair are as follows:
-
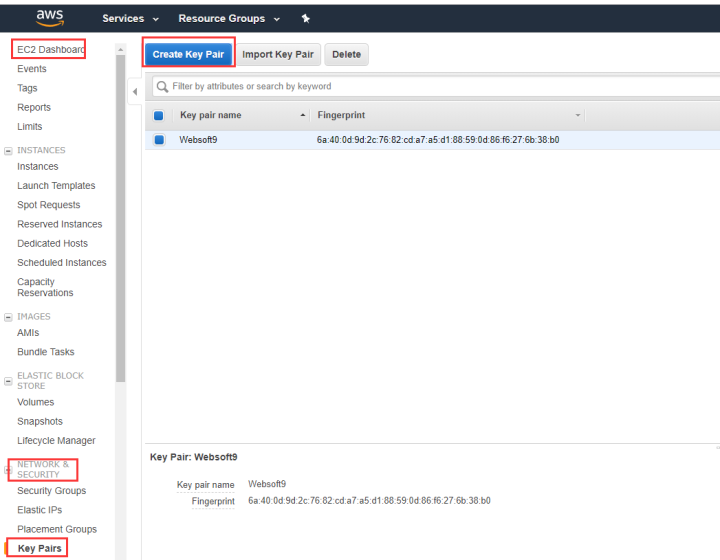
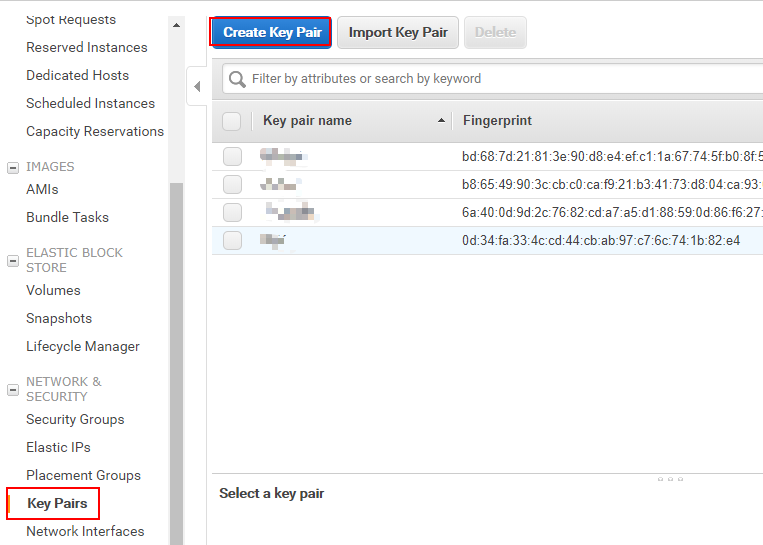
Login to AWS console, open 【EC2 Dashboard】>【NETWORK & SECURITY】>【Key Pairs】and click 【Create Key Pair】.
-
Name the key pair, such as "myKey".
-
Store key pair file myKey.pem into the local computer.
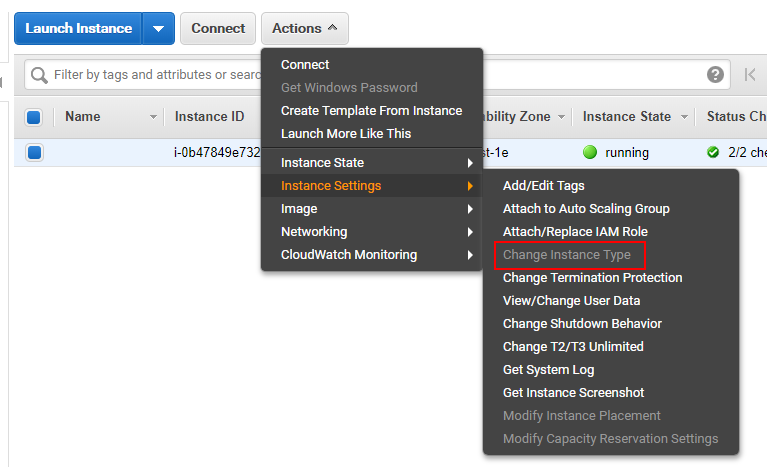
Change EC2 Type
Follow the steps below to change instance type:
-
Login to AWS console and stop the instance.
-
Open 【Actions】>【Instance Settings】>【Change Instance Type】.
-
Complete new settings, then start the instance.
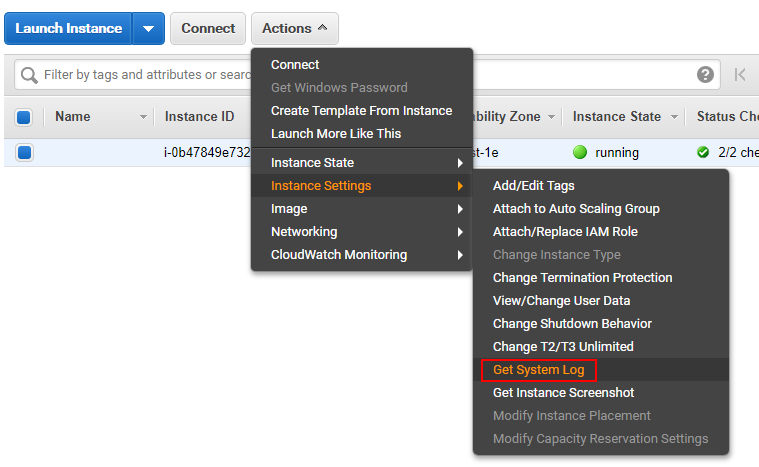
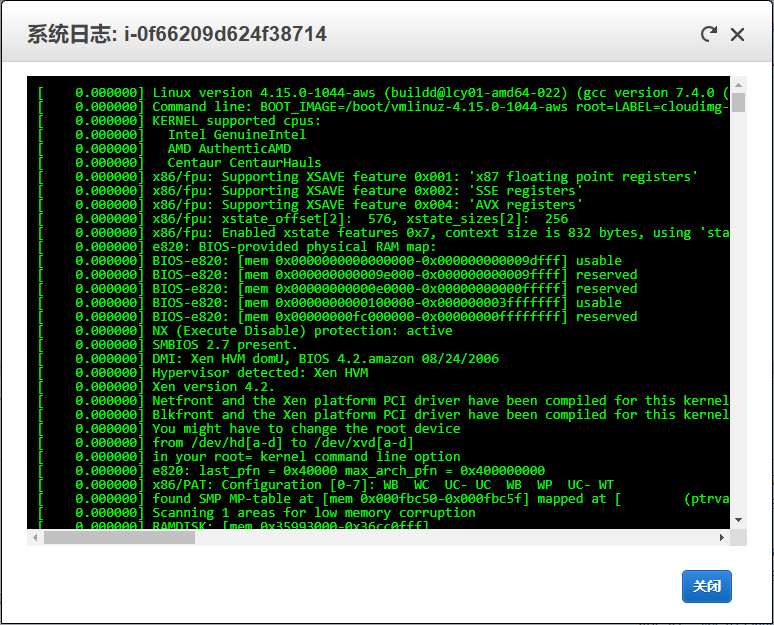
Get EC2 logs
You can get system log on EC2 console:
-
Login to AWS console and stop the instance.
-
Open 【Actions】>【Instance Settings】>【Get System Log】.
-
Complete the new settings, then start the instance.
Backups EC2
We know that no one (organization) can guarantee that the EC2 will always be up and running. If EC2 fails to start or fails to connect, what would happen without backups? Is it worthwhile to try?
If there is a backup, it can be restored, which greatly reduce the loss.
For AWS, to create backup for EC2 is based on automatic snapshot for the volume of EC2.
There are two entries to create backups on AWS console:
Snapshot Backup
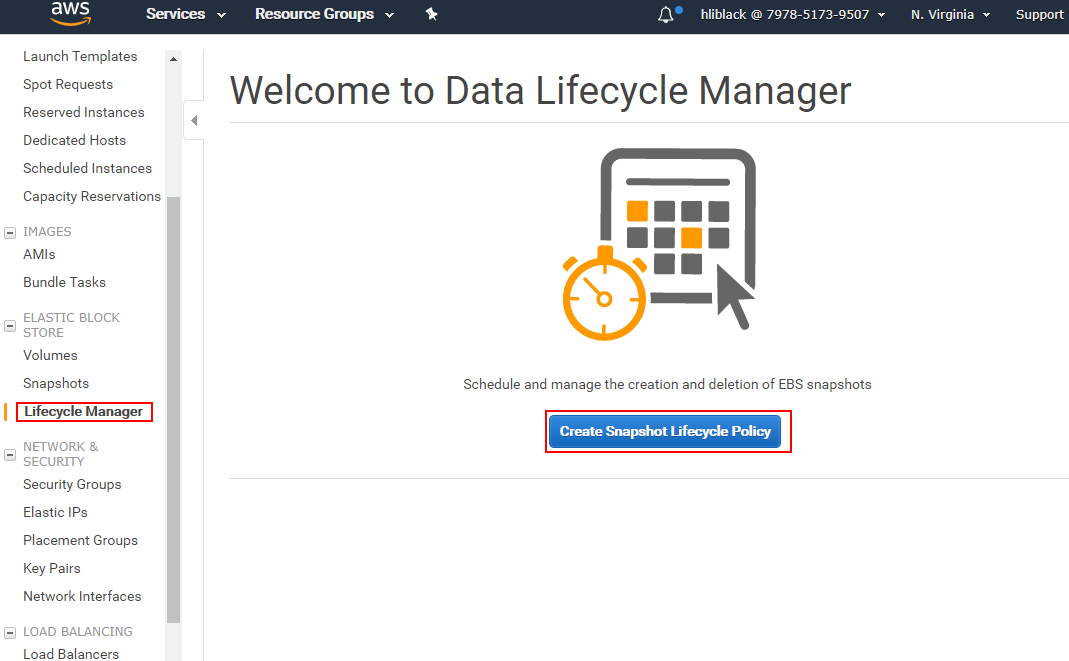
Automatic Backup
-
Login to AWS console.
-
Open【EC2】>【ELASTIC BLOCK STORE】>【Lifecycle Manager】>【Create Snapshot Lifecycle Policy】.
-
Follow the prompts to complete the settings.
Manual Snapshot
Steps for manual snapshot on demand are as follows:
-
Login to AWS console and open EC2 Dashboard.
-
Open 【ELASTIC BLOCK STORE】>【Volumes��】 and choose volume to 【Create Snapshot】.
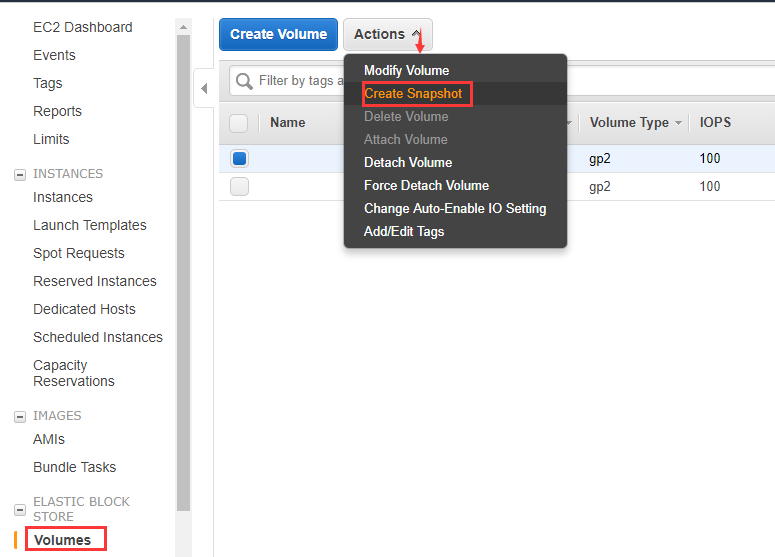
-
Name the snapshot before creating.
AWS Backup service
AWS Backup is the specific backup service for AWS resources.
-
Login to AWS console, open 【Services】>【Storage】>【AWS Backup】 and create Backup plan.
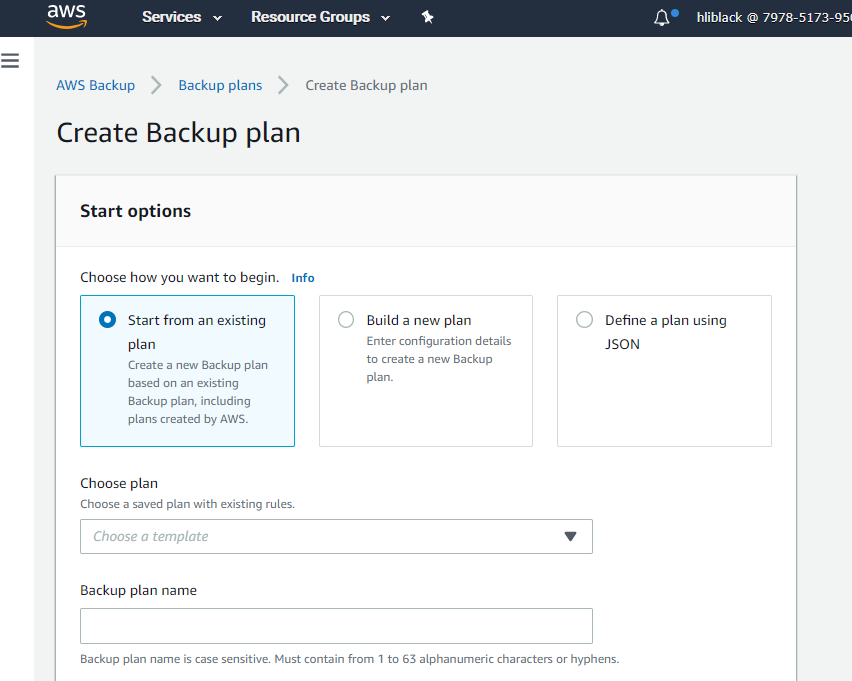
-
Choose to start from an existing plan and begin to create on-demand backup, that is, to choose the protected resources as you need.
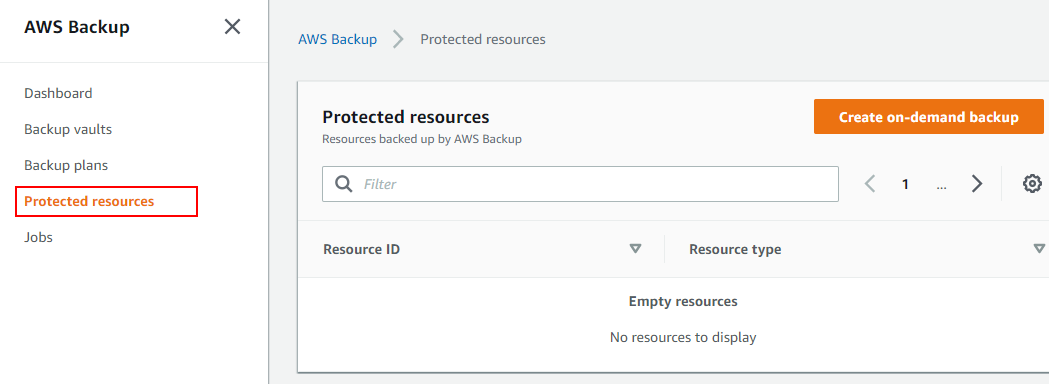
-
Choose EBS (disk) as the resource type and choose the volume ID.

-
Complete the settings.
Upgrade EC2
AWS offers AWS Systems Manager solution, which can help you automate collecting software inventory, patching applications OS, launching system VMs, and configuring Windows and Linux.
-
Login to AWS Management Console and open 【AWS System Manager】 service.
-
Open 【Instances & Nodes】>【Patch Manager】to enter the manage interface.
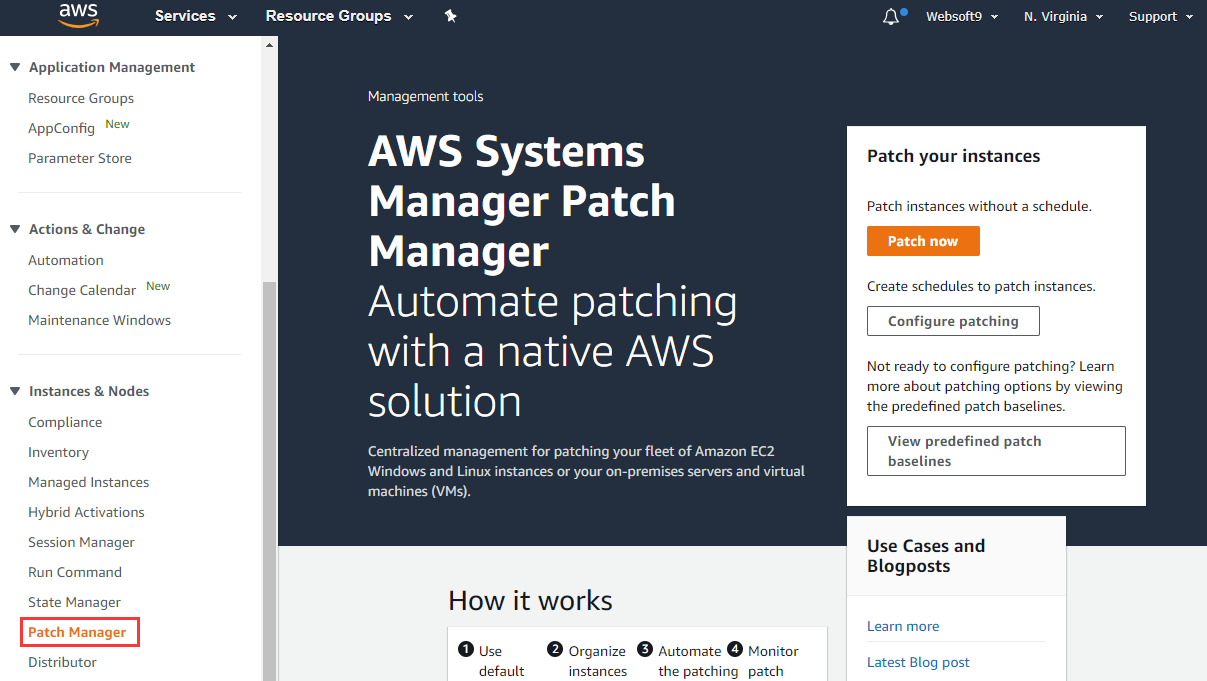
-
Follow the guide to complete upgrading.
Disk, Snapshot and Image
Key connection between snapshots and image are as follow:
-
A snapshot can be created based on the disk.
A snapshot is a "photographing" of a disk. As the name suggests, it is to back up the data of a disk at a certain point in time. It is a backup method.
-
A image can be created based on a snapshot, but the image cannot be directly converted into a snapshot.
-
Based on the image, you can create an instance directly, and you can create a image directly based on the instance.
Summary: (volume --> snapshot) --> (image - instance)
Volumes (Disk)
For AWS, volume can be a separate computing resource (created separately, billed separately, managed separately, etc.) and can be integrated into an instance as a component.
Create Volume
-
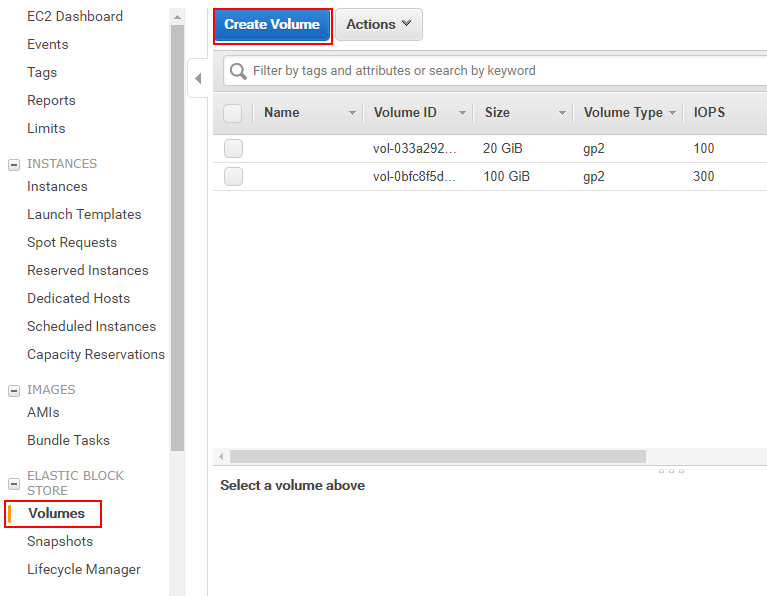
Login to AWS console and open EC2 Dashboard.
-
Open 【ELASTIC BLOCK STORE】>【Volumes】 to create volume.
-
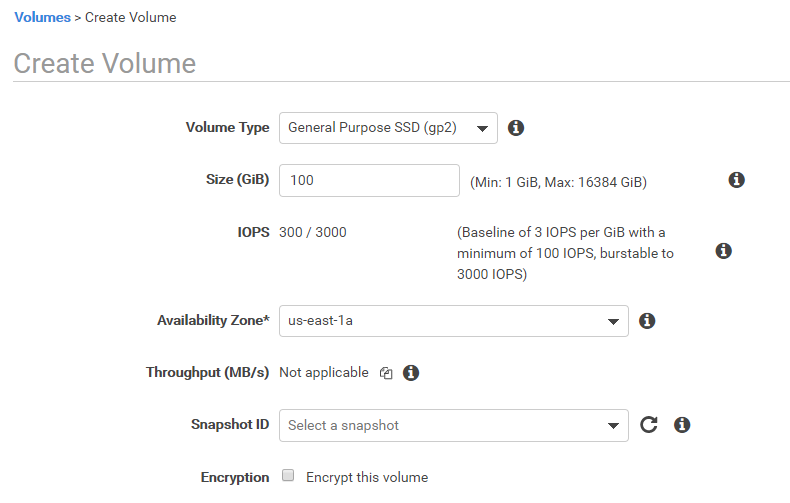
Complete volume type, size and other settings, then check before creating.
-
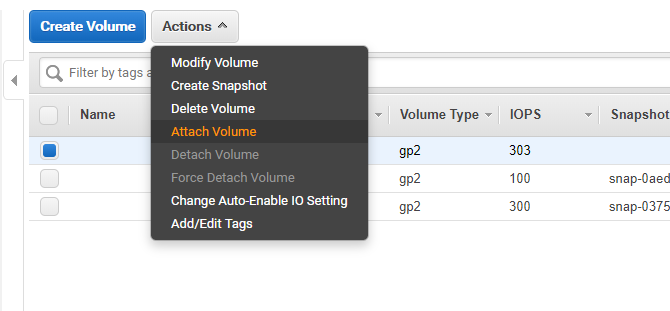
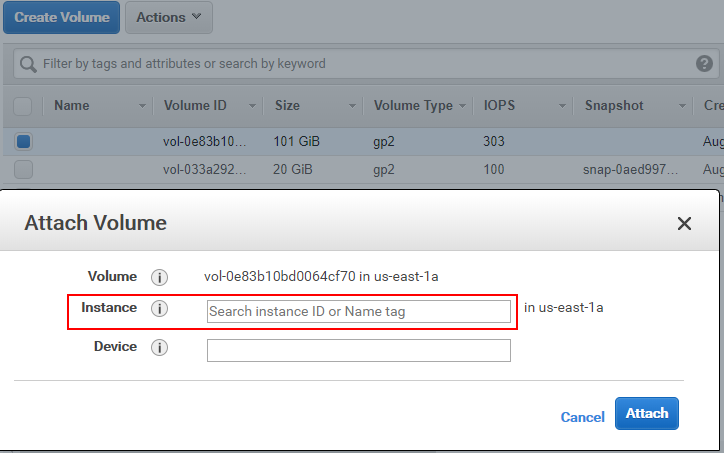
Attach the volume created to the instance.
-
Log in to the instance, and complete volume initialization to make it available.
- For Windows, view official document Making an Amazon EBS volume available for use on Windows
- For Linux, view official document Making an Amazon EBS volume available for use on Linux
-
Complete all settings and the volume is available.
Detach Volume
To detach volume from the instance, refer to the steps below:
-
Login to AWS console and open EC2 Dashboard.
-
Open 【Instances】, choose the instance from which the volume will be detached and click 【Stop】.
-
Open【ELASTIC BLOCK STORE】>【Volumes】, choose the volume and click 【Detach Volume】.
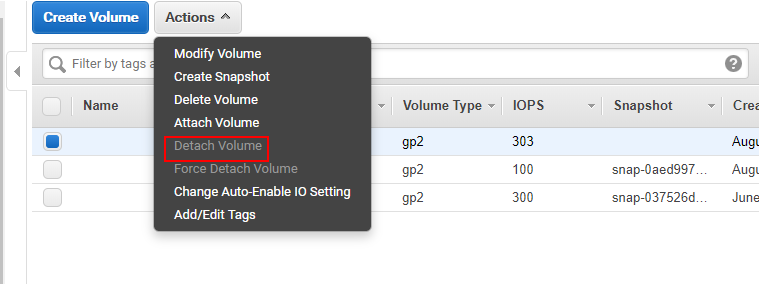
The volume detached remains in the storage account and wouldn't be deleted.
Modify Volume
If the volume is not attached to instance, it can be modified.
-
Login to AWS console and open 【EC2->ELASTIC BLOCK STORE】>【Volumes】.
-
Choose the volume need to modify and open 【Actions】>【Modify Volume】.

-
Set new size.
In most cases, the volume can only increase in size, but can not decrease.
Create Snapshots
For AWS, to create Snapshots based on the volume.
-
Login to the AWS console and open EC2 Dashboard.
-
Open 【ELASTIC BLOCK STORE】>【Volumes】 and choose volume to create Snapshot.
-
Name the snapshot before creating.
Create Image
As mentioned before, image can be created based on snapshots, and instance.
Instance to Image
-
Login to AWS console.
-
Choose the instance, and open 【Actions】>【Image】>【Create image】.
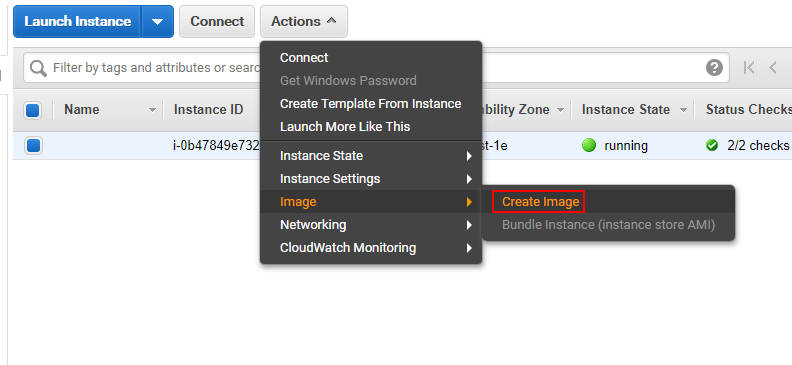
-
Follow the prompts to complete it.
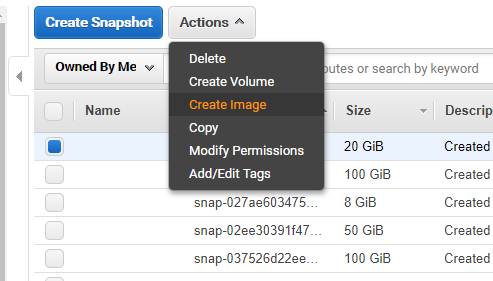
Snapshots to Image
-
Login to the Aws console and open EC2 Dashboard.
-
Open 【ELASTIC BLOCK STORE】>【Create Snapshot】 and list all snapshots.
-
Choose from the list of snapshots and create image based on it.
Network and Security
Internet IP
View IP
-
Login to AWS console.
-
Choose the instance, and you can see the Public IP and Public DNS.
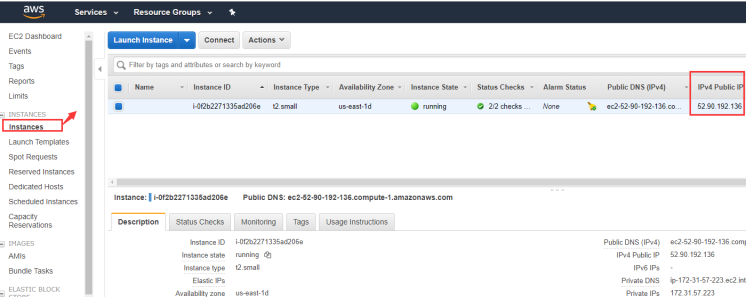
-
If the instance does not have a public IP address entry (or is empty), you need to refer to the next section to mount a public IP address.
Mount IP
If the created instance does not have a public IP address, as long as there is a free (or newly purchased) public IP address, the AWS console can mount the public network IP address to the instance.The specific steps are as follows:
-
Login to AWS console.
-
Choose the instance and open 【Actions】>【Networking】>【Manage IP Addresses】.
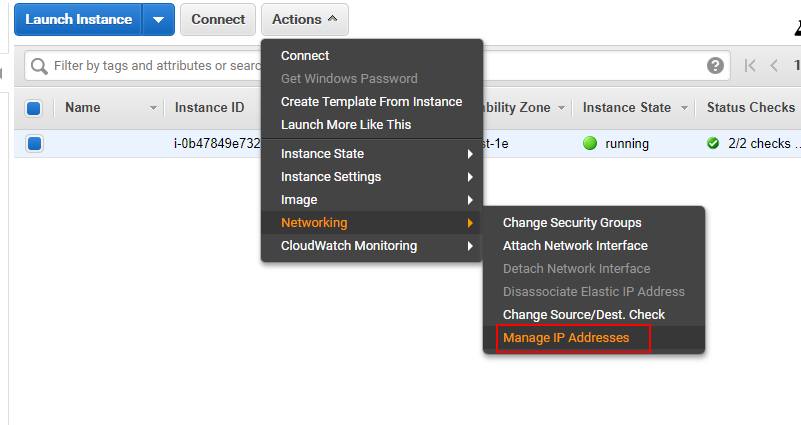
-
Click 【Allocate an Elastic IP】.
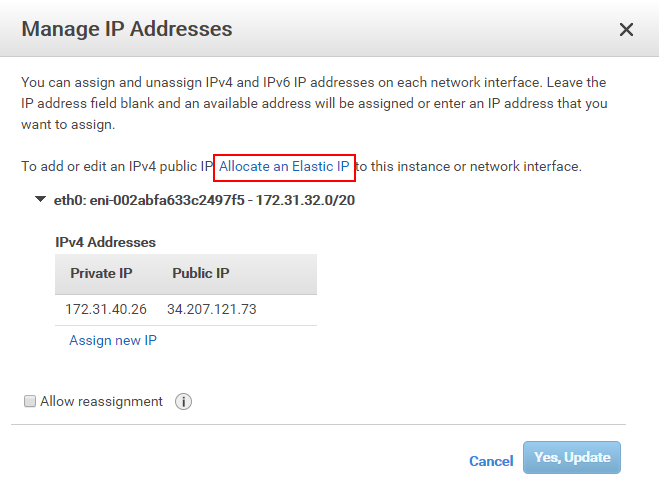
-
Follow the prompts to complete the action.
Security Group
A security group is a function of managing the EC2 port, which is a channel for access application from external access. Let's take opening port 80 as an example to introduce you to the use of security groups.
-
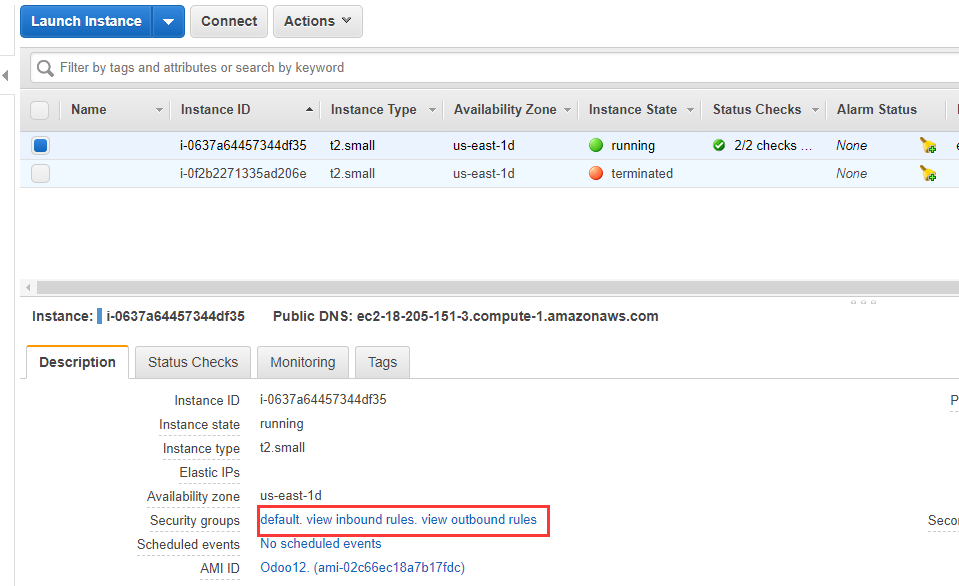
Login to AWS console and open 【EC2】>【Instances】.
-
Open 【Description】and then click the name of Security groups.
-
Enter the setting interface, click 【Inbound】and 【Edit】.

-
Edit inbound rule and add a new one.

-
Save it.
Domain Name
General skill such as applying for a domain name and resolving domain names will not discussed in this document.
Here we introduce a more useful domain feature of AWS: AWS provides DNS services for each instance.
DNS for EC2
AWS provides public public DNS services for each instance.
When the instance is configured with a dynamic IP address, the IP address may change each time the instance is restarted. As a result, the domain name needs to be re-resolved, which brings unnecessary trouble to the operation and maintenance. AWS's DNS function can help us avoid this problem.
-
Login to AWS console and open 【Instance】>【Description】.
-
Copy the public DNS.
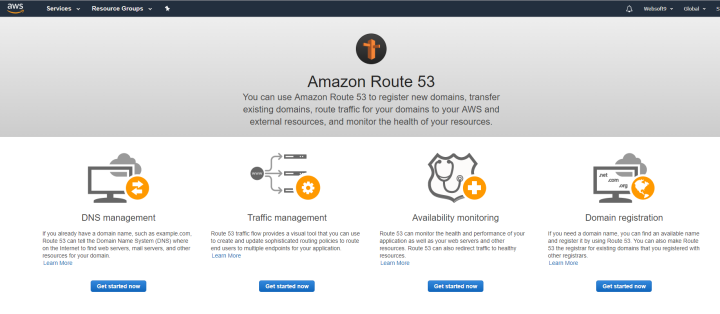
Route 53
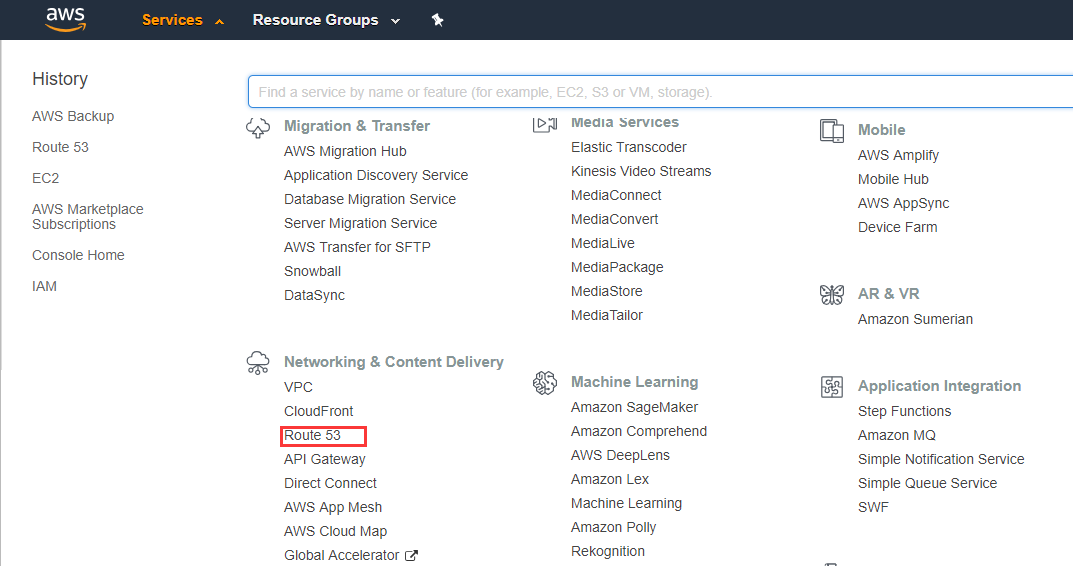
Route 53 is the platform for applying domain, domain resolution and management. You can use Route 53 to register domain names, transfer existing domains, route traffic for your domains to your AWS and external resources and check the health of your resources.
- Login to AWS console and choose Route 53 in 【Networking & Content Delivery】.
- Start to manage domains.