Deploy from Websoft9 App Store
Once completed the installation and login to Websoft9 Console to verify it, you can plan to deploy applications.
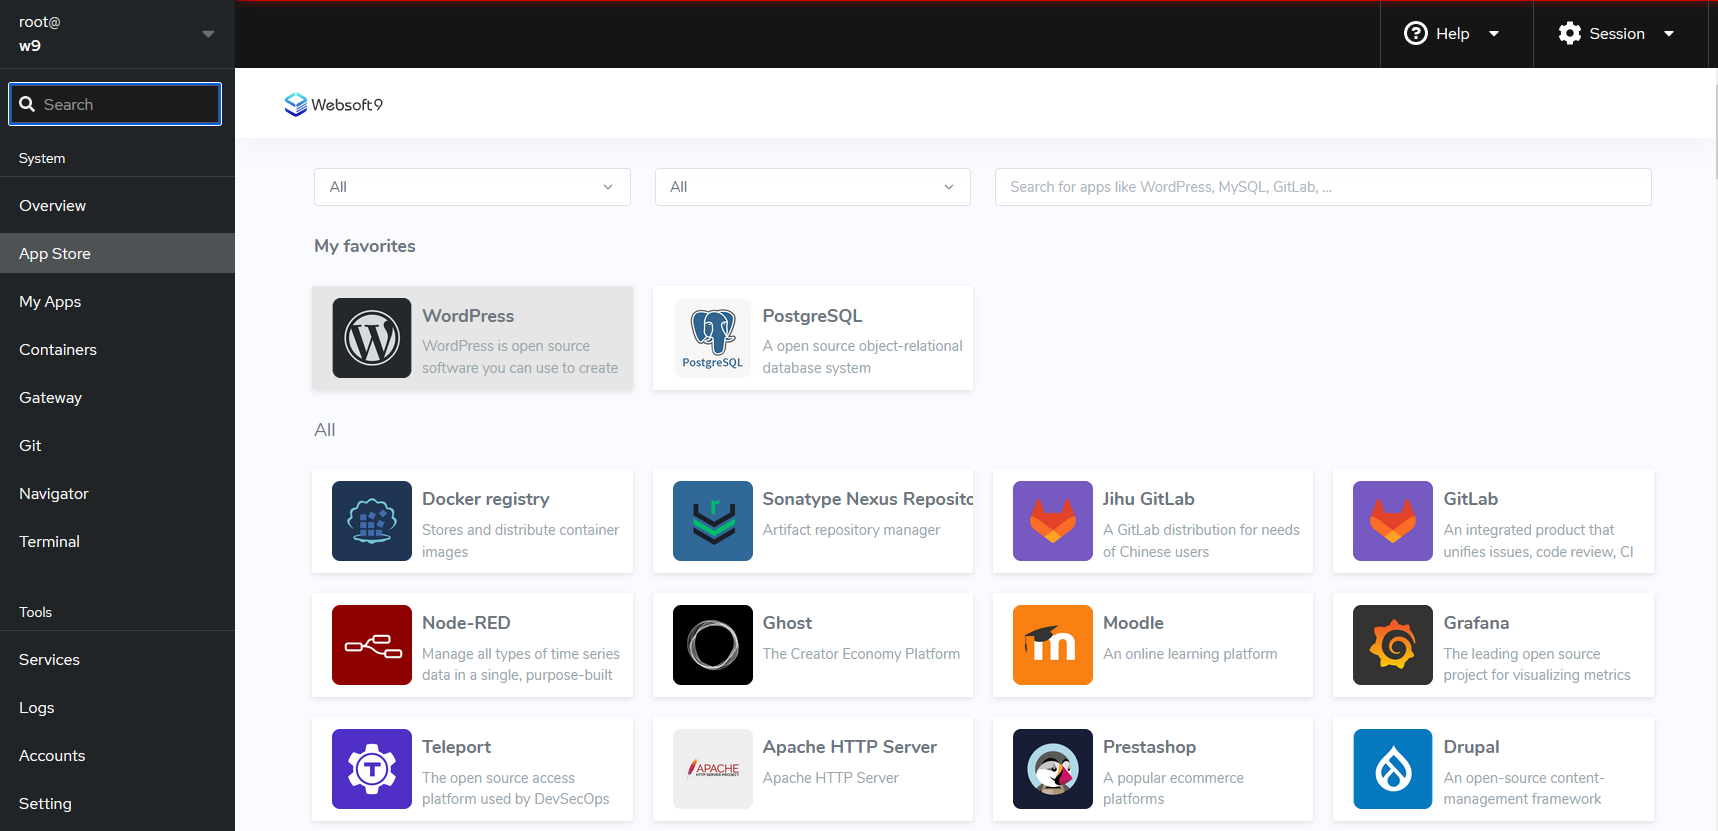
Deploy applications easily from Websoft9 App Store, featuring 200+ templates for data analysis, AI, websites, and more.
Steps to quickly deploy applications from Websoft9 App Store:
Step1: Set global domain
A domain is not required for Websoft9 to run. However, without a domain, application access is limited. We recommend configuring a domain for your application.
Recommend set a global domain for Websoft9, it uses wildcard DNS, enabling all applications to share one domain.
For more information, see the related chapter:
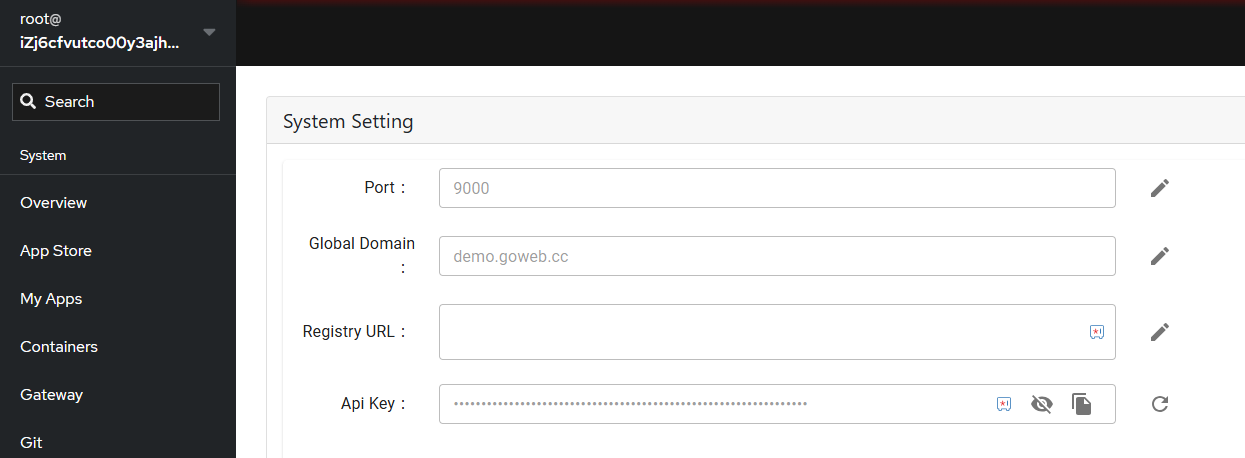
Step2: Set registry-mirrors for Docker
Websoft9 pulls images online from DockerHub when deploying templated applications. You will need to set up docker registry-mirrors if the server is having network issues accessing DockerHub.
The best simple method to set it by: Websoft9 Console > Settings > System Settings > Registry-mirrors
Step3: Launch your Application
On the Websoft9 Console, click on App Store, find the target application, and deploy it with one-click.
For more information, see the related chapter:
Step4: Access and manage applications
After deployment application from App Store, get the applicaiton's overview, status, and access credentials from My Apps.
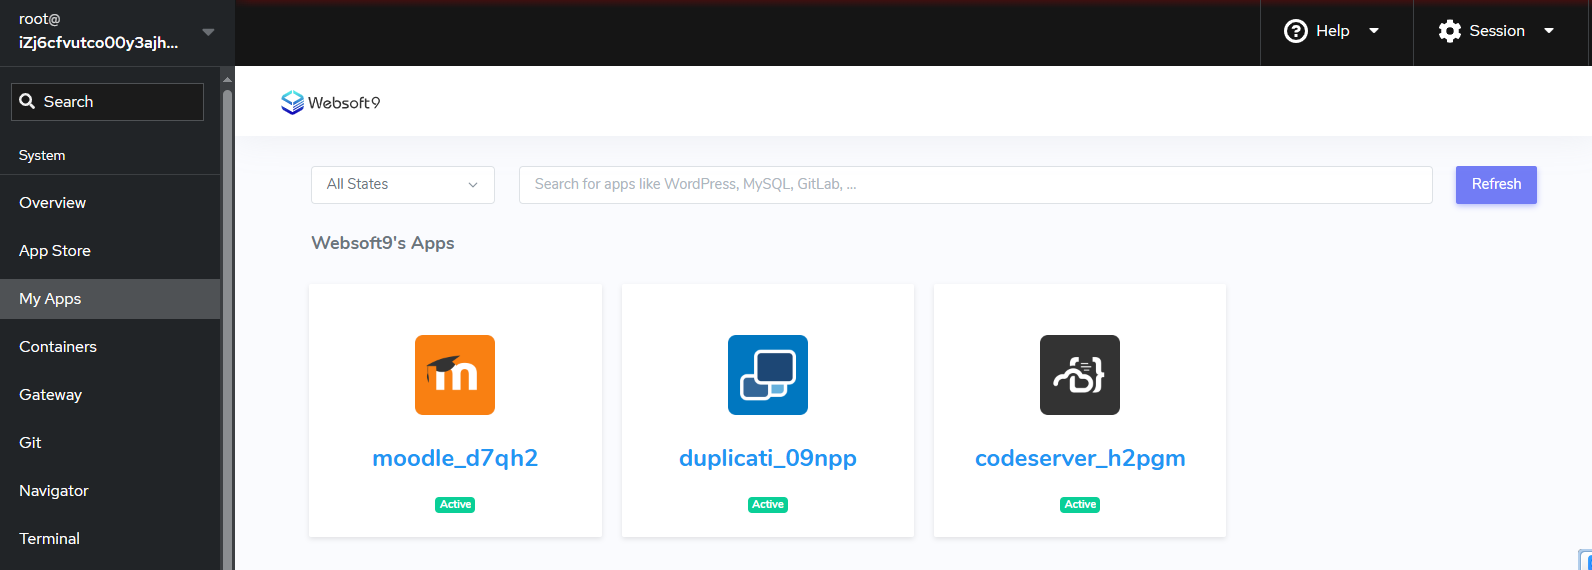
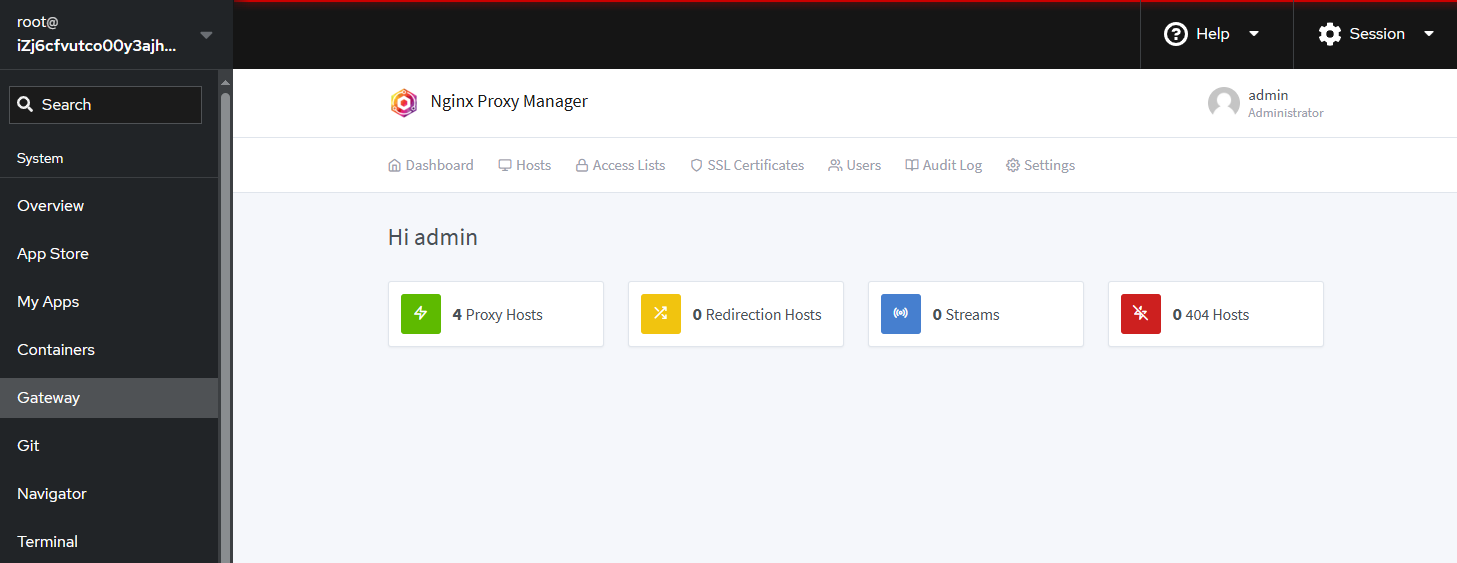
In addition, Websoft9 gateway, provides domain binding, HTTPS setting, access and control services for applications.
For more information, see the related chapter:
- Get the applicaiton's access credentials
- Managing application's status and lifecycle
- Config domain and security access for applications
- Set HTTPS for applications
Step5: Updating your deployment
Update your application code and configuration as needed - will automatically pull all changes to production again.
For more information, see the related chapter: