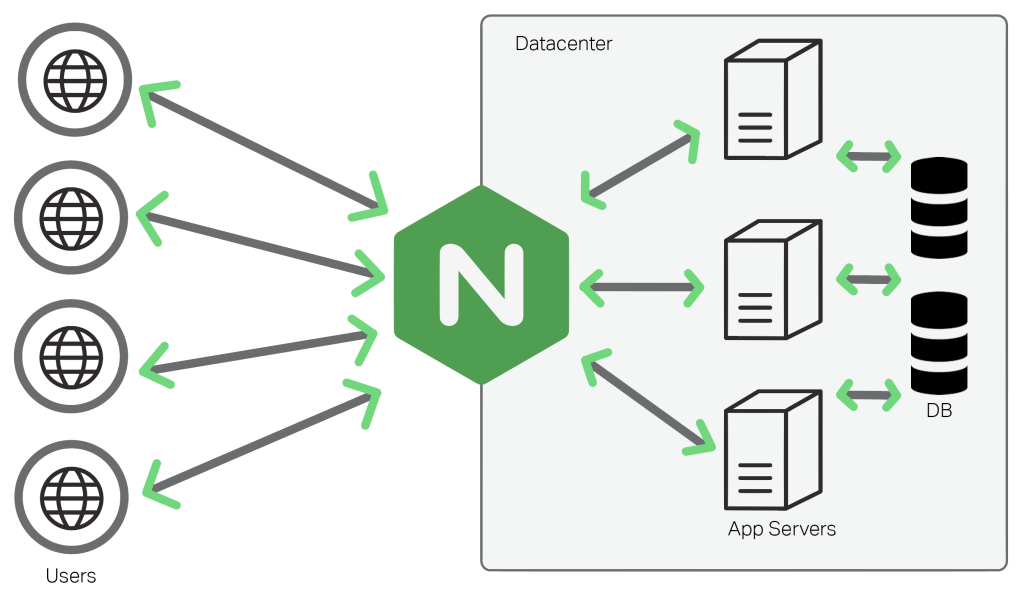
跳到主要内容

指南

NGINX Open Source (读音 "engine x") 是一款高性能的 Web 代理服务器,具有优异的静态资源和高并发处理能力。

Nginx 在网站工作过程中,起着非常重要的作用。下面列出一些常见的设置场景,供用户参考

场景

域名绑定

当服务器上只有一个网站时,不做域名绑定也可以访问网站。但从安全和维护考量,域名绑定不可省却。

以示例网站为例,域名绑定操作步骤如下:

  1. 确保域名解析已经生效
  2. 使用 SFTP 工具登录云服务器
  3. 修改 Nginx虚拟机主机配置文件,将其中的 server_name 项的值修改为你的域名
    server
    {
    listen 80;
    server_name www.example.com; # 此处修改为你的域名
    index index.html index.htm index.php;
    root /data/wwwroot/www.example.com;
    ...
    }
  4. 保存配置文件,重启 Nginx 服务

修改网站目录

原理同上,仅需修改 root 对应的值即可修改网站目录

server
{
listen 80;
server_name example.yourdomain.com;
index index.html index.htm index.php;
root /data/wwwroot/example;...
}

Nginx 配置可视化生成

Nginx 配置文件可以通过此工具可视化生成。

设置伪静态

设置 Nginx 伪静态有三个步骤:

  1. 确保已经安装Rewrite模块。

  2. 在服务器目录 /etc/nginx/conf.d/rewrite 下新建你网站的伪静态规则文件(例如:wordpress.conf)

  3. 在网站的虚拟主机配置段 server{ } 中将伪静态规则文件 include 进来

    server
    {
    listen 80;
    server_name mysite2.yourdomain.com; # 此处修改为你的域名
    index index.html index.htm index.php;
    root /data/wwwroot/mysite2;
    ...

    ## Includes one of your Rewrite rules if you need, examples
    include conf.d/rewrite/wordpress.conf; # 引入你的伪静态规则
    }

伪静态的常见场景包括:重定向、隐藏页面后缀名等。

.auth_basic 认证

Nginx 转发应用时,可以启动 auth_basic 功能为应用设置额外的账号和密码:

  1. 编辑 Nginx 验证访问控制文件: /etc/nginx/.htpasswd/htpasswd.conf 中的密码
  2. 重启 Nginx 服务后生效
    sudo systemctl restart nginx

也可以直接通过命令行修改:

htpasswd -b /etc/nginx/.htpasswd admin new_password

设置默认首页顺序

设置 IP 白名单/黑名单

设置 HTTP 跳转到 HTTPS?

在网站对应的 server{} 配置段中增加规则即可:

 if ($scheme != "https") 
{
return 301 https://$host$request_uri;
}

设置最大打开文件数

这个指令是指当一个Nginx进程打开的最多文件描述符数目,理论值应该是最多打开文件数(ulimit -n)与nginx进程数相除,但是nginx分配请求并不是那么均匀,所以最好与ulimit -n的值保持一致。

注:文件资源限制的配置可以在/etc/security/limits.conf设置,针对root/user等各个用户或者*代表所有用户来设置。

*   soft nofile   65535
* hard nofile 65535

提升性能

以下内容参考:《nginx性能优化 汇总篇》《使用 Nginx 提升网站访问速度》

状态监控

定义一个 location ~ ^/NginxStatus/,通过 http://localhost/NginxStatus/ 就可以监控到 Nginx,运行结果:

Active connections: 70 
server accepts handled requests
14553819 14553819 19239266
Reading: 0 Writing: 3 Waiting: 67

静态文件处理

通过正则表达式,我们可让 Nginx 识别出各种静态文件,例如 images 路径下的所有请求可以写为:

location ~ ^/images/ {
root /opt/webapp/images;
}

而下面的配置则定义了几种文件类型的请求处理方式。

location ~ \.(htm|html|gif|jpg|jpeg|png|bmp|ico|css|js|txt)$ {
root /opt/webapp;
expires 24h;
}

对于例如图片、静态 HTML 文件、js 脚本文件和 css 样式文件等,我们希望 Nginx 直接处理并返回给浏览器,这样可以大大的加快网页浏览时的速度。因此对于这类文件我们需要通过 root 指令来指定文件的存放路径,同时因为这类文件并不常修改,通过 expires 指令来控制其在浏览器的缓存,以减少不必要的请求。 expires 指令可以控制 HTTP 应答中的“ Expires ”和“ Cache-Control ”的头标(起到控制页面缓存的作用)。您可以使用例如以下的格式来书写 Expires:

expires 1 January, 1970, 00:00:01 GMT;
expires 60s;
expires 30m;
expires 24h;
expires 1d;
expires max;
expires off;

连接程序运行时

Nginx 可以作为常见的开发语言的 Web 服务器,集成数据库、应用容器,最后形成一个完整的应用运行环境,例如:Nginx+PHP,Nginx+Tomcat+Java等

下面我们以常见的开发语言为例,分别介绍它们是如何与 Nginx 一起工作的。

PHP

Nginx 主要与 PHP-FPM(PHP FastCGI Process Manager) 完成 PHP 应用程序的访问。

下面是 Nginx+PHP-FPM 共同工作的系统架构图

Java

Nginx 无法直接运行Java程序,而是与Tomcat一起组合去部署Java程序。

这种组合下,Nginx处理静态资源,JSP等动态程序需转发给Tomcat处理,然后返回给用户。Nginx 使用 proxy_pass 模块来连接 Tomcat。

proxy_pass 模块是基于 HTTP 协议的代理,因此它要求 Tomcat 必须提供 HTTP 服务,也就是说必须启用 Tomcat 的 HTTP Connector。常见的配置如下:

server
{
listen 80;
server_name www.xxx.com;

location ~* "\.(jpg|png|jepg|js|css|xml|bmp|swf|gif|html)$"
{
root /data/wwwroot/aminglinux/;
access_log off;
expire 7d;
}

location /
{
proxy_pass http://127.0.0.1:8080/;
proxy_set_header Host $host;
proxy_set_header X-Real-IP $remote_addr;
proxy_set_header X-Forwarded-For $proxy_add_x_forwarded_for;
}
}
Python

Nginx 也可以用于Python环境,通过扩展模块mod_proxy_uwsgi,连接Python的uWSGI服务器或Gunicorn服务器,便可以解析Python程序。

这种组合的的基本配置方法如下:

  1. 配置为uwsgi.ini
    [uwsgi]
    chdir = /home/vagrant/myweb/
    virtualenv = /home/vagrant/env/
    socket = 127.0.0.1:8080
    env = DJANGO_SETTINGS_MODULE=myweb.settings
    module =myweb.wsgi:application
    master = true
    processes = 4
    vacuum = True
    max-requests = 5000
    daemonize = /var/log/uwsgi.log
    pidfile = /var/log/uwsgi.pid
  2. apache的配置文件加载mod_proxy_uwsgi.so
  3. apache的配置文件反向代理到uwsgi
    ProxyPass / uwsgi://127.0.0.1:8080
Node

Nginx 也可以用于Node.js环境,Nginx 与 Node.js 最常见的连接方式是http_proxy,即利用 Apache 自带的 mod_proxy 模块使用代理技术来连接 Node.js。

下面是典型的配置文件范例:

server {
listen 80 default_server;
server_name _;


location / {
proxy_pass http://127.0.0.1:2368;
proxy_set_header Host $host;
proxy_set_header X-Forwarded-For $proxy_add_x_forwarded_for;
}

}
Ruby

Nginx 广泛被用于 Ruby 应用程序的 HTTP 前端,而 Ruby 应用程序框架中(Rails)集成的应用服务器会将应用以端口的形式开放访问。 所以,Nginx 只需采用转发即可连接 Ruby 程序。

故障排除

网站显示重定向错误?

打开Nginx虚拟主机配置文件,检查网站对应的 server{} 配置段内容,分析其中的重定向规则,找到其中的死循环。

重启 Nginx 服务显示 No spaces...

出现此信息的时候,重启服务是成功的。

413 Request Entity Too Large

这是由于上传文件大小超过了 Nginx 默认设置,因此需要修改 Nginx 这个限制:

  1. 使用 WinSCP 远程连接服务器
  2. 编辑 Nginx 虚拟机主机配置文件
  3. 插入一行 client_max_body_size 0; 解除上传文件限制的配置项
    server {
    listen 80;
    server_name _;
    client_max_body_size 0; #解除上传文件限制
    ...
  4. 保存并重启 Nginx 服务

参数

以下参数供用户在各种 Nginx 设置场景下使用:

路径

不同的 Linux 发行版,对应的安装路径有一定的差异:

CentOS/RedHat/Fedora

Nginx 配置文件目录: /etc/nginx/conf.d
Nginx 虚拟主机配置文件:/etc/nginx/conf.d/default.conf
Nginx 主配置文件: /etc/nginx/nginx.conf
Nginx 日志文件: /var/log/nginx
Nginx 伪静态规则目录: /etc/nginx/conf.d/rewrite

Ubuntu/Debian

Nginx 虚拟主机配置文件:/etc/nginx/sites-available/default
Nginx 主配置文件:/etc/nginx/nginx.conf
Nginx 日志文件:/var/log/nginx/

.default 结尾的文件是配置范例文件

命令行

Nginx 安装完成后,运行 nginx -h 查看可选参数

$ nginx -h
nginx -s reopen #重启Nginx
nginx -s reload #重新加载Nginx配置文件,然后以优雅的方式重启Nginx
nginx -s stop #强制停止Nginx服务
killall nginx #杀死所有nginx进程  
nginx -s quit #优雅地停止Nginx服务(即处理完所有请求后再停止服务)
nginx -t #检测配置文件是否有语法错误,然后退出
nginx -v #显示版本信息并退出
nginx -V #显示版本和配置选项信息,然后退出
nginx -t #检测配置文件是否有语法错误,然后退出
nginx -T #检测配置文件是否有语法错误,转储并退出
nginx -q #在检测配置文件期间屏蔽非错误信息
nginx -?,-h #打开帮助信息  
nginx -p prefix #设置前缀路径(默认是:/usr/share/nginx/)
nginx -c filename #设置配置文件(默认是:/etc/nginx/nginx.conf)
nginx -g directives #设置配置文件外的全局指令

服务启停

在不同的操作系统下,Nginx对应的服务启停如下:

sudo systemctl start nginx
sudo systemctl stop nginx
sudo systemctl restart nginx
sudo systemctl status nginx

server 模板

server 模板即 Nginx 虚拟主机配置文件的模板。

HTTP server 模板

server
{
listen 80;
server_name yourdomain.com-error.log;
index index.html index.jsp index.php;
root /data/wwwroot/yoursite;
error_log /var/log/nginx/yourdomain.com-error.log-error.log crit;
access_log /var/log/nginx/yourdomain.com-error.log-access.log;
include conf.d/extra/*.conf;

## Includes one of your Rewrite rules if you need, examples
# include conf.d/rewrite/wordpress.conf;
# include conf.d/rewrite/joomla.conf;
}
include extra/*.conf;

#------------- SSL Start --------------

#------------- SSL End ---------------
}

HTTP uwsgi 模板

server {
listen 80;
server_name yoursite1.yourdomain.com;

location / {
include uwsgi_params;
uwsgi_read_timeout 3600;
uwsgi_pass 127.0.0.1:8001;
}

location ~/static/ {
expires 30d;
autoindex on;
add_header Cache-Control private;
root /data/wwwroot/mydjango/mysite1;
}

error_log /var/log/nginx/yourdomain.com-error.log error;
access_log /var/log/nginx/yourdomain.com-access.log;

include extra/*.conf;

#------------- SSL Start --------------

#------------- SSL End ---------------
}

HTTP Alias 模板

Alias 模板插入到 default.conf 中已存在的 server{} 段中,并修改其中的 location,alias

location /mysite2
{
alias /data/wwwroot/mysite2;
index index.php index.html;
location ~ ^/mysite2/.+\.php$ {
alias /data/wwwroot/mysite2;
fastcgi_pass unix:/dev/shm/php-fpm-default.sock;
fastcgi_index index.php;
fastcgi_param SCRIPT_FILENAME /data/wwwroot/$fastcgi_script_name;
include fastcgi_params; }
include conf.d/extra/*.conf;
}

注意:Alias 模板只能插入到 server{} 配置段中

HTTP Proxy 模板

server {
listen 80;
server_name yoursite1.yourdomain.com;
location / {
proxy_pass http://127.0.0.1:8001;
proxy_redirect off;
proxy_set_header Host $host;
proxy_set_header X-Real-IP $remote_addr;
proxy_set_header X-Forwarded-For $proxy_add_x_forwarded_for;
proxy_set_header X-Forwarded-Proto $scheme;
proxy_set_header Upgrade $http_upgrade;
proxy_set_header Connection upgrade;
proxy_next_upstream error timeout invalid_header http_500 http_502 http_503 http_504;
proxy_max_temp_file_size 0;
proxy_connect_timeout 90;
proxy_send_timeout 90;
proxy_read_timeout 90;
proxy_buffer_size 4k;
proxy_buffers 4 32k;
proxy_busy_buffers_size 64k;
proxy_temp_file_write_size 64k;
}
error_log /var/log/nginx/yourdomain.com-error.log error;
access_log /var/log/nginx/yourdomain.com-access.log;

include extra/*.conf;

#------------- SSL Start --------------

#------------- SSL End ---------------
}

有多少个网站,就需要在 default.conf 中增加同等数量的 server 配置项。

Proxy_pass反向代理,用的是 nginx 的 Proxy 模块。下面是常见的 Proxy 方式:

第一种:
location /proxy/ {
proxy_pass http://127.0.0.1/;
}
代理到URL:http://127.0.0.1/test.html


第二种:
location /proxy/ {
proxy_pass http://127.0.0.1; #少/
}
代理到URL:http://127.0.0.1/proxy/test.html


第三种:
location /proxy/ {
proxy_pass http://127.0.0.1/aaa/;
}
代理到URL:http://127.0.0.1/aaa/test.html


第四种(相对于第三种,最后少一个 / )
location /proxy/ {
proxy_pass http://127.0.0.1/aaa;
}
代理到URL:http://127.0.0.1/aaatest.html

HTTPS server 模板

HTTPS 配置项 到对应的 HTTP server{ } 段落中

#-----HTTPS template start------------
listen 443 ssl;
ssl_certificate /data/cert/xxx.crt;
ssl_certificate_key /data/cert/xxx.key;
ssl_session_timeout 5m;
ssl_protocols TLSv1 TLSv1.1 TLSv1.2;
ssl_ciphers ECDHE-RSA-AES128-GCM-SHA256:HIGH:!aNULL:!MD5:!RC4:!DHE;
ssl_prefer_server_ciphers on;
#-----HTTPS template end------------