Odoo
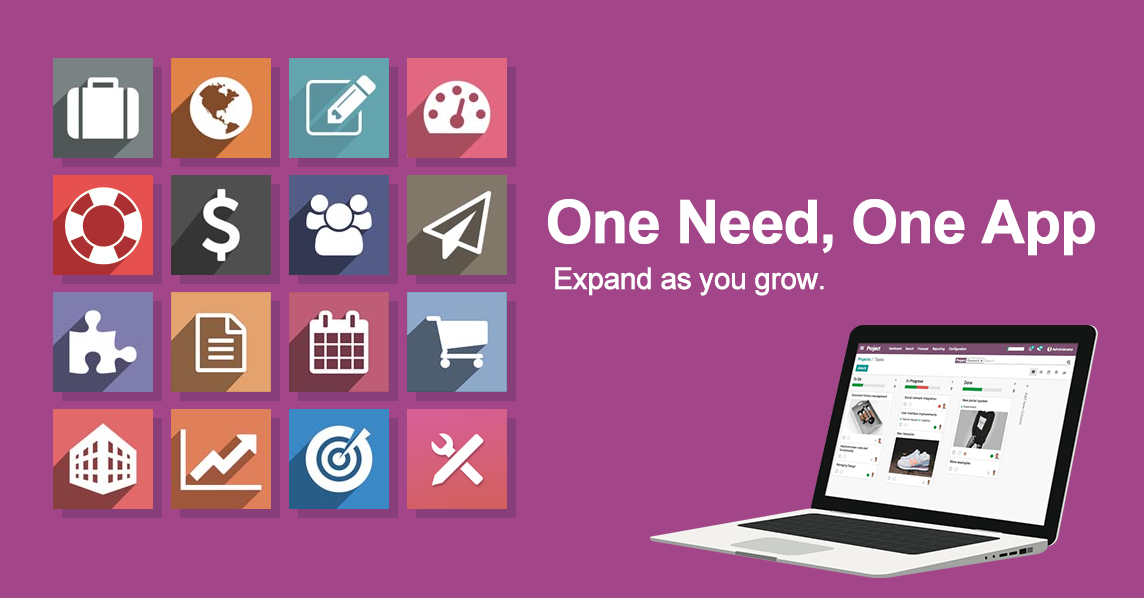
Odoo 是一个 面向全球用户的开源ERP/CRM软件,它被用于 ERP/财税/后勤 CRM/分销/订单 供应链/采购/生产/物流 战略/合规/人事 客服/售后/支持 产品生命周期 市场营销 企业建站 项目/任务/流程 运营与供应链数字化 内容营销技术 等场景。Odoo是面向全球用户的开源ERP/CRM软件,它有强大而灵活的系统架构,产品迭代速度非常快,用户可模块化修改、升级、新增功能。
准备
在参阅本文档使用 Odoo 时,需要确保如下几点:
-
登录 Websoft9 控制台,然后找到(或安装)Odoo:
- 我的应用 菜单找到应用
- 应用商店 菜单部署应用
-
应用是基于 Websoft9 安装的
-
应用的用途符合 LGPL-3.0 开源许可协议
-
为应用准备配置访问方式:配置域名 或 服务器安全组开启网外端口
入门指南
初始化向导
-
Websoft9 控制台安装 Odoo 后,通过 "我的应用" 查看应用详情,在 "访问" 标签页中获取访问 URL。
-
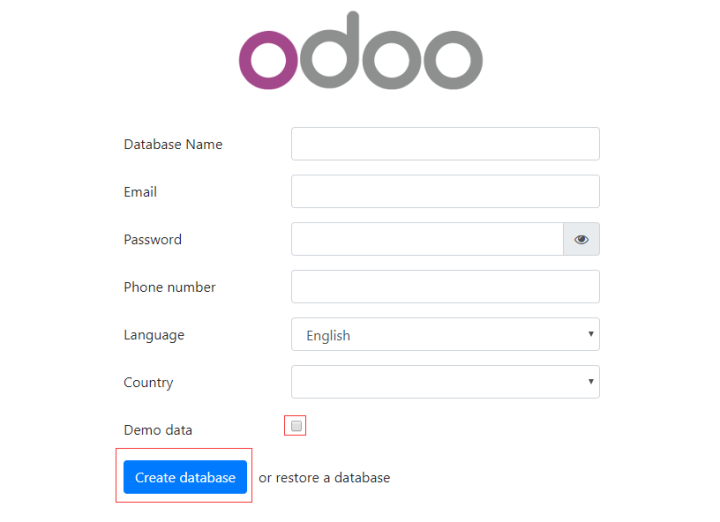
使用本地浏览器访问 URL,开始初始化的第 1 步:创建数据库
-
填写好所有参数(Email 和 Password 是登录账号),点击 create database,等待初始化完成
-
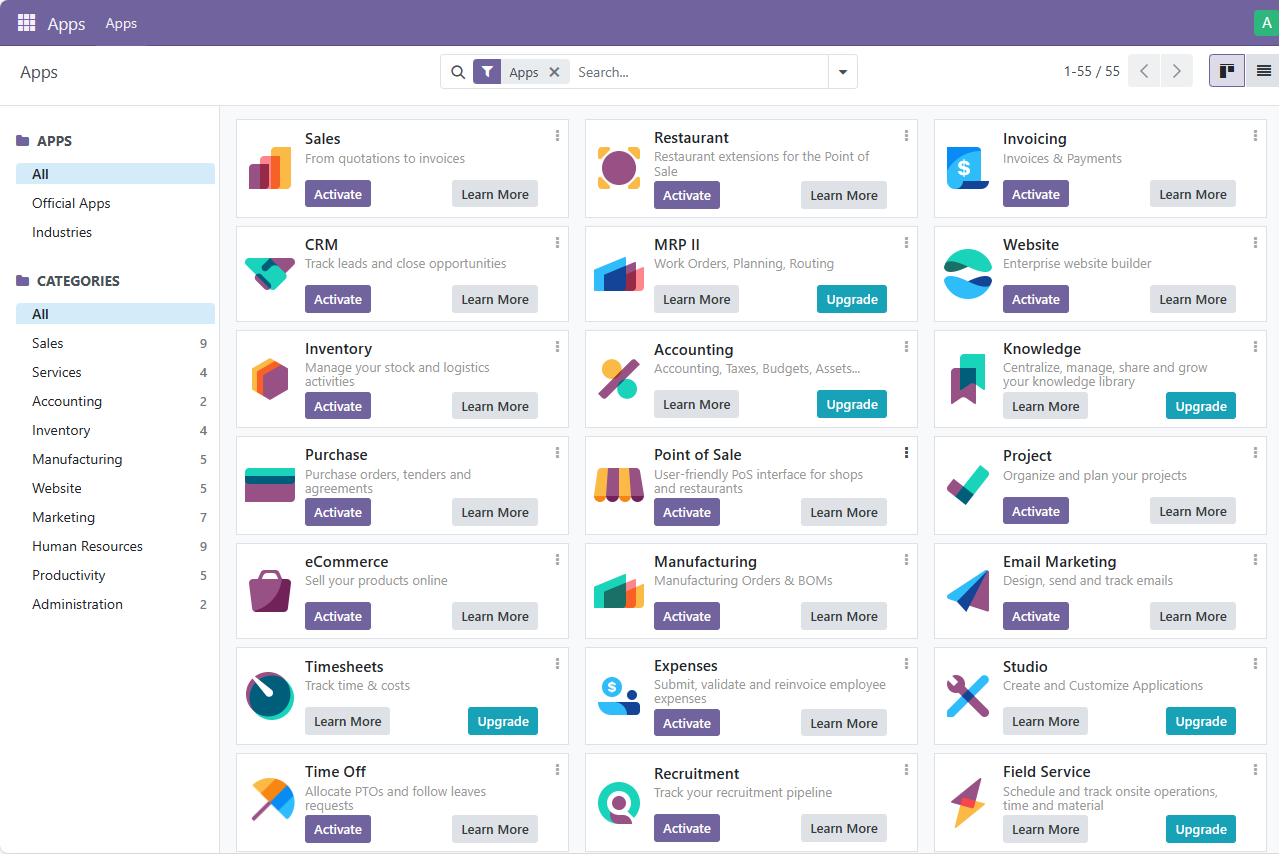
登录到后台,默认进入 Apps 页面
-
点击左上角的设置图标,打开 Settings 项,可设置语言、企业信息等
开发者模式
开发者�模式开启方式:Settings > Developer Tools > Active the developer mode
导入第三方应用
- 登录 Odoo 控制台,激活开发者模式
- 上传插件到 Odoo 容器的
/mnt/extra-addons目录(自行决定是否挂载到宿主机) - 重启 Odoo 容器后,第三方应用便显示在应用列表中
导出 PDF
安装 Invoice、Purchase 等模块可以测试 print to PDF 功能
企业版
如果想使用企业版,请联系 Websoft9 客户成功团队 获取企业版镜像和试用授权码
- 企业版安装第一个应用后,就需要输入试用授权码
- 1 个月免费试用期结束之后,数据库会被被清空
Websoft9 提供 Odoo 企业版的采购、交付和全面托管服务:
- 高效率的商务流程
- 公有云和私有云的全面托管服务
- 企业内部管理的 Odoo 低代码开发
配置选项
-
Odoo Apps 市场(✅)
-
自定义 Logo(✅):Settings > My Company
-
多租户(多企业组织)(✅):在 Odoo 登录界面的 "Manage Databases" 入口进入数据库管理,其中增加一个数据库,即增加一个企业,多个数据库可以共享 Odoo 运行时
-
多语言(✅):右上角设置菜单的 Preferences 设置语言
-
Odoo 配置文件(已挂载): /etc/odoo/odoo_config/odoo.conf
-
CLI:
odoo -h -
社区版在线升级到企业版(✅)
-
SMTP(✅):Settings > General Settings > Discuss > Use Custom Email Servers
管理维护
- 数据库管理:Odoo 自带数据库管理器,在 Odoo 登录页面的 Manage Database 链接中进入。它支持创建、复制、备份、恢复和删除等操作。
故障
删除 Demo 数据?
官方没有提供便捷的 Demo 数据删除工具
413 Request Entity Too Large?
需通过 Websoft9 网关中配置 client_max_body_size 0,解除文件限制。
使用 ** 我的应用 > 数据库 ** 中 postgres 用户无法连接Postgresql数据库?
Odoo 不能直接使用 postgres 用户,你可以 我的应用 > 概览中的 应用Id 即是具有管理员权限的数据库用户名