CloudBeaver
CloudBeaver is Multi-database Supported Visualization Management Tool, used for Database Management Tools . CloudBeaver is a web-based database GUI tool which provides rich web interface. You can use it to manage PostgreSQL, MySQL, MariaDB, SQL Server, Oracle, DB2, Firebird, H2, Trino
Prepare
When referring to this document to use CloudBeaver, please read and ensure the following points:
-
Login to Websoft9 Console and find or install CloudBeaver:
- Go to My Apps listing applications
- Go to App Store installing target application
-
This application is installed by Websoft9 console.
-
The purpose of this application complies with the apache2 open source license agreement.
-
Configure the domain name or server security group opens external network ports for application access.
Getting started
Prepare the database
CloudBeaver is a tool for managing databases. If you don't have a database yet, you can install one through the Websoft9.
- The Websoft9 provides one-click installation templates for various databases, including MySQL, PostgreSQL, SQLite, SQLServer, and Oracle.
- Databases installed through Websoft9 can be connected to CloudBeaver using the container ID as the Host without the need to open an external network port.
Verify CloudBeaver Installation
After completing the installation of CloudBeaver in the Websoft9 Console, get the applicaiton's Overview and Access information from the My Apps section.
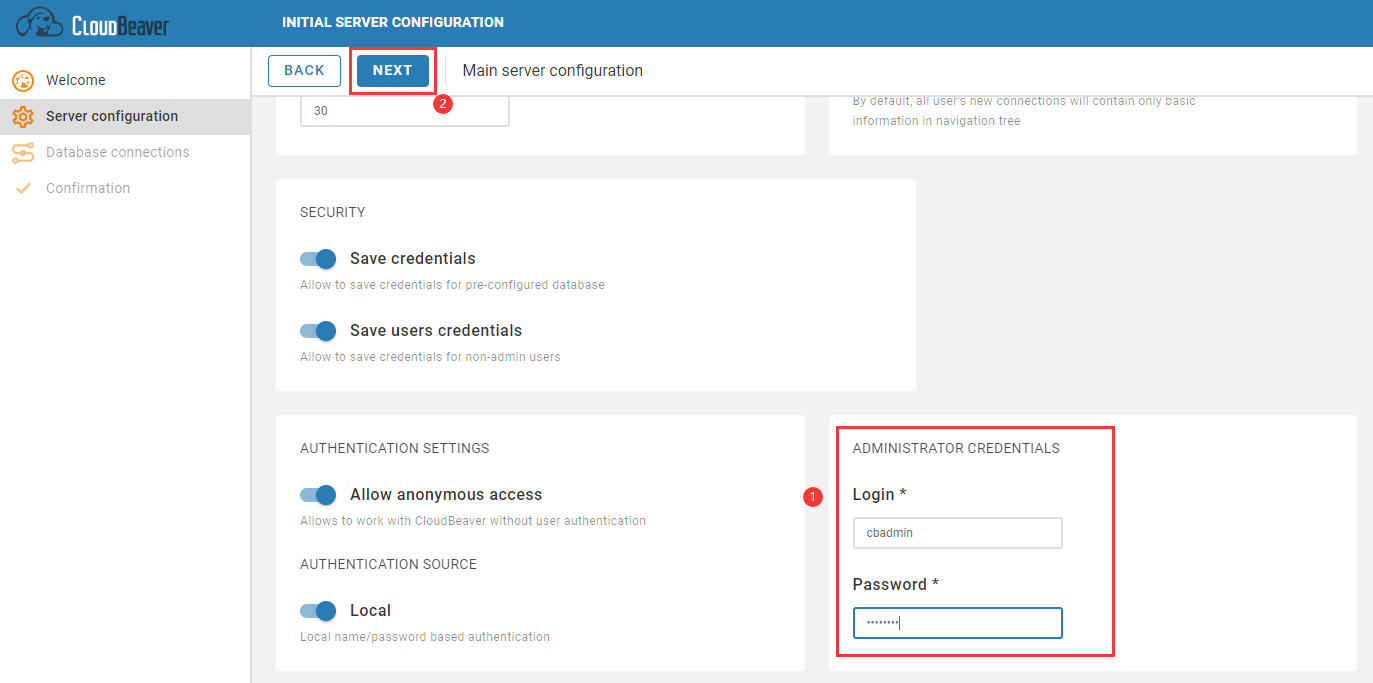
-
Open your local computer's browser and visit the URL to complete the installation wizard step by step.
-
Navigate to Administrator > Connection Management, and delete the SQLite-Chinook (Sample) connection to prevent potential SQL injection attacks.
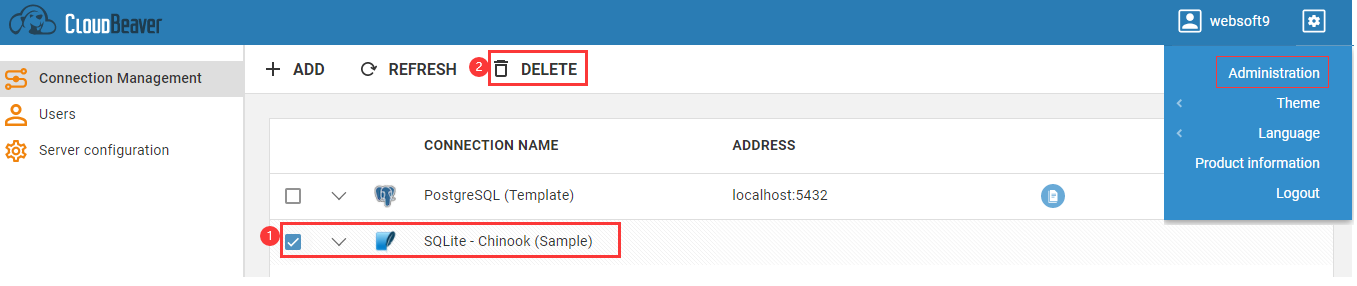
-
Go back to the homepage, the default SQLite demo connection should no longer exist.
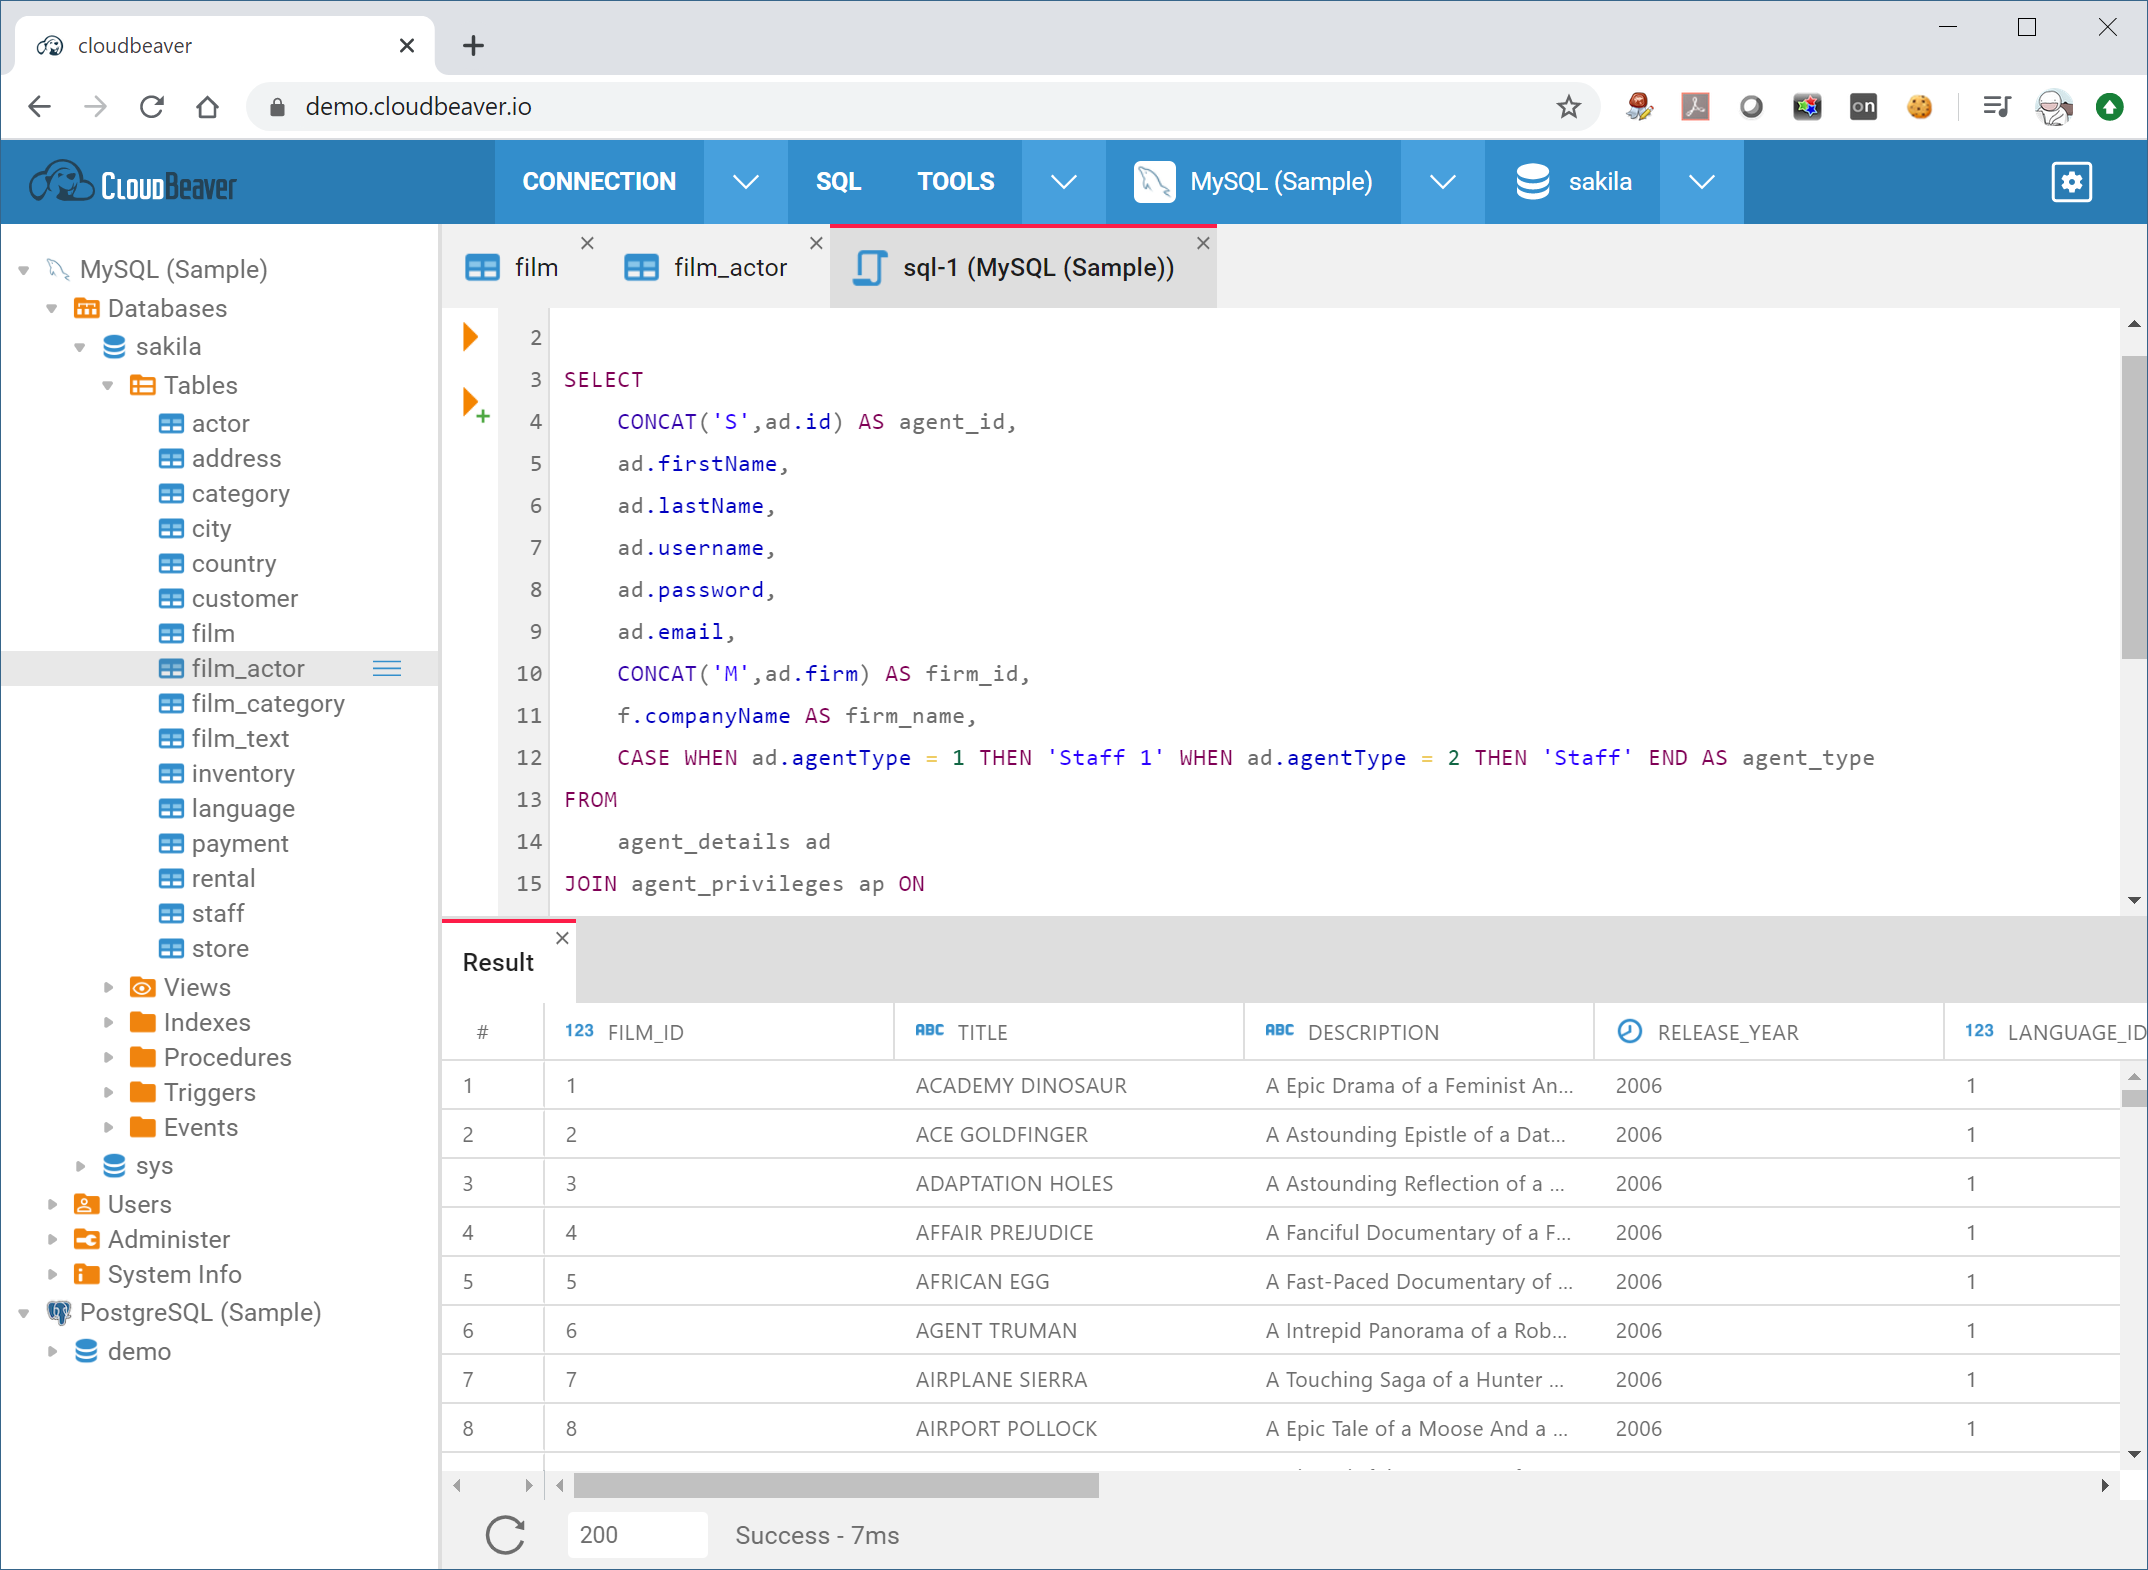
Managing Databases
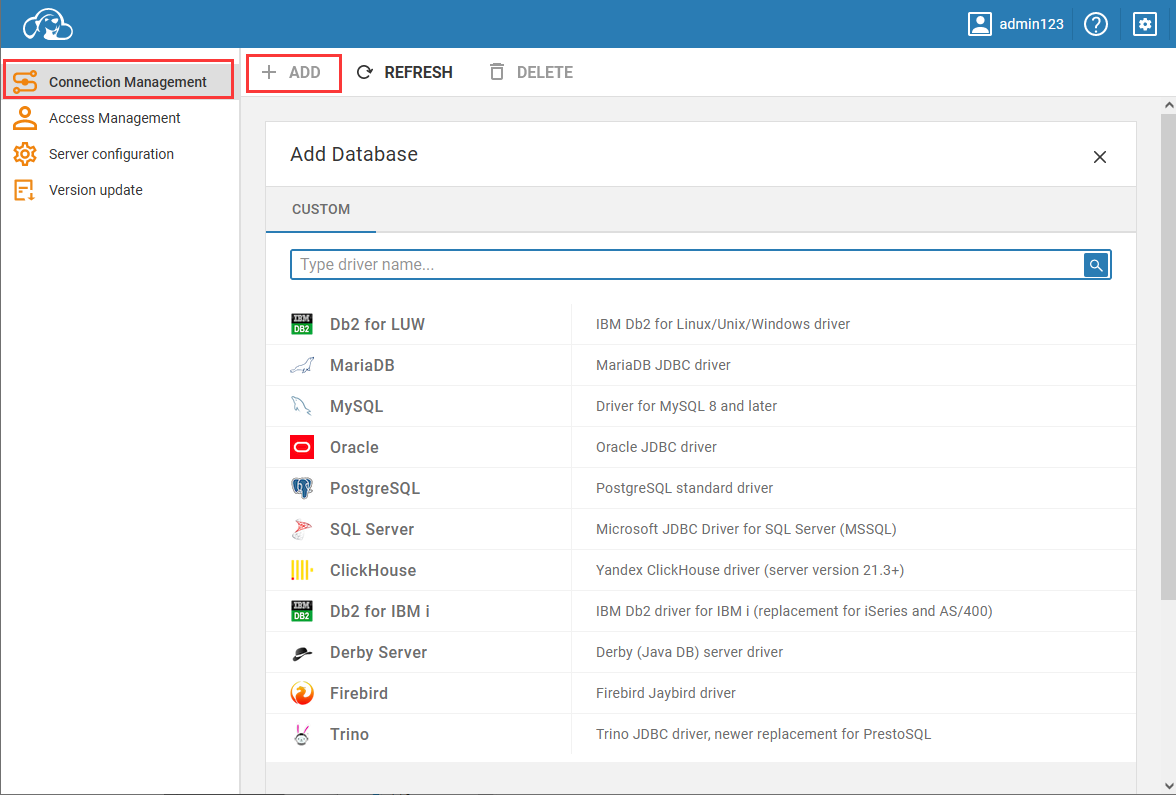
-
Navigate to Settings > Administration > Connection Management in the CloudBeaver console, and add the required database connection.
-
Enter the connection information, including the host address, port, account password, and then click Save.
-
Test the connection availability.
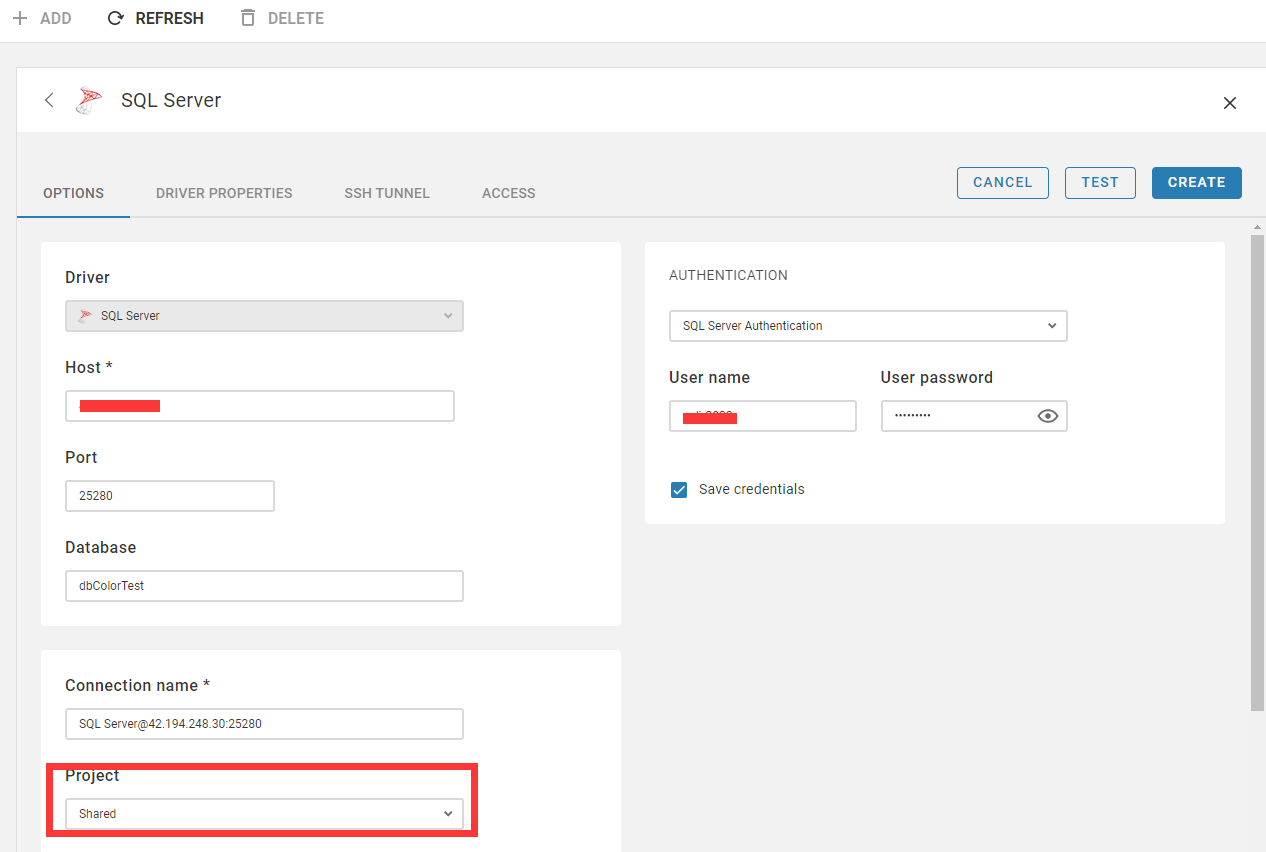
Shared Data Connection
A Shared Data Connection allows an administrator to grant access to a team of users by modifying the connection configuration.
-
Configure the connection to be shared
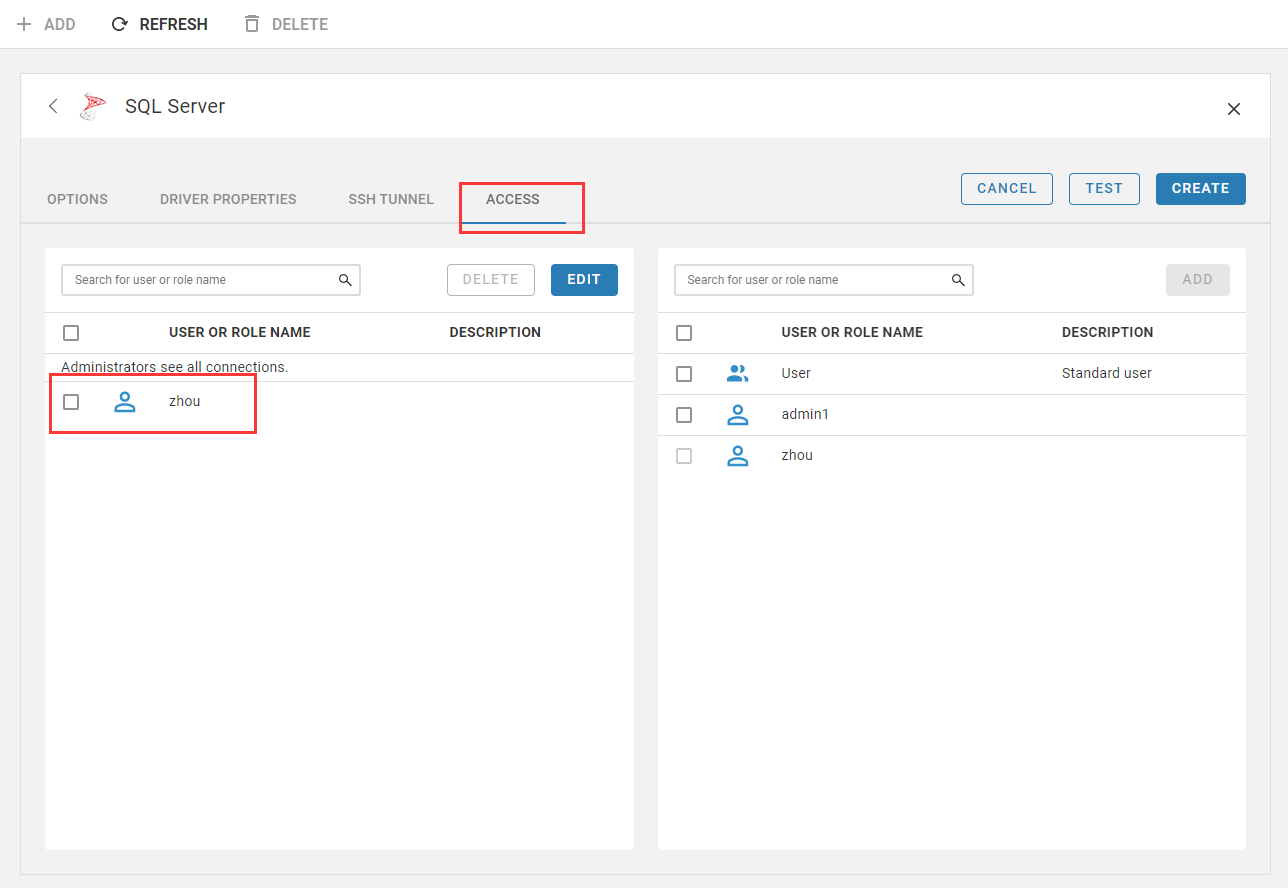
-
Authorize the user
Configuration options
- Multilingual(✅): Chinese not supported
- Database connection driver: JDBC
- Configuration file: /opt/cloudbeaver/workspace/GlobalConfiguration/.dbeaver/data-sources.json
- Supported databases
- Export data(✅): only table export is supported
Administer
Troubleshooting
Failed to connect to Oracle database?
If the account is correct, you still cannot connect to the Oracle database. In this case, check if the CloudBeaver database driver matches the Oracle version.