Portainer
Portainer is Web-based tool for Docker and Kubernetes(built-in to Websoft9), used for Cloud Infrastructure Monitoring . A powerful open-source management toolset that allows you to easily build, manage and maintain Docker environments.
Prepare
When referring to this document to use Portainer, please read and ensure the following points:
-
Login to Websoft9 Console and find or install Portainer:
- Go to My Apps listing applications
- Go to App Store installing target application
-
This application is installed by Websoft9 console.
-
The purpose of this application complies with the Zlib open source license agreement.
-
Configure the domain name or server security group opens external network ports for application access.
Getting Started
Initial Setup
-
After completing the installation of Portainer via the Websoft9 Console, retrieve the application's Overview and Access information from My Apps.
-
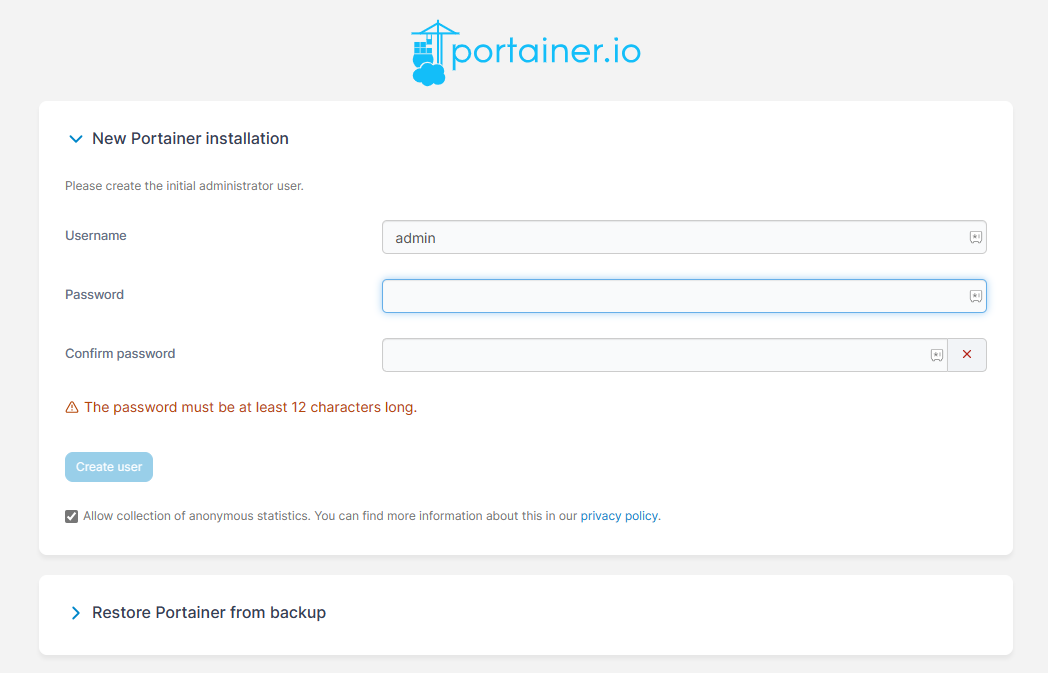
Follow the guide to complete the administrator account setup. After entering the backend, the system prompts you to set up Environments.
-
To manage local containers (recommended): Delete the current installation of Portainer and use the Websoft9 console Containers management function directly.
-
To manage local containers: Modify the Portainer orchestration file, delete the comment on the line
/var/run/docker.sock, and it will take effect after you rebuild the application. -
To manage non-local containers: Follow the Environments instructions to set up the connection method.
-
-
After completing the Environments setup and connection, you can start managing containers.
Running Commands in Containers
Portainer provides the ability to run container commands visually, which is equivalent to docker exec -it.
-
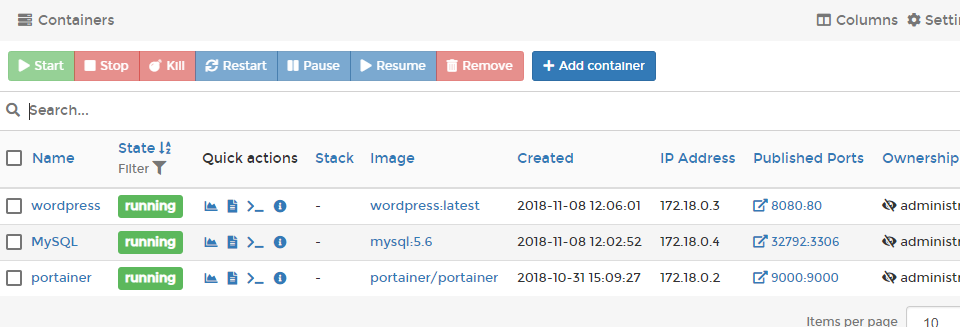
In the list of containers, click the >_ icon under the Quick actions section of MySQL, as shown below:
-
On the newly opened page, click the Connect button to prepare the connection.
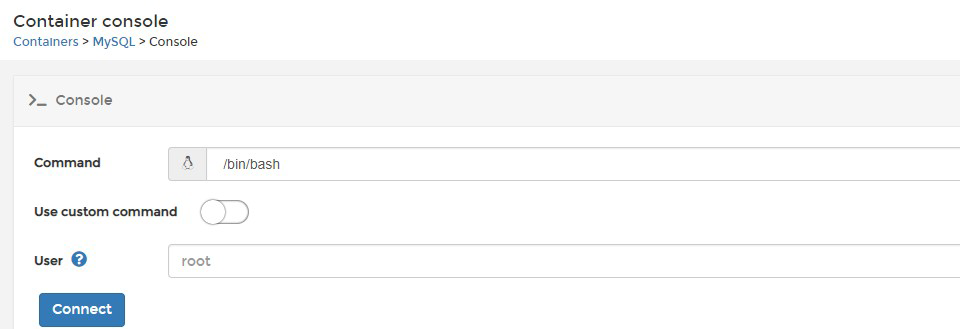
- Command: Select available commands to execute (choose one of three, there is always one available).
- User: Default is root (recommended).
-
Click Connect, and if the connection is successful, run the command.
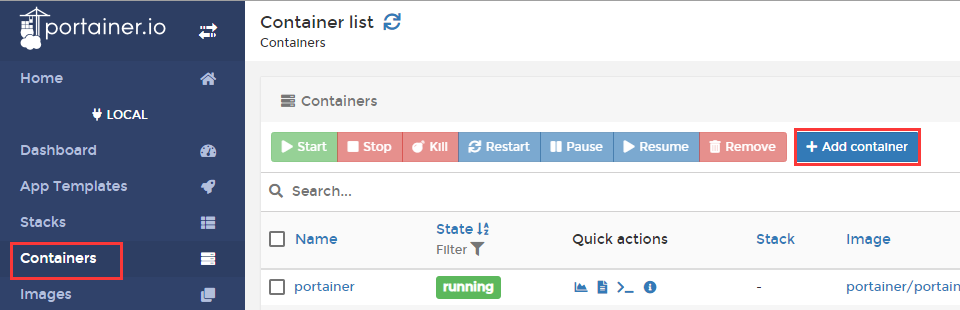
Install the App in Portainer
If the Websoft9 App Store does not meet your installation requirements, you can install Docker applications on the container management platform in a self-defined way:
- Custom installation of Docker-Compose apps: Container > Stacks > Add Stack.
- Custom installation of Docker containers: Containers > Containers > Add Container.
Configuration Options
- Enterprise Edition Free Range: 5 nodes.
- Portainer CLI
- Portainer API
- Managing K8s (✅)
Administration
Troubleshooting
Portainer Cannot Enter the Initialization Page?
Reason: For security reasons, Portainer will lock the initialization page if it is not accessed within a few minutes after installation.
Solution: Restart the Portainer application.
Can I Delete Existing Environments?
If you delete the Environments after you have running containers, the containers will become unmanageable.
Websoft9 Application VS Portainer Stack?
Portainer creates Websoft9 app containers through its Stack API for management.
However, there is more to Websoft9 applications, meaning they cannot be completely equated.