Ghost
Ghost is The Creator Economy Platform, used for Website Builder Blog Content Marketing Home Server . Ghost is the world's most popular open source headless Node.js CMS for professional publishing.
Prepare
When referring to this document to use Ghost, please read and ensure the following points:
-
Login to Websoft9 Console and find or install Ghost:
- Go to My Apps listing applications
- Go to App Store installing target application
-
This application is installed by Websoft9 console.
-
The purpose of this application complies with the MIT open source license agreement.
-
Configure the domain name or server security group opens external network ports for application access.
Getting started
Initial setup
-
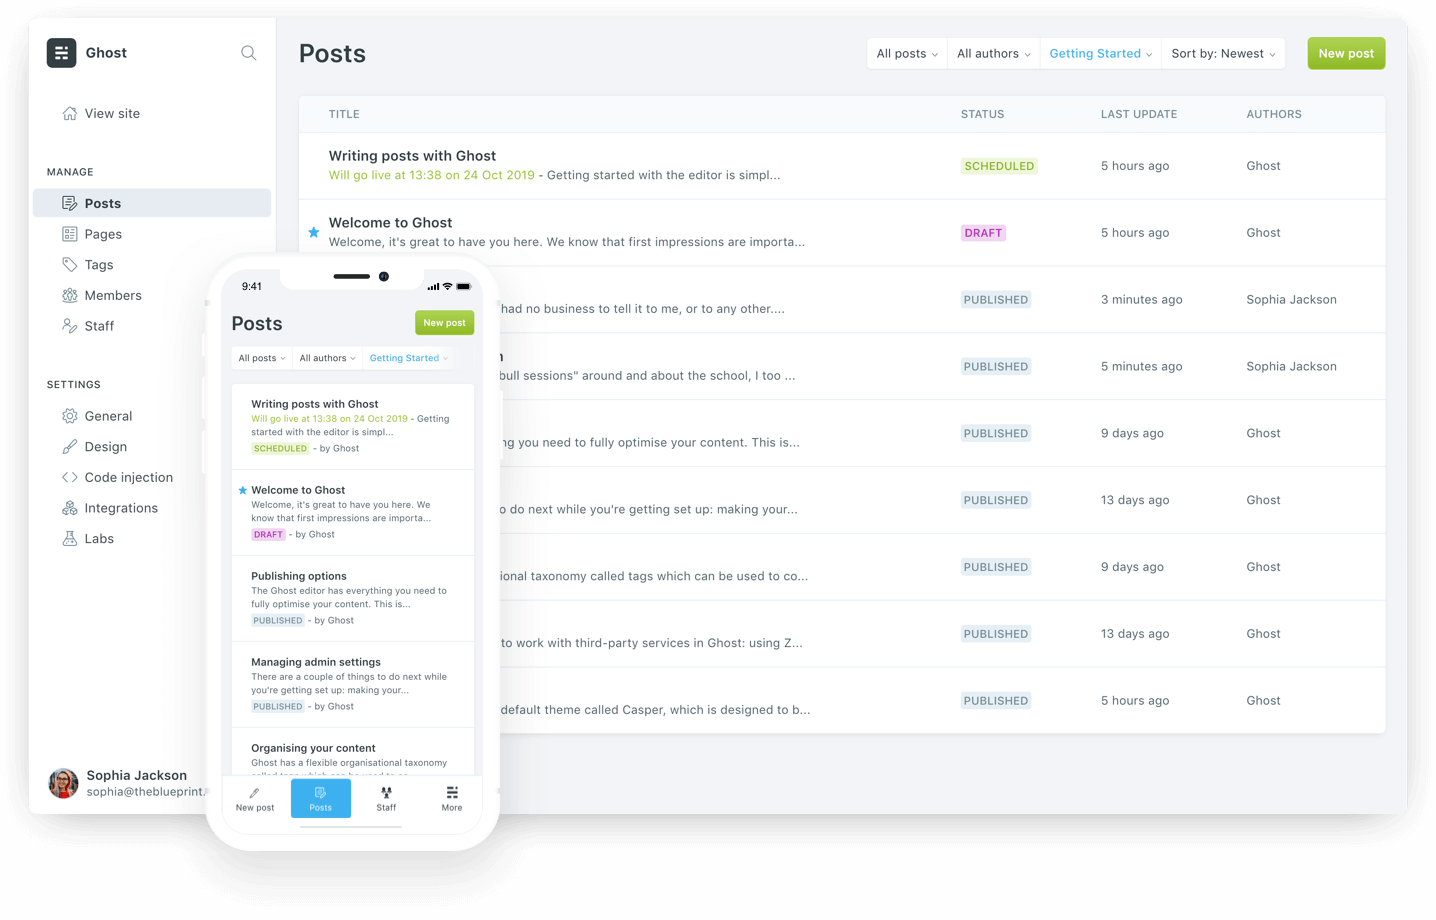
After completing the installation of Ghost in the Websoft9 console, get the applicaiton's overview and access information from My Apps
-
Access by
http://URL/ghost, and complete the installation of wizard
-
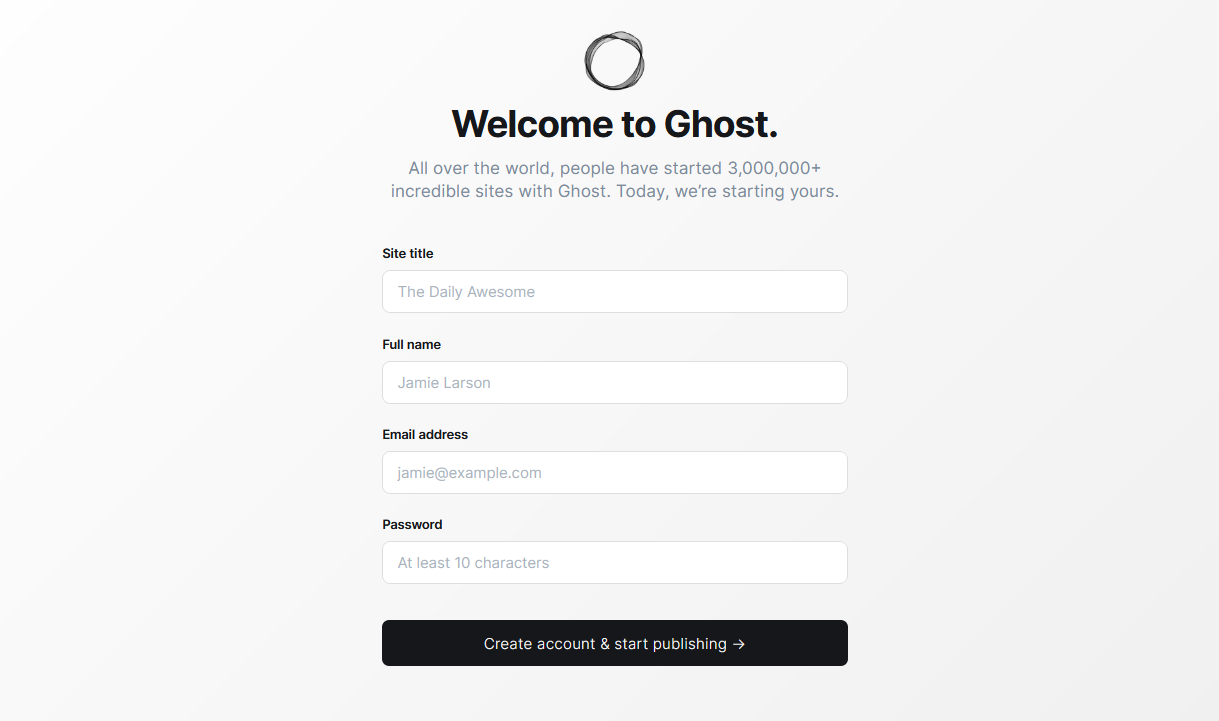
Start by creating an administrator account (email address as the username)
Multi-language website
Ghost's backend does not support Chinese, but the frontend does (provided that Chinese is included in your theme).
-
Translate the files in the
localesdirectory under the theme, wherezh-hans.jsonrepesents Chinese. -
Log in to the Ghost backend, click General on the left menu bar, expand Publication Language, and set its value to
zh-hans.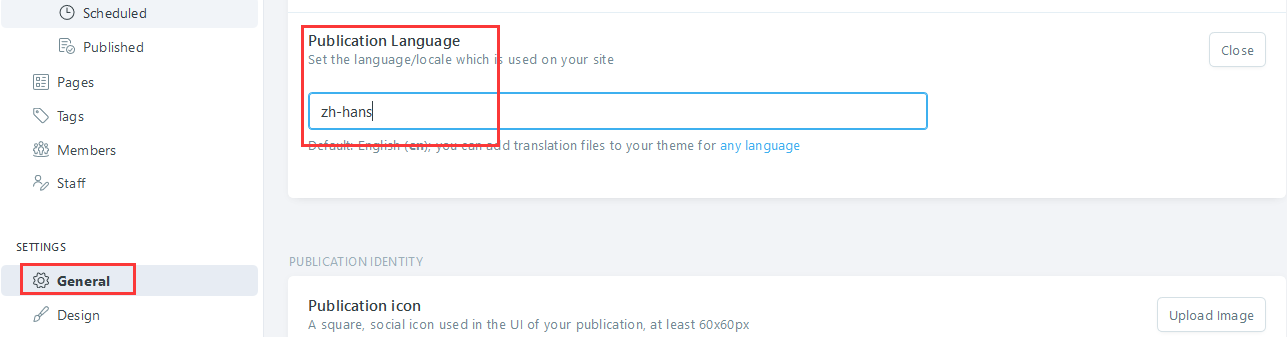
-
After saving, the changes will take effect immediately.
Enable Paid Reading
Ghost supports websites in selling articles to customers on a subscription basis, serving as a productivity tool for KM entrepreneurs.
-
Log in to Ghost and click SETTING > Labs on the left menu bar.
-
Configure Settings such as Enable members, Connect to Stripe, Subscription pricing, etc.

Configuration options
-
Code embedding(✅): Ghost backend SETTING > Code Injection
-
SMTP(✅): Modify configuration file
-
Configuration file(mounted): /var/lib/host/config.production.json
-
Theme directory(mounted): /var/lib/ghost/themes
-
Subscription for reader (✅): SETTING > Labs and configure Enable members, Connect to Stripe, Subscription pricing
-
Theme market(✅)
-
Change theme: SETTING > Design
-
Custom menu(✅):SETTING > Design
Administer
-
Change URL: After changing the domain, you must reset the URL-related values in the Ghost configuration file
{"url": "http://ghost.yourdomain.com","server": {"port": 2368,"host": "0.0.0.0"} -
Configure SMTP: Modify mail settings in the configuration file